

On Lockdown

That was an interesting 3 months. I was planning on publishing weekly blogs but I had a lot in my life change very rapidly, so I took a break from writing. In the midst of bringing the garage shop online, starting a business formally ( swarf.io ), and interviewing for jobs, a pandemic started and I got exposed to a friend who got the ‘rona. I’ve been on lockdown since (starting around Feb 28th). Luckily I never got sick, but now I’m busier than ever.

Back on track
I got a job! (somehow) in all of this mess. I’m working remote on robotics projects for a small firm in Santa Monica called Wavemaker and helping the team out as they grow and mature. I had actually interviewed at a few places but a couple of them got cold feet when the stay at home order went out, which I totally understood. It’s a brave new world out there.

New additions: Starting a business
So along the way I got thrown some parts to quote by various friends in aerospace / startups. I realized to be legit, I needed a business. So I looked into what type of business I should form to organize the shop under. Swarf LLC is a Delaware corporation, and I set it up using Stripe Atlas, which conveniently files the incorporation paperwork, gets you a Tax ID with the IRS, sets up a bank account and has a payment processor to link to it that allows you to sell products or create invoices and take credit card payment and have it automatically go into that bank account. All for $500. It takes a couple weeks, but is fairly painless and got me up and running quickly.
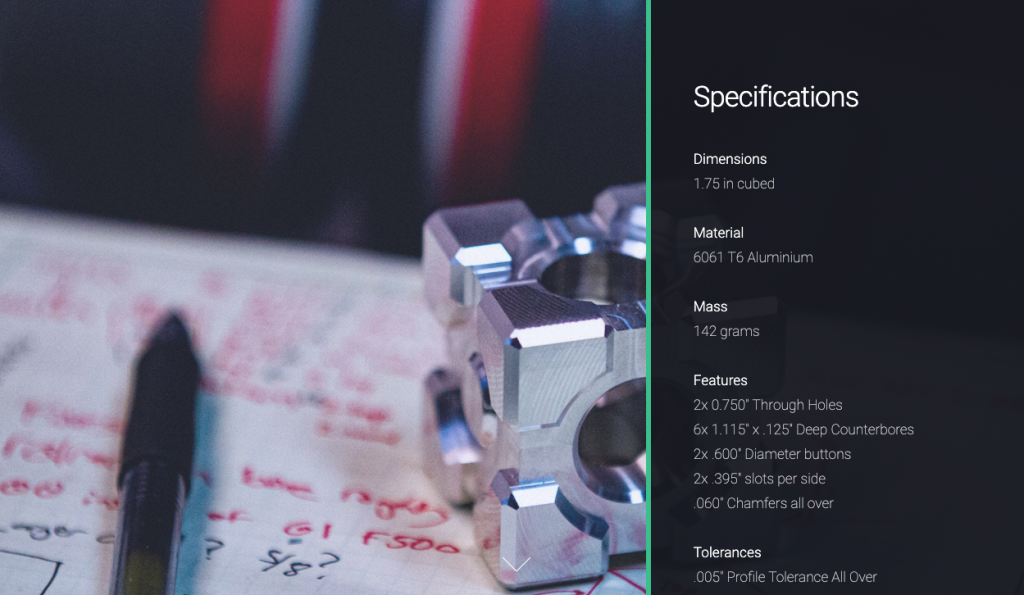
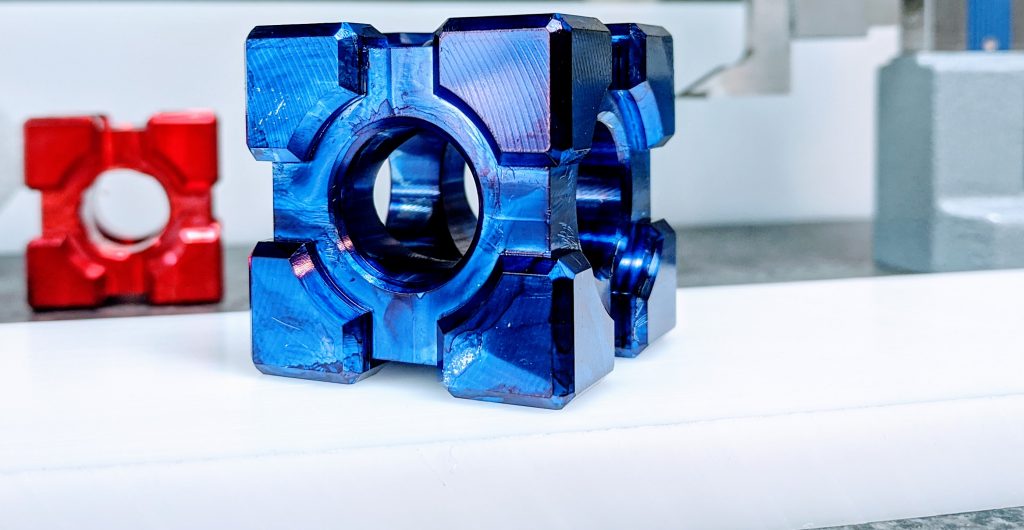
Test Part: Swarf Cube

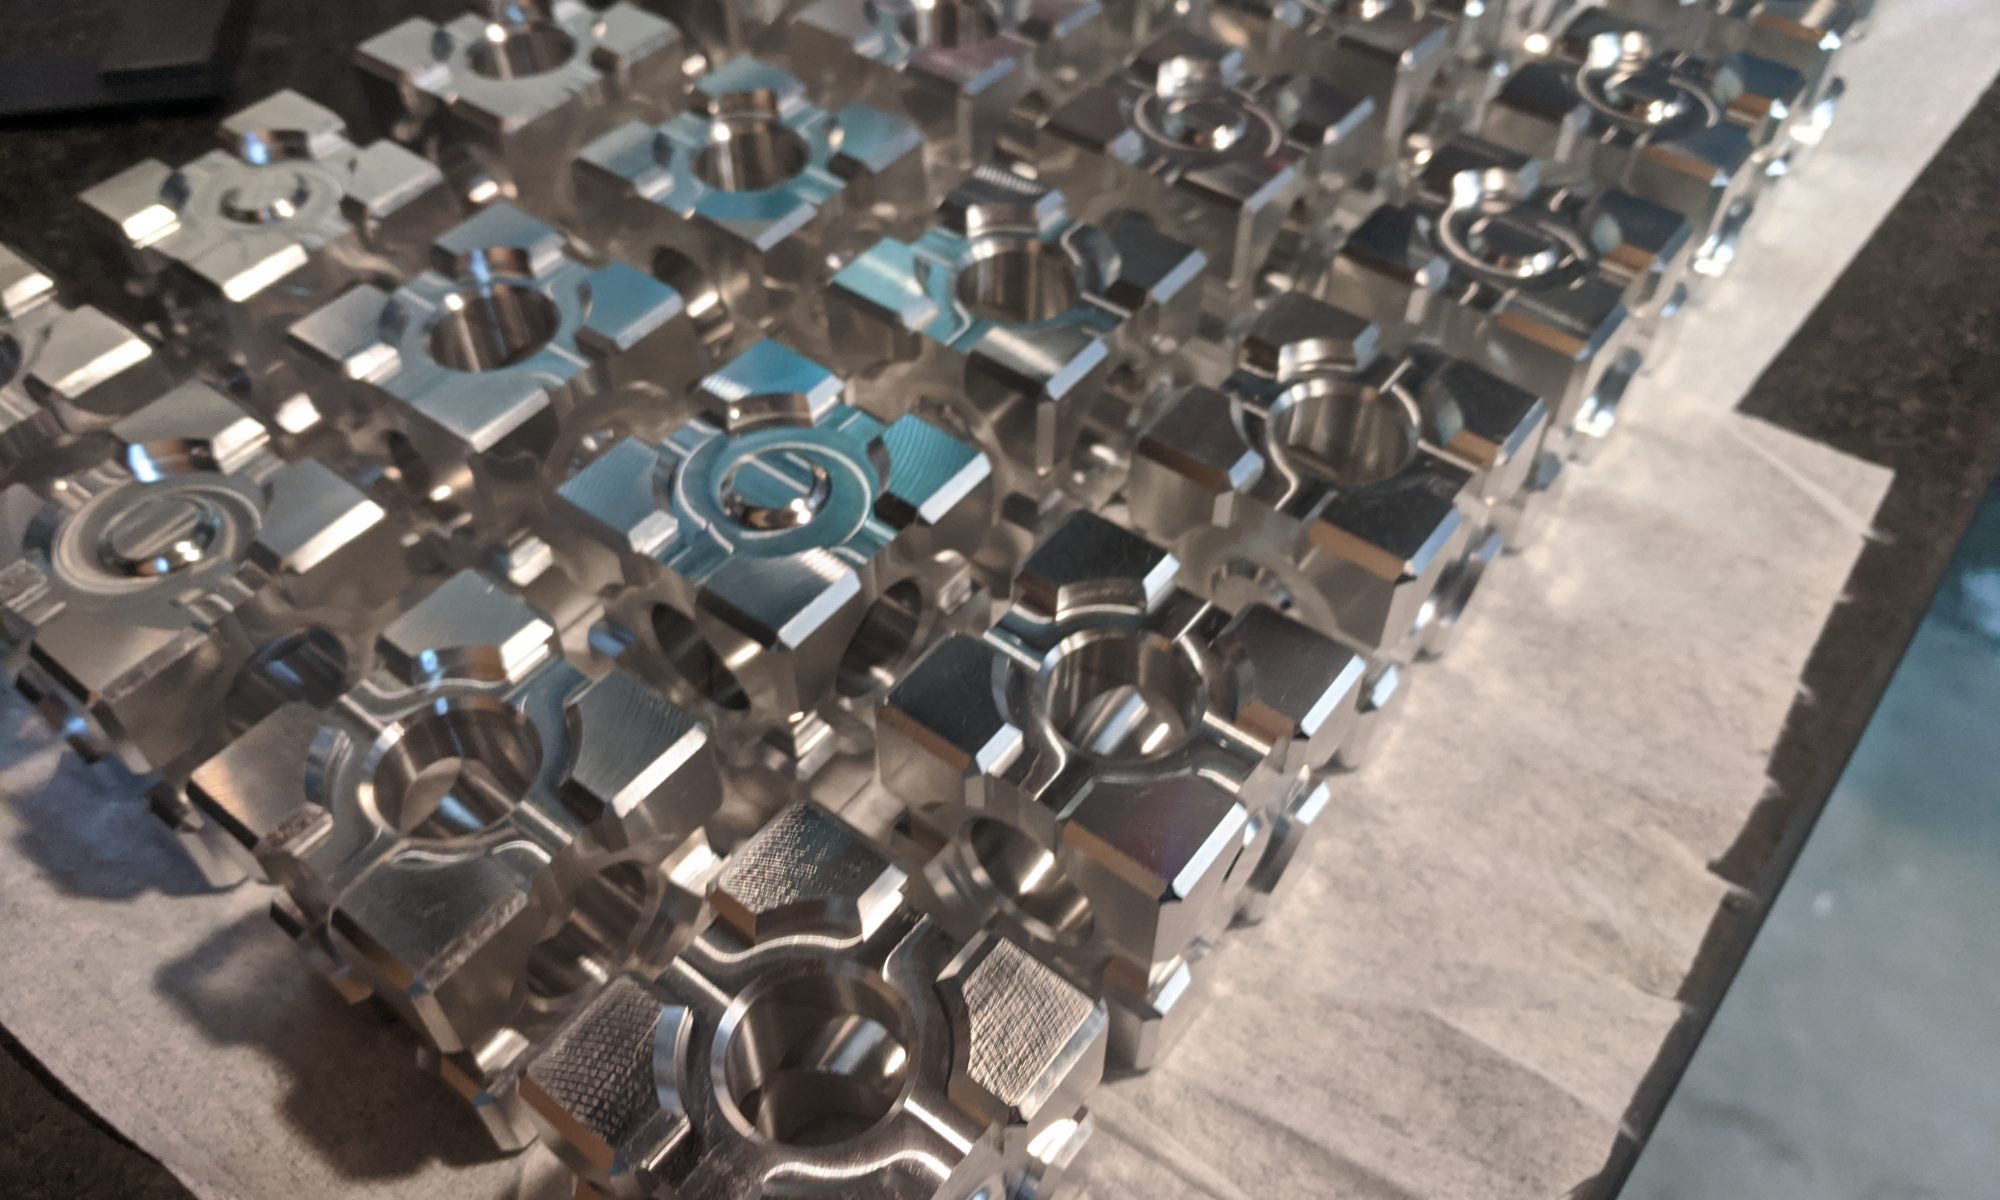
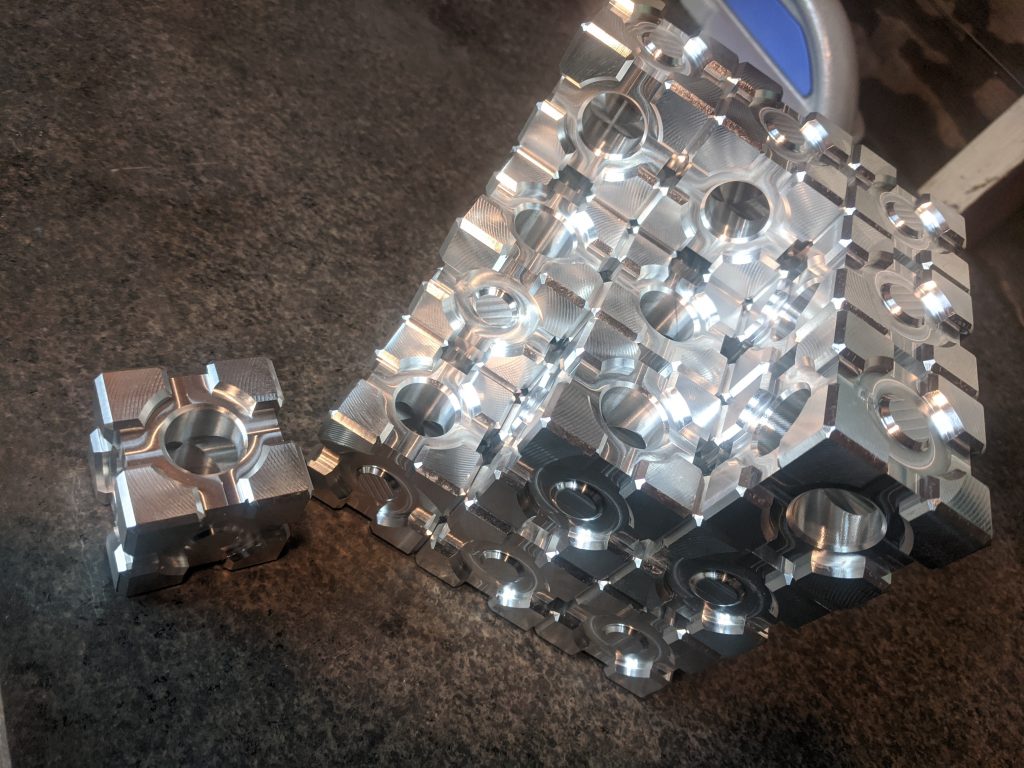
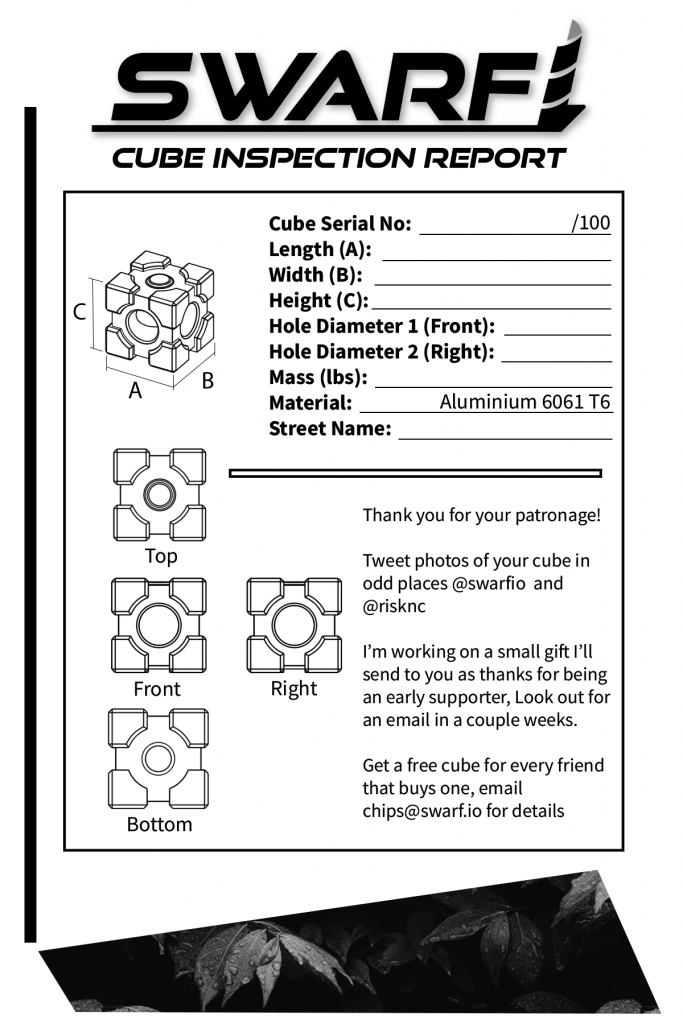
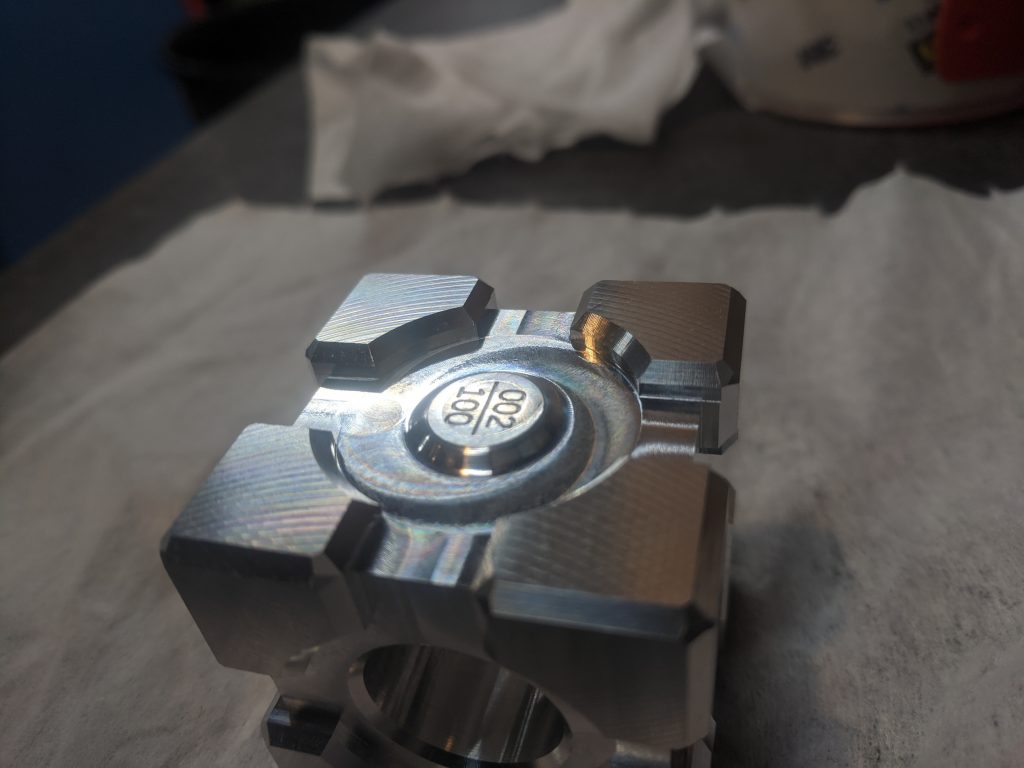
While waiting for the paperwork to come in, I decided to make a test part on the mill. I wanted to take advantage of the tool changer and the renishaw probe, so I decided to make a simple six sided cube. I threw a cube in CAD and grabbed some aluminium stock that was lying around after the move. Around then I decided, hey, I should add some details to this, and give it away as a gift at a shop opening party. So I cut some features in the faces and drilled some through holes so it could be worn as a big bling necklace.
Dialing in Production
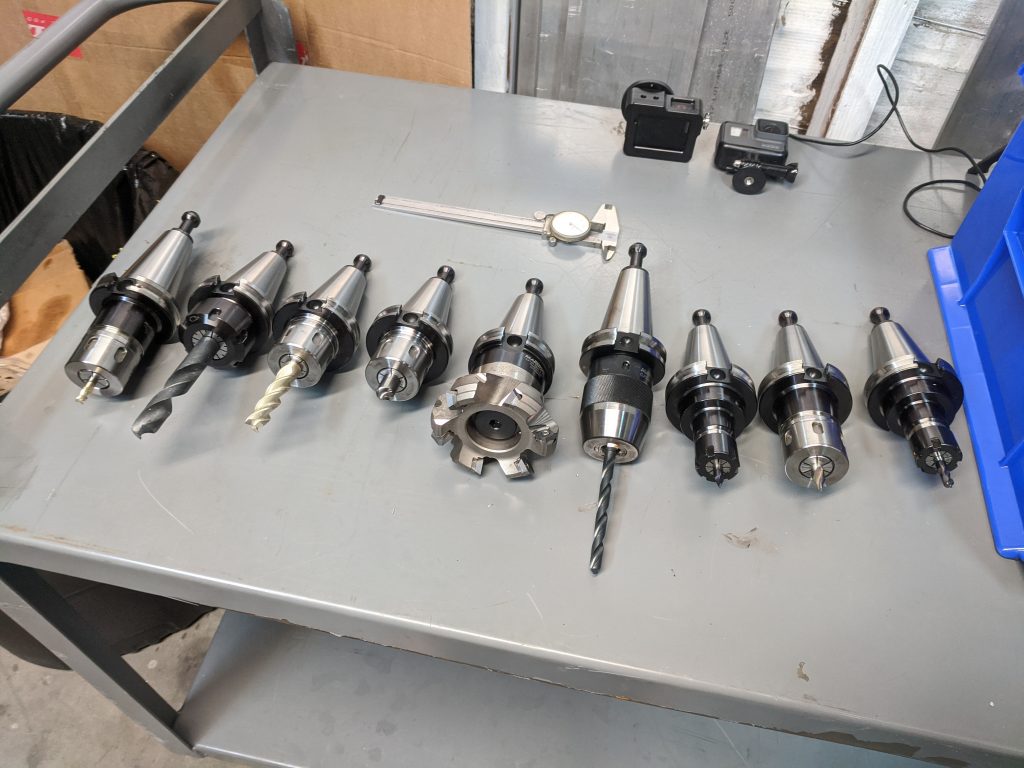
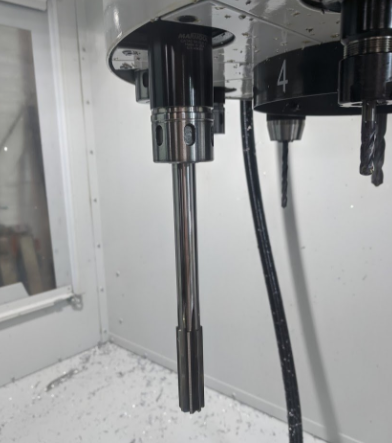
Left to right: 1/4″ 3 flute TiN Carbide End Mill, 5/8″ black oxide jobber drill, 1/2″ dia 2″ LOC 3 flute variable geometry carbide sq end mill, 90deg carbide chamfer mill, 3″ carbide insert shell mill, 1/4″ black oxide jobber drill, .020″ engraving carbide ball end mill, 1/8″ HSS center drill, 1/4″ .060″ radius bull nose end mill (tool 10 is the renishaw probe and remains loaded in the machine).
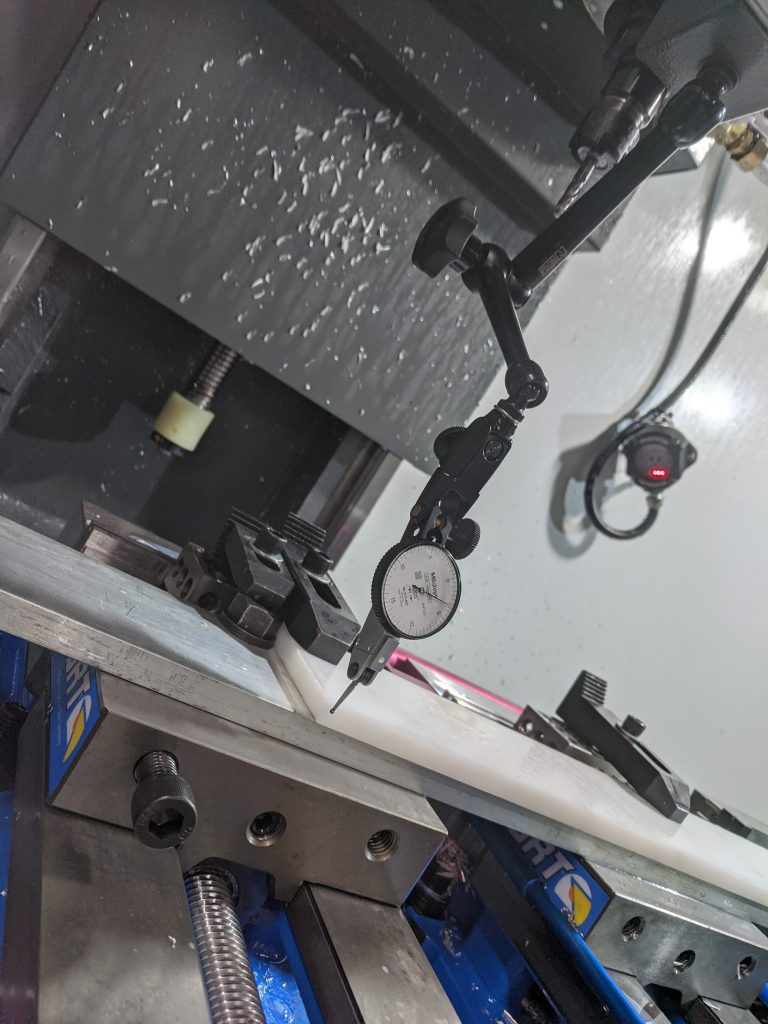
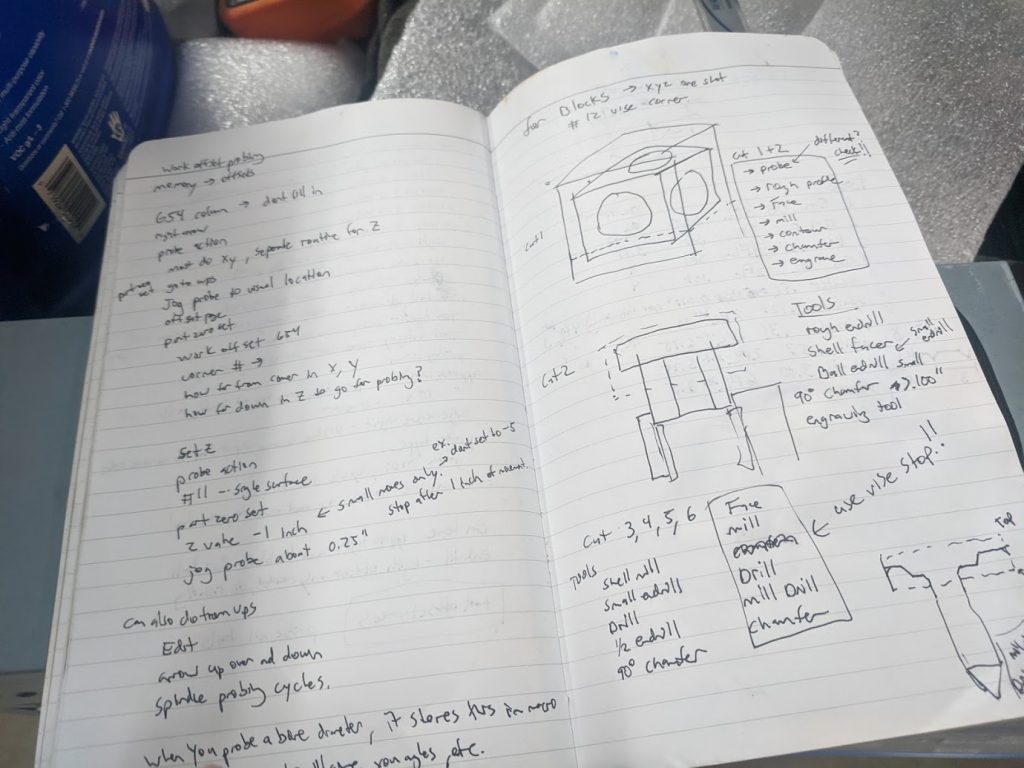
The first cube was a lengthy endeavor. After creating the shape in CAD, I fired up CAM to create a toolpath for the Haas, then exported it to a flash drive to load onto the mill. At the mill, I spent about 5 hours proving out the first six programs for each side of the cube. I would probe each side before every operation and flip 5 times in between. First cube was done! I figured it would be a good time to have an open shop party, and make some give away cubes for friends. I kept improving the one vise setup toolpaths, and after making a couple cubes this way I had a minor issue ( a cube lifted out of the vise on the facing pass with the 3″ shell mill, it was saw cut on 3 sides and only clamped on a single edge on the moving jaw side of the vise, which was insufficient clamping force to keep it in place), so I ordered the correct 2″ bar stock from mcmaster, that way I’d have consistent blanks. With the new blanks, I re-strategized the workholding and toolpaths to optimize for small run production.
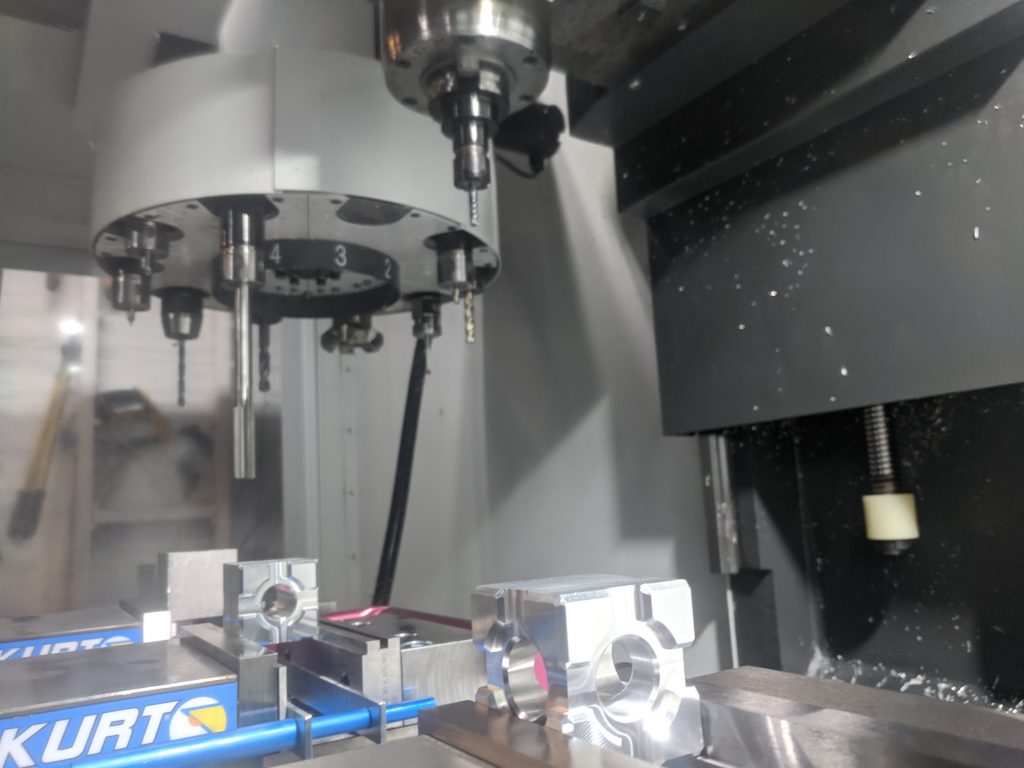
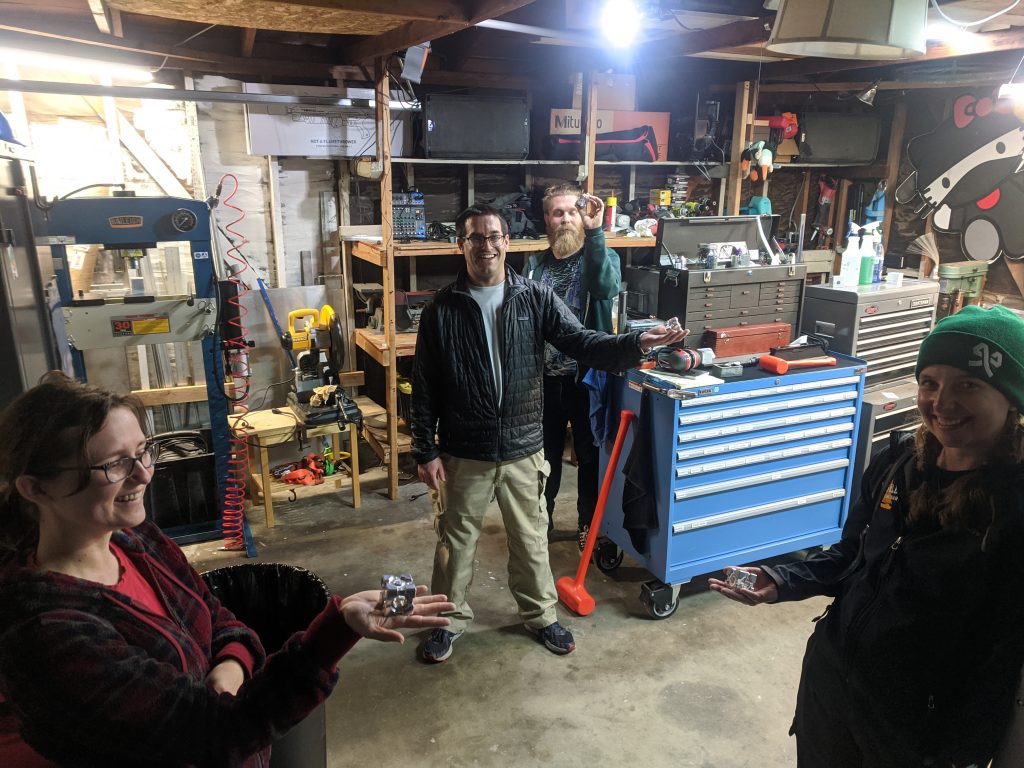
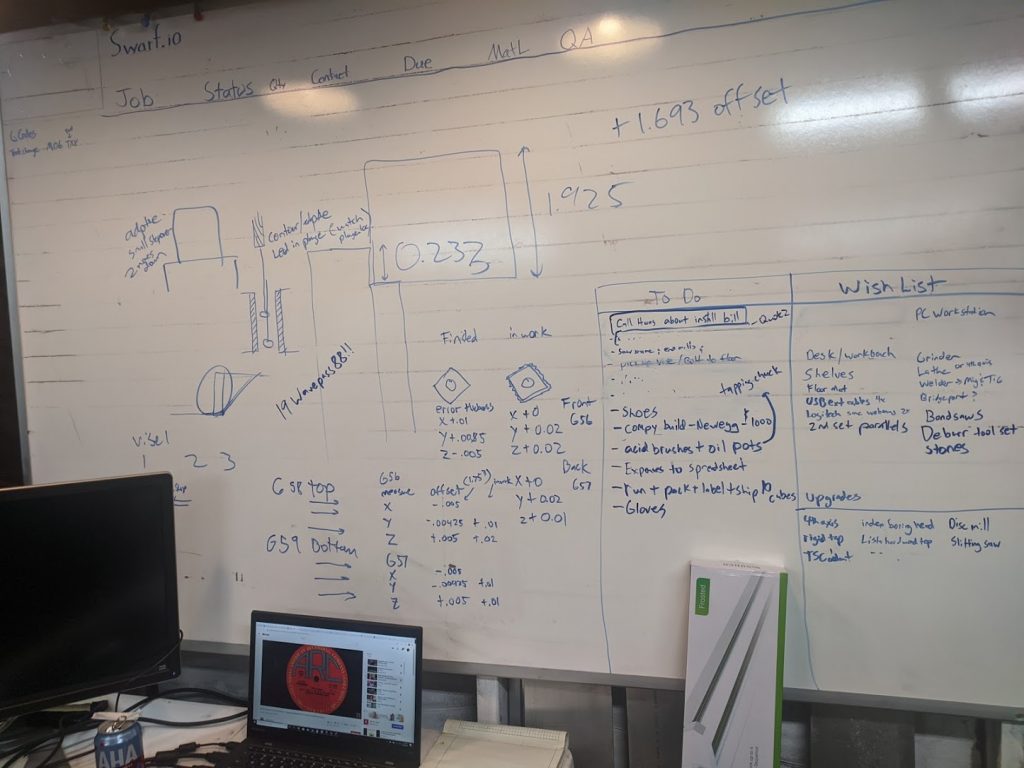
I set up 3 vises on the mill, using 3 offsets, each for two sides of the cube cutting. I posted 2 programs to run each half of the cube. At first I’d probe each cube, but after talking with Adam ( the owner of the mill who was visiting ), I probed the vise and offset the zeros so I’d get consistent cubes every time as long as I pushed them firmly into the stop when clamping. This brought the per cube time down to about 30 minutes with the changeover. In the first week I made 27 cubes ! enough for everyone at the party :D.
Going on the internets.
Now that I had some cubes, I posted pictures of them on twitter, and got lots of “ooo I want one” comments.
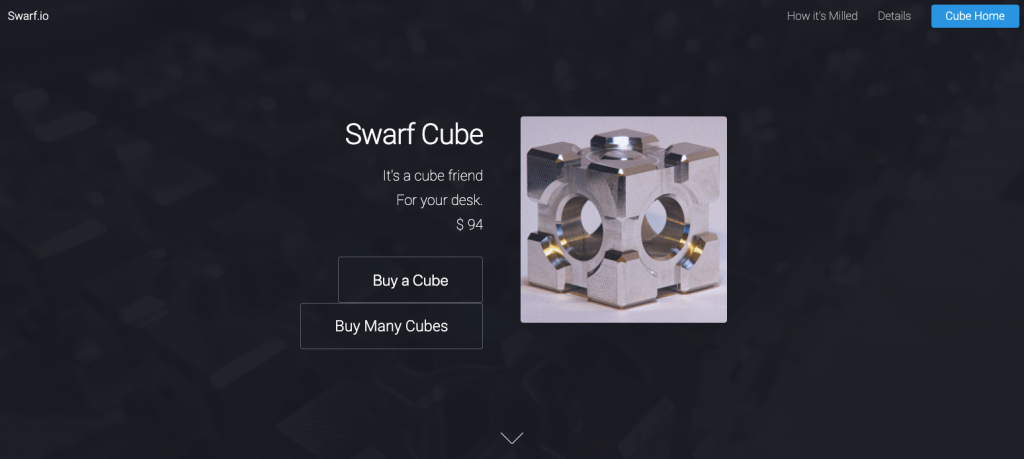
Relenting, I decided to set up a web page and test out Stripe’s functionality as a payment processor by selling a limited run of cubes. This would also allow me to get back on top of basic web development, learn how to integrate payment scripts, and get ready to sell other products in the future.
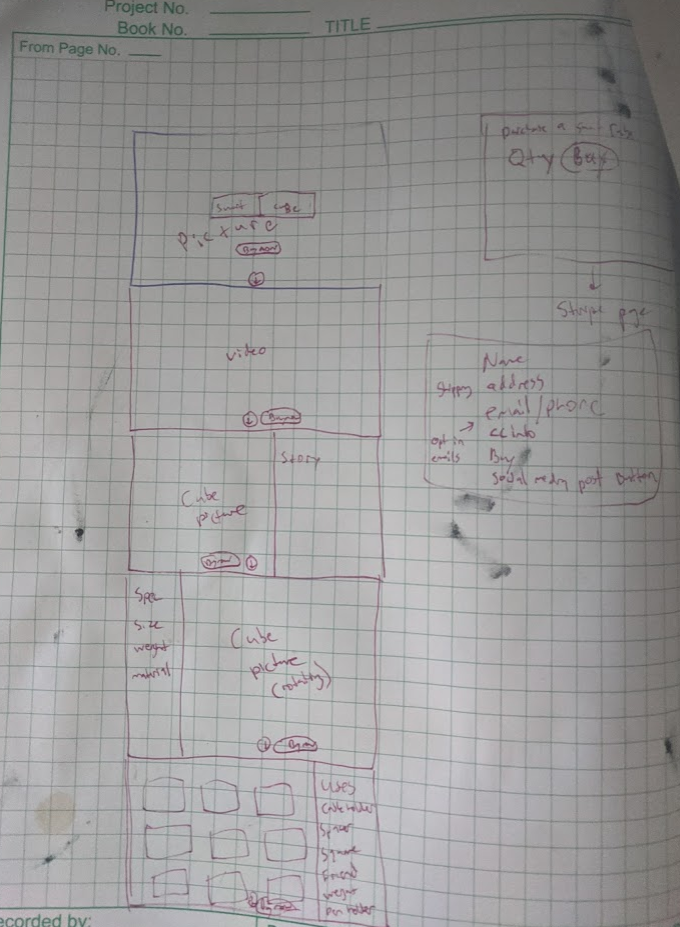
I started with a layout of the site. I sketched it out in a notebook and started on mock-ups in photoshop. The mock-ups got a bit out of hand so I dropped complicated photoshopping and grabbed my trusty camera to do a bunch of product photography.
I set up a tripod, light, and a few backdrops and started playing around with lots of pictures, hoping I’d get a few that looked good enough for the website. I’ve been a photographer for years, so hopefully that’d kind of outshine my lackluster artistic graphic design skills.
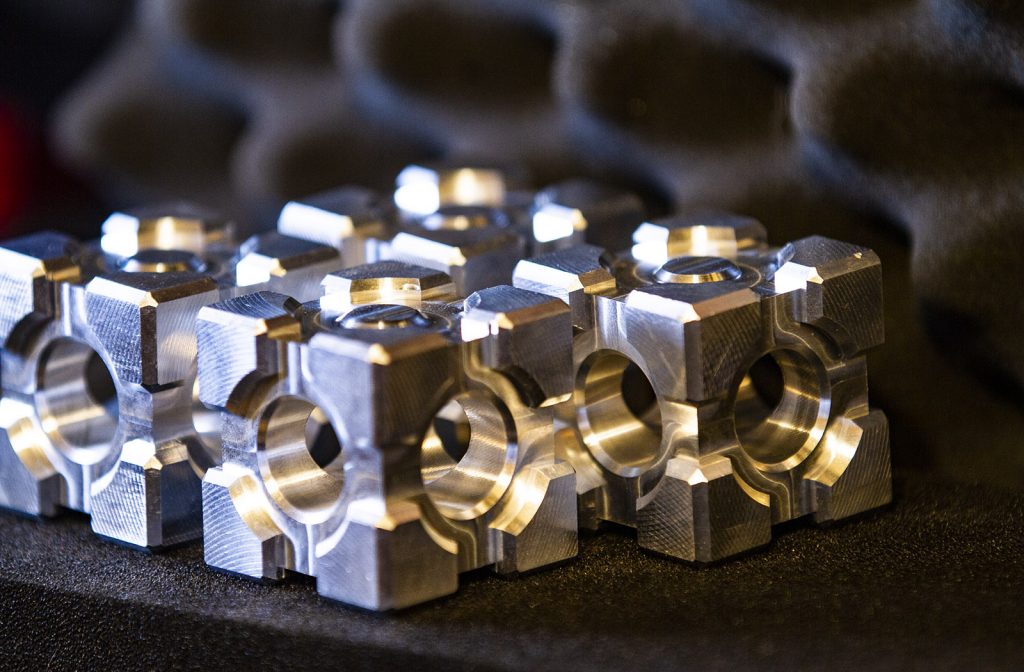
I found a cool tutorial explaining how to remove scratches and dust quickly in photoshop and ended up with a good set of product photos in no time. Next I moved on to cutting together footage I’d taken while machining the cubes to make a short “how it’s made” style video of the cube making process. I wanted potential customers to have as much insight as possible into how the product is being made.
Cutting together the video took a few days (editing is always a long process), and in the end it was probably too long, but it did provide a nice taste of how machining the cubes was done, so I was happy enough with it to post it and move on to the next part of building the website.
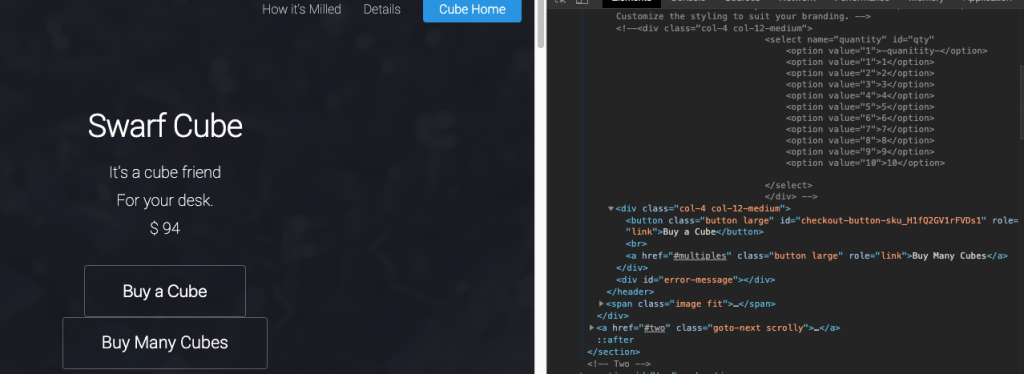
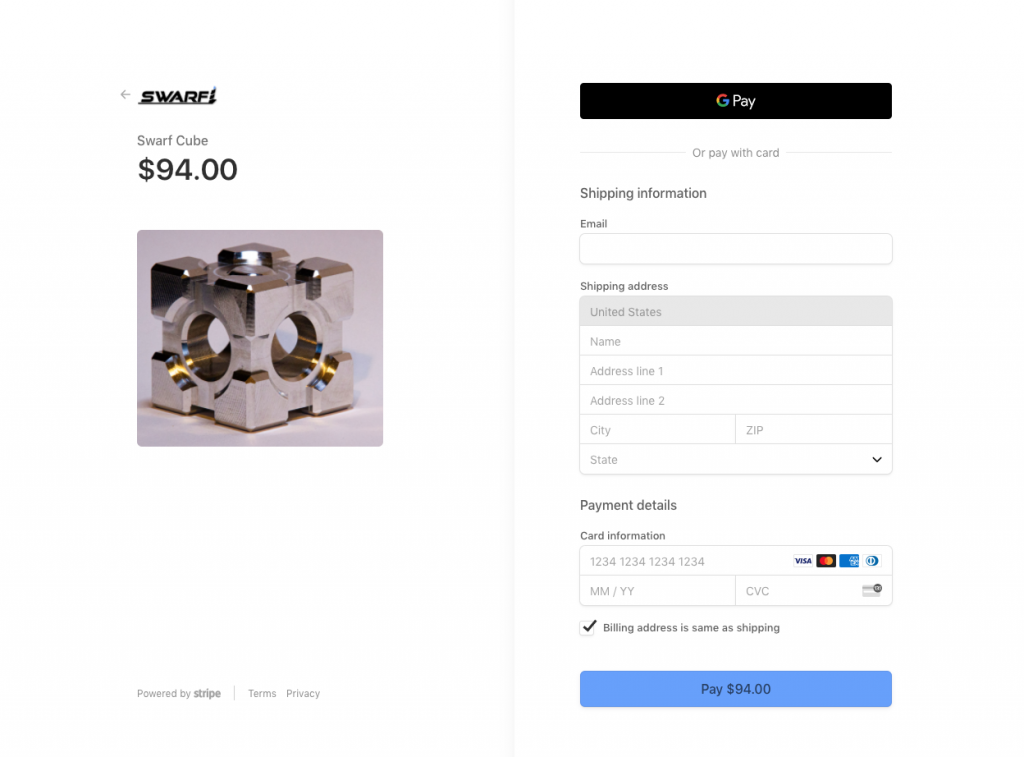
I now had a website with content and a video, and only needed a way for users to purchase the cubes. I dug through Stripe’s documentation and they have a checkout button you can drop onto your site that redirects to their secure payment information page.
You set up a product sku, grab the checkout button code from Stripe, put it on the page, link the button to it, and then it handles the rest. You do need to configure it to collect shipping address information if you’re shipping a physical product, which is a simple flag edit to the script you paste onto your website.
There is a test mode you can see how data is collected and verify the buttons are working properly, then you swap out the test code for the live code and bam, you’re in business. Next I set up an “If this then that” style script triggered auto-emailer that would send an email to a customer on a successful purchase, thanking them for their order, confirming address information and providing contact info if they had any questions or changes. I bcc these to the Swarf email account so I can quickly see via email as orders come in.
First Job!
After being setup for about a week, I got a call for a quick job for a friend’s startup up in the bay area. I had the vises and stops dialed in for the cubes, and didn’t want to rebuild the setup, so I clamped some 1-2-3 blocks in the vises and bolted toe clamps to those, building the setup on the backside of the moving vise jaw. It was light work on plastic so I got away with it, and turned the parts around in a couple days. I heard back that they worked great, and it was exciting to invoice my first job shop style job.
First Customer !

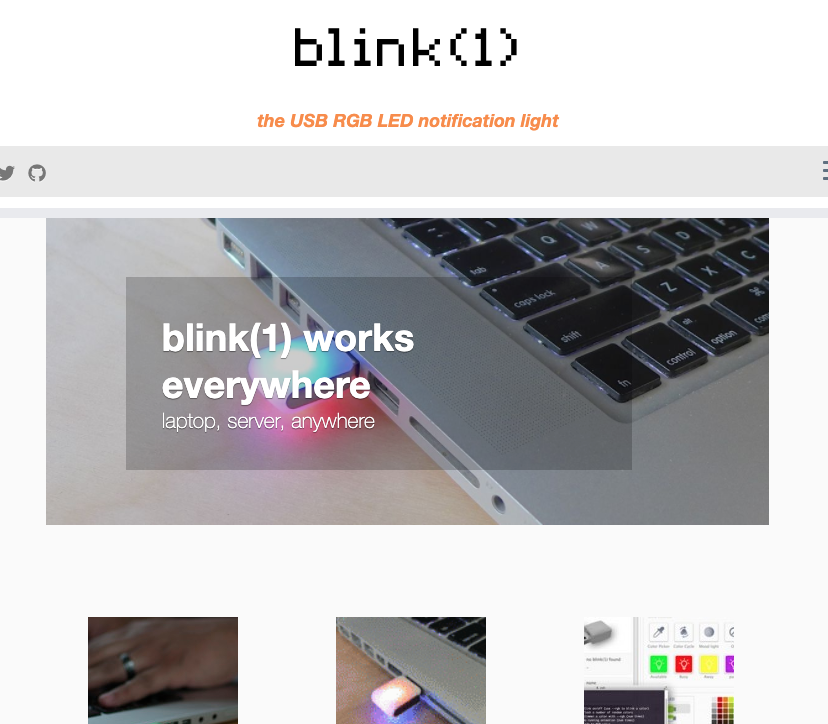
Once the cube website went live and I tweeted the link out, within minutes @todbot placed the first order! Tod has been a friend since I met him taking the notes at my first Crashspace meeting (a hacker space in culver city I’ve been involved with for years). He was a founder of crashspace and has his own company, ThingM, which makes a really nifty product called blink (1) that is a super configurable USB status light for your computer or server. Check it out!
First Shipment !
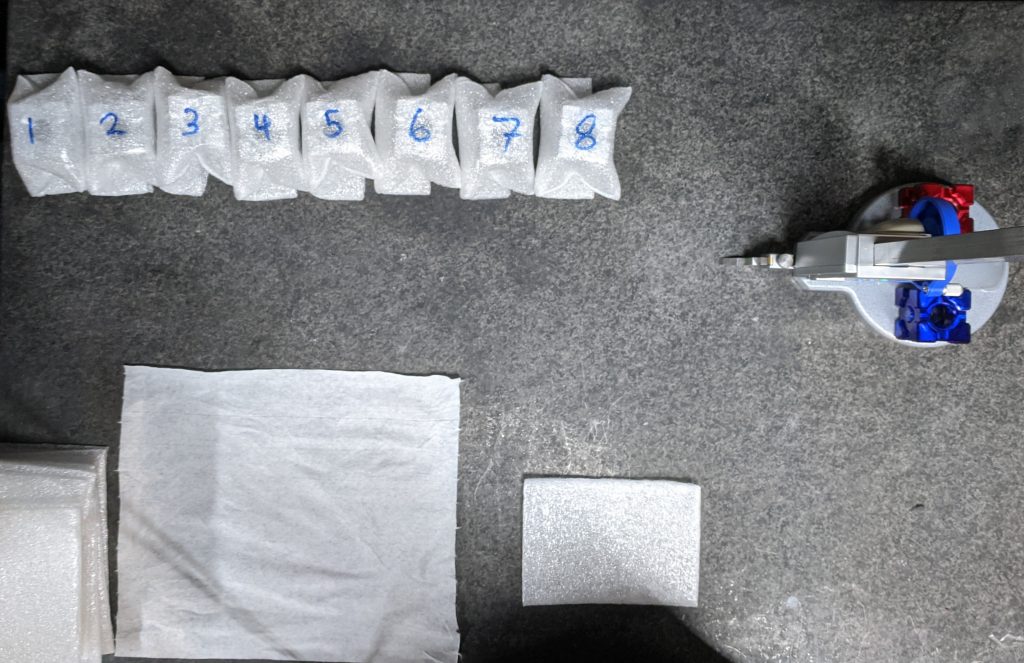
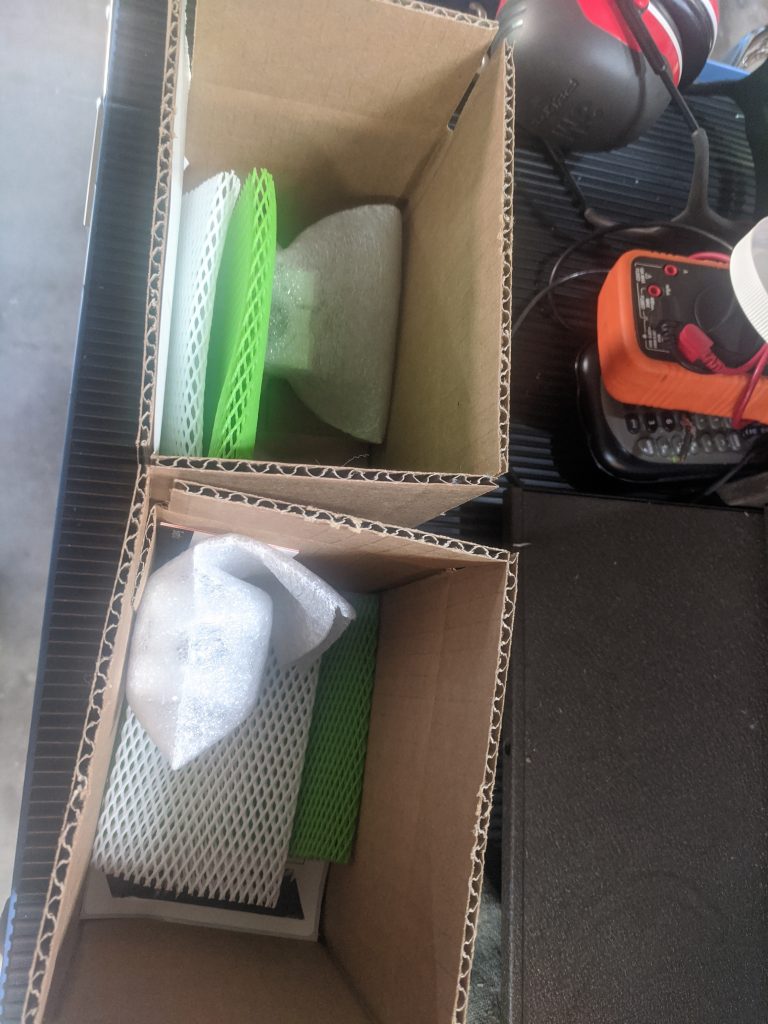
Now that about 8 cubes were on order in the first day, I had to get packing! I went on Uline and picked up some boxes and foam, and then went on mcmaster and grabbed some tool wrap. I fooled around with a few ways of packaging and wrapping and landed on a pretty good one that would ensure the cubes didn’t get damaged but didn’t add a ton of weight.
I grabbed a thermal printer (called rollo, it’s pretty nice) and some 4×6 shipping lables, grabbed the scale out of my kitchen and filled out the shipping information. Labels printed in a few seconds. I use USPS to support the postal service, and they’re really cheap! They even will pick up packages at your door for free during normal mail delivery if you schedule a pickup on their website.
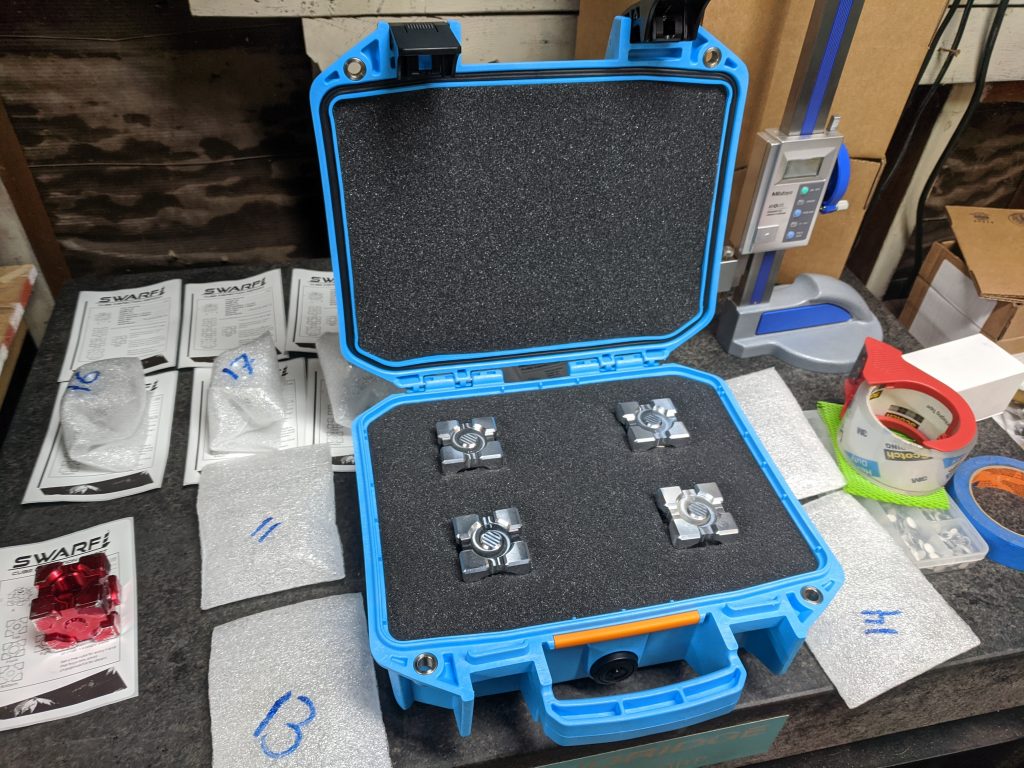
After a few days, I added buttons to buy multiples of the cubes ( I realized it would be a pain to do so without this functionality on the website). Someone bought 4! I was really impressed. So I picked them up a nice case to ship them in from Pelican. I think they were happy!
So far it seems like my customers have been happy with their cubes. If you bought one, tweet some pictures @risknc or @swarfio on twitter. I’d love to see more of them out in the wild.
First Ad Campaign ( meh ).
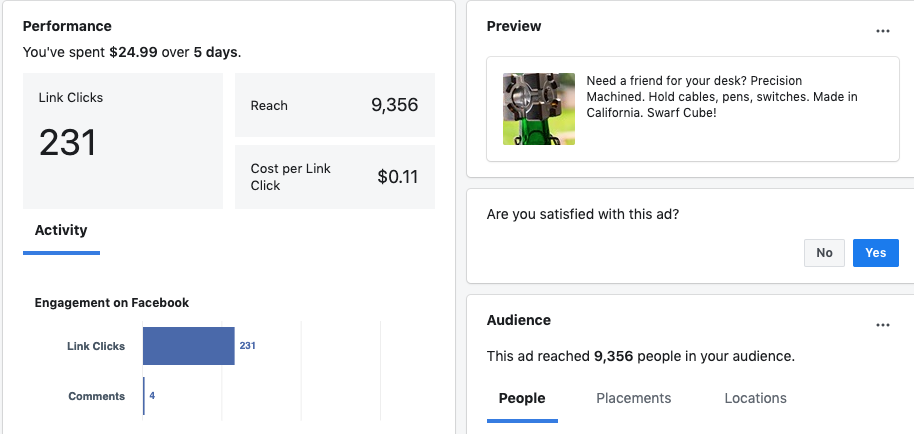
I ran an ad campaign on Facebook to see how that worked. It was pretty straighforward to setup, a blurb and some product shots, and a target link for where you wanted to send people if they clicked on the ad. I set the demographics to target higher income people that liked gadgets, and let it go for $25.00.
I figured if I sold a cube for that much it’d maybe be worth it. I did get 231 link clicks but not a single purchase in that week. I did get a few more direct sales from twitter conversations in that amount of time so I’m probably not going to put much into facebook ads in the future. I do want to see how twitter and google ads work out, maybe I’ll have better luck. I’m also not banking on this being a mass appeal product at its price point, so it’s probably not best to put it on blast too much, beyond to find out more about how to set up advertising in the first place.
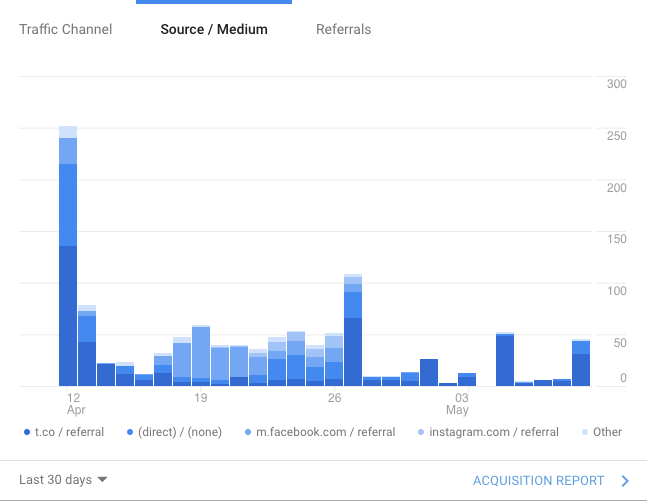
I also tracked the page views on the cube.swarf.io using google analytics in the meantime. I found I was getting a lot of clicks from facebook over that time period but not many were going through with a purchase.
First Dollar. First Hundred, First Thousand. ( Next: Ten thousand ).
Now that I’m in business I’m excited for what the future holds. I’ve been strategically reinvesting profits in tools and equipment, and working on a number of conceptual products both functional and more for fun.
I picked up a few tools to make the cube production go smoother, though I don’t think I’ll go so far as to build jigs just for cubes, as I’m not interested in making sweet swag forever. For that reason I’ll be limiting the first production to 100 cubes (get yours today 😀 cube.swarf.io )
O Arm Revisited
Now that cubes are settling and I’ve got stock built up / the first orders are all shipped, I’m starting development again on the O-Arm robot arm for drafting on a big wall. I’m excited to work on this, but as a product I can make in my garage this time instead of just a prototype. I’ll be designing and building prototypes over the coming months, testing, and eventually shipping it as a product.
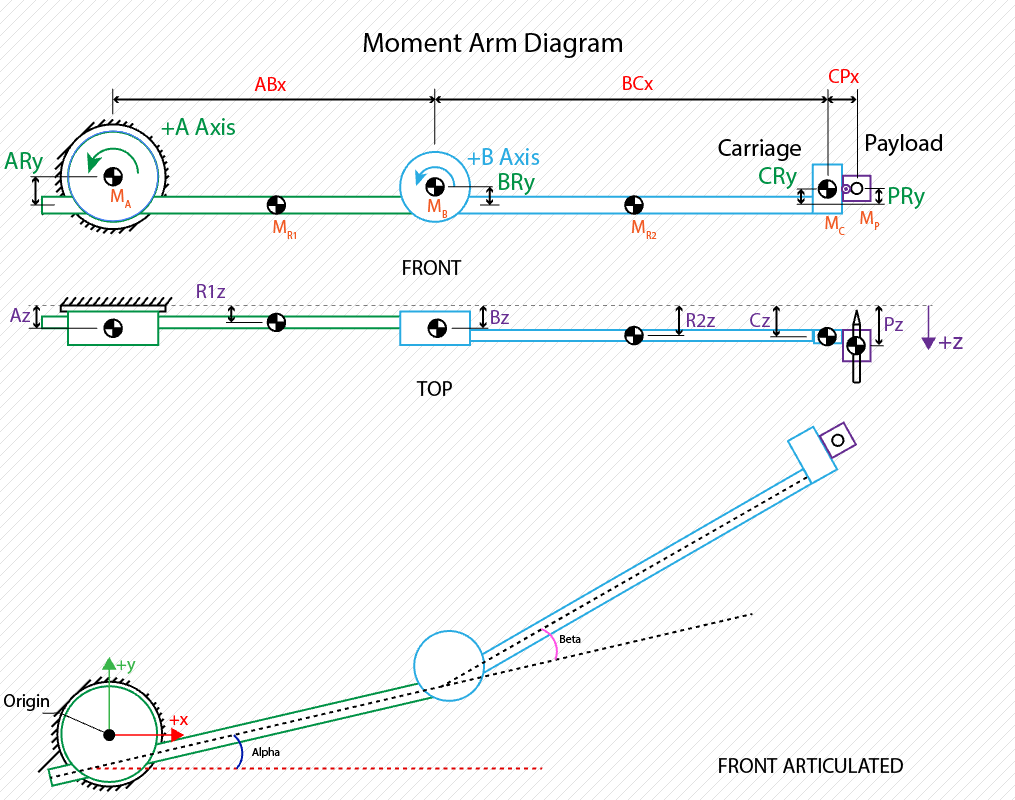
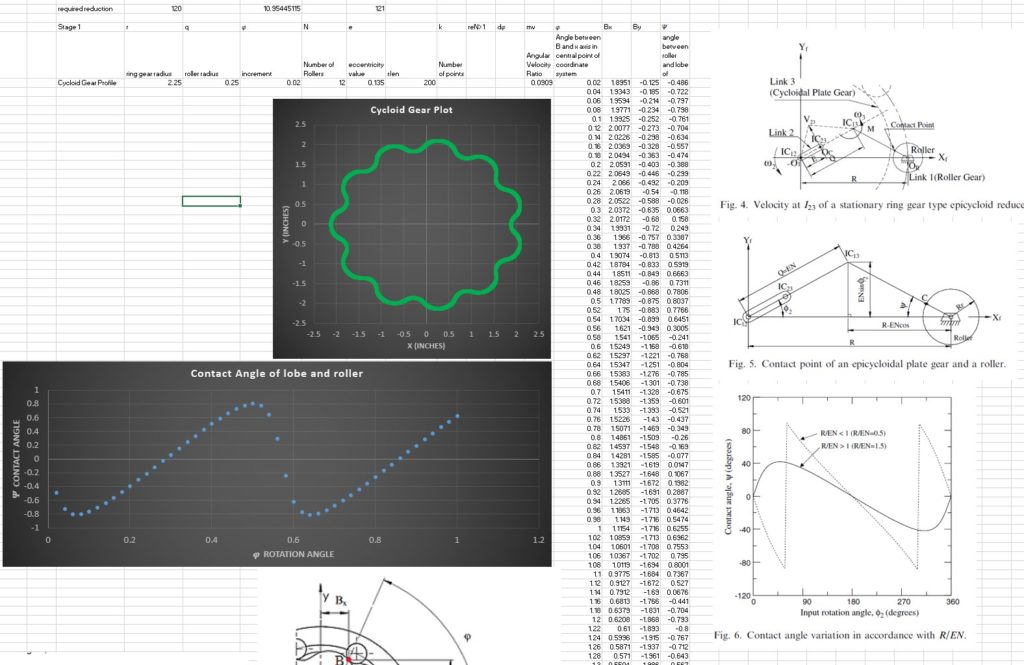
The first task is to design a cycloid gear reduction for taking relatively inexpensive brushless DC motors and getting out a high torque, high accuracy output in the right RPM range for a plotting application. I’m excited to reopen this design and leverage all the spreadsheet calculators I built back when I started the project a couple years ago. You can check out the original project logs over on hackaday.io
Back to the blog! Next up: Making Swarf #4: Products in Development, Shop Specs 😀
Now that things are getting settled I’ll hopefully be able to maintain a regular cadance of blog posts to keep you up to date! check back weekly right here for more updates on the shop, swarf, and all things mechanical. Thanks for reading! – Kyle

Thanks for reading.