

Last week in making Swarf I covered moving this lil Haas TM2P into my garage and getting it placed, as well as some machine shop basics. This week I’ll go over the extensive process of getting power and air to it, getting it setup, and loading it up with coolant.
Power
Steve, my electrician savior friend and I took a look at how to run power to the garage. There was already a single 120 VAC breaker and a catenary hanging out to the peak of the garage. The machine needed 40 amps max (per its internal breaker, it will pull 25 when under load ), and the compressor wanted 28 amps. If both need to run at the same time, and there’s a peak transient load from compressor startup, we’d probably need at least 80 amps.

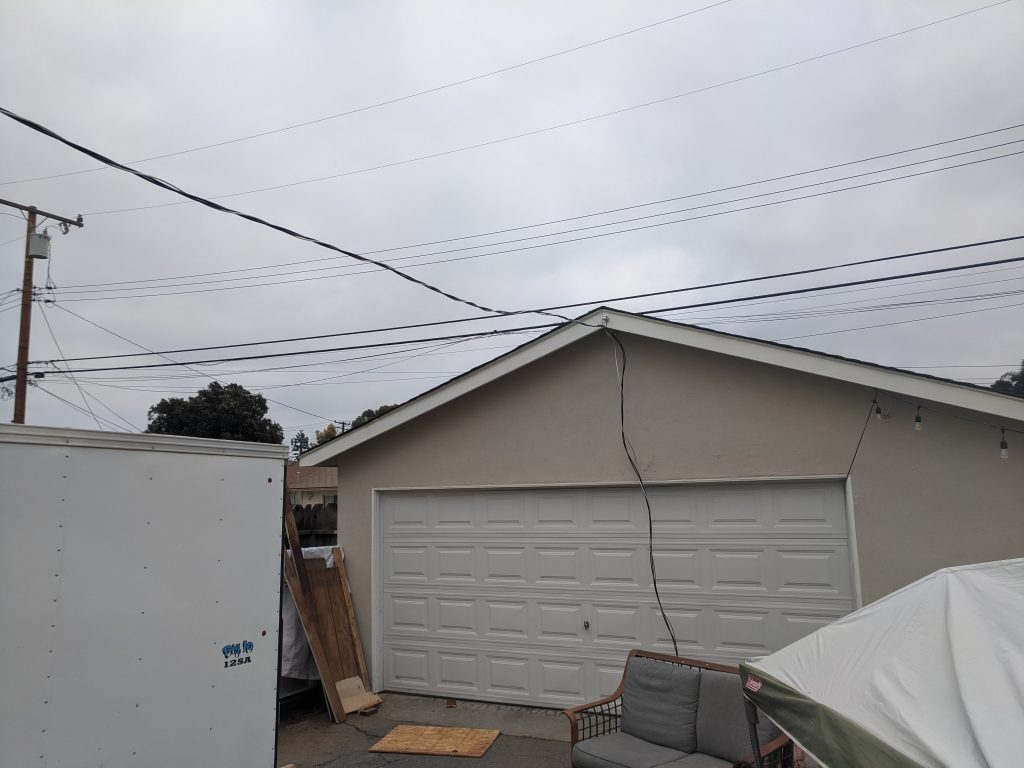
If we could replace the dinky aerial with some 4 gauge periwinkle aluminium drop cable (with a 110 ampacity rating, designed for outdoors), we could swap the old dryer breaker for a 100 amp two pole breaker and do a run where the old cable to the garage went. We measured everything and figured we needed 50 ft of cable to do the run. I ordered 100 feet.

We probably ended up using 70 feet. We found an unused knockout in the main box, ran the cable up the wall, added a junction box and some conduit to go up to the roof aerial mount, clamped either end of the ground cable to the hooks on both ends, ran the cable down the eave and through the old junction box that went into the garage.
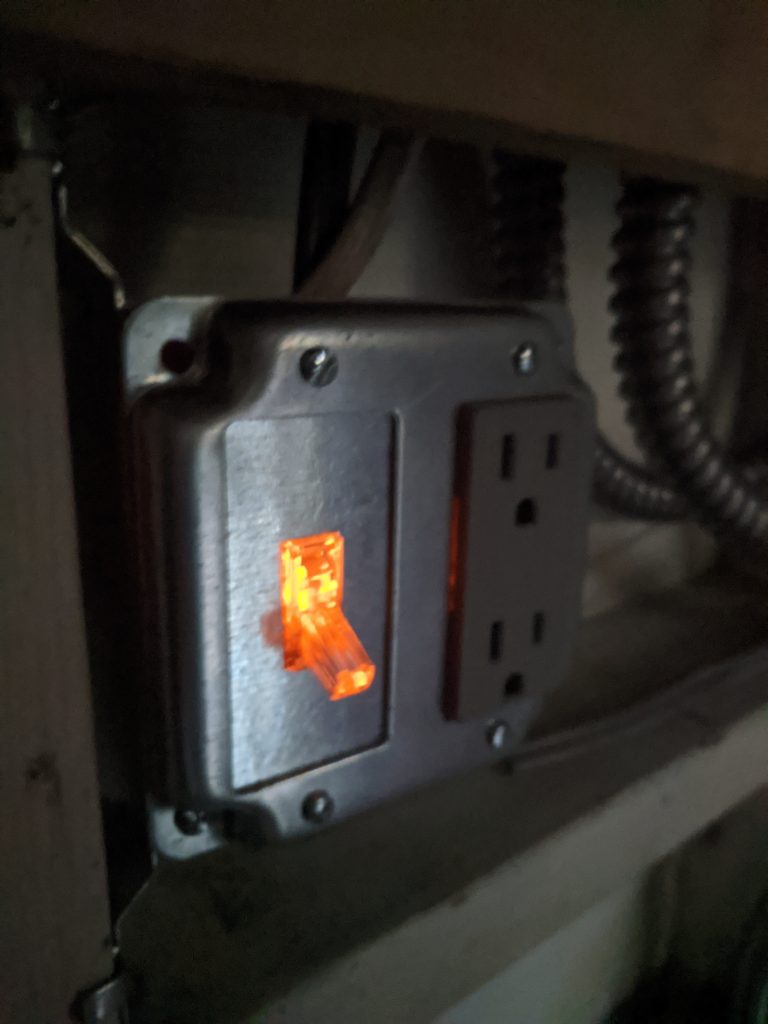
I mounted a sub panel (harvested from the old install) in the garage, we hooked everything up and were in business. I added a few 20 amp breakers for outlet plugs in the garage, and ran conduit to the machine and wires through the roof to the various outlets. We put one of the center outlets on a switch.

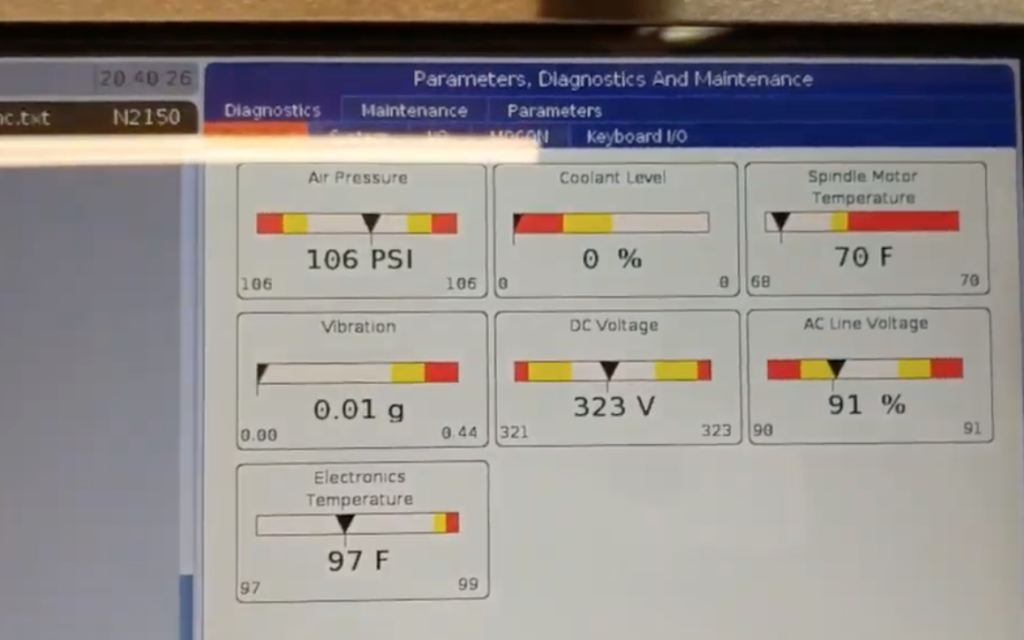
Steve wired up the machine, compressor, and an accessory 220 outlet (for a later lathe or welder on a plug). We fired up the machine, it turned on, but with a warning light about low air pressure ( which made sense). We also checked the function of the compressor. It seemed great. I checked noise levels and it seemed like maybe a little loud washing machine from outside the garage, great. Hopefully the neighbors don’t get antsy about the noise. It cuts off when it reaches 150 PSI tank pressure.

Total parts cost, between breakers, hangers, junction boxes, fasteners, outlet boxes, outlets, cable, was probably ~$500 for everything electrical. The cable was about $100 or that, the rest was a couple ~$150 trips to home depot. The breakers and outlets were a significant portion.

Air
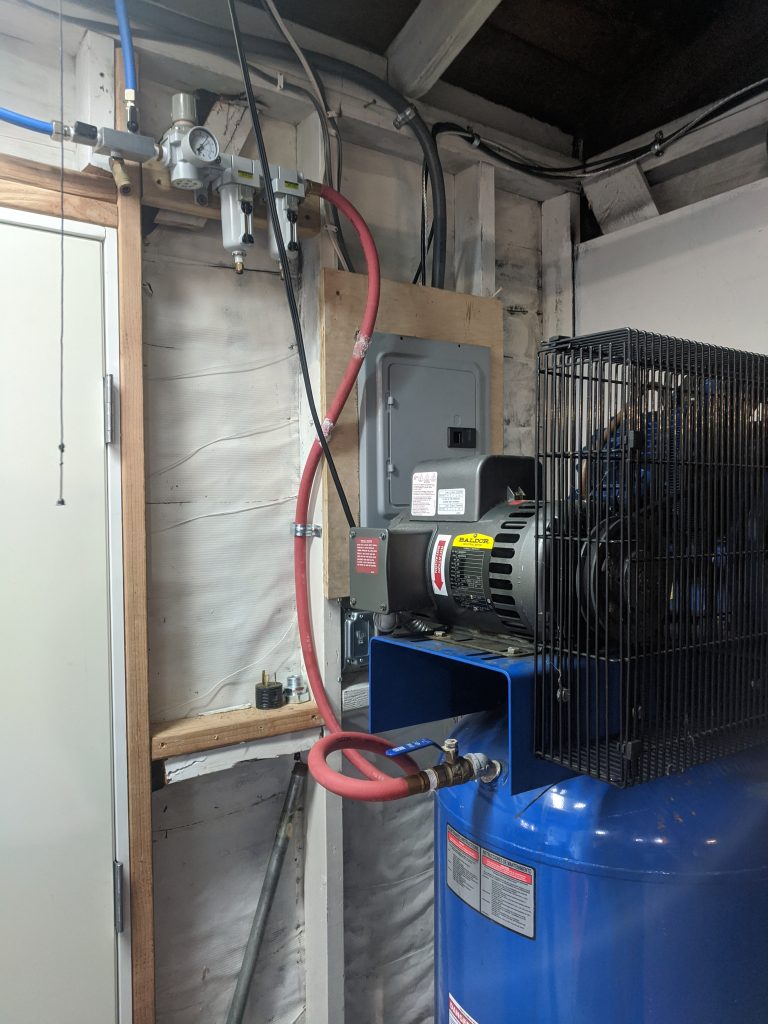
The PEX tubing that came with the compressor was great. I installed the Filter Regulator Lubricator on the wall near the compressor ( it was actually a filter, regulator and dryer ). I had to go high because it’s a crowded corner, but it looks alright. Might be a bit uncomfortable to adjust the reg, but I’ll probably leave it on 120 psi forever anyways. I had to disassemble it to flip around the inlet / outlet side relative to the mounting brackets, so I put new teflon tape on all the fittings to get a good seal. I shortened a couple of the pex lines and reapplied the compression fittings on the ends.
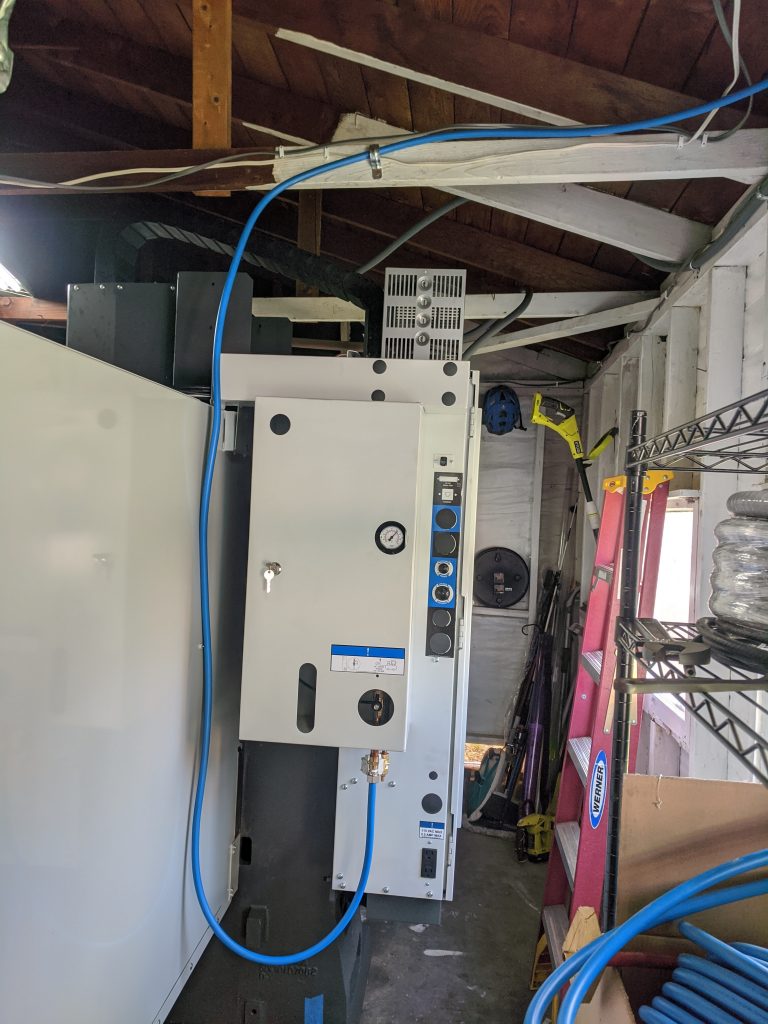
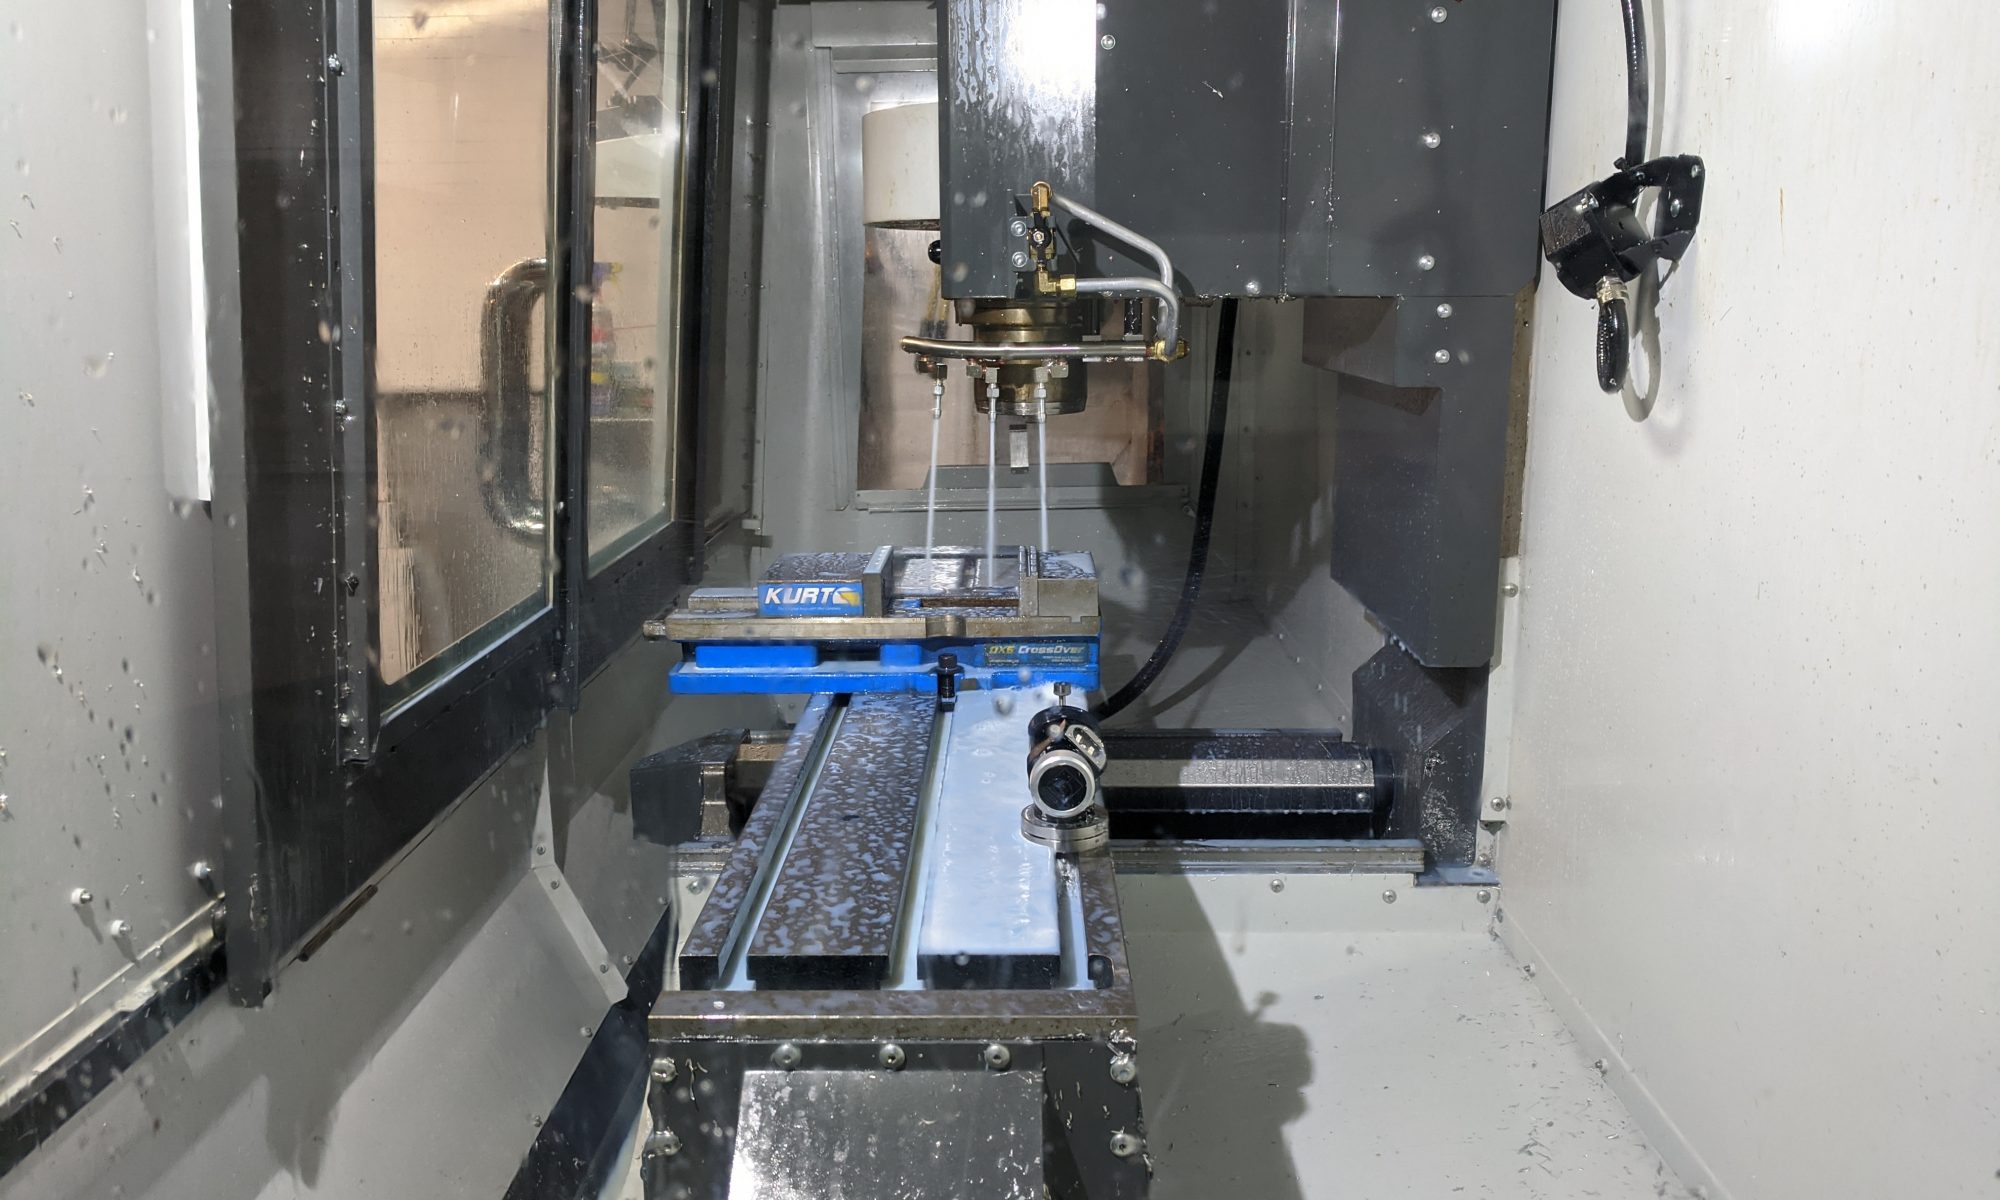
Hooked up the machine and put an accessory outlet overhead by the machine for doing work with air tools ( die grinders, sanders, blowguns, etc) I used some leftover hangars from the electrical install to route the tubing. I pressurized the system and checked for leaks. Everything was good (there was a slight leak on the fitting that goes to the machine, but I tightened it and it’s slower now. I might redo that joint later if it bugs me). Now that the machine had air, I powered it up and checked the axes movement (the column topped out has good clearance to the roof, yay :D). It seems good, but I don’t want to run it much without getting leveled, so I shut it down.
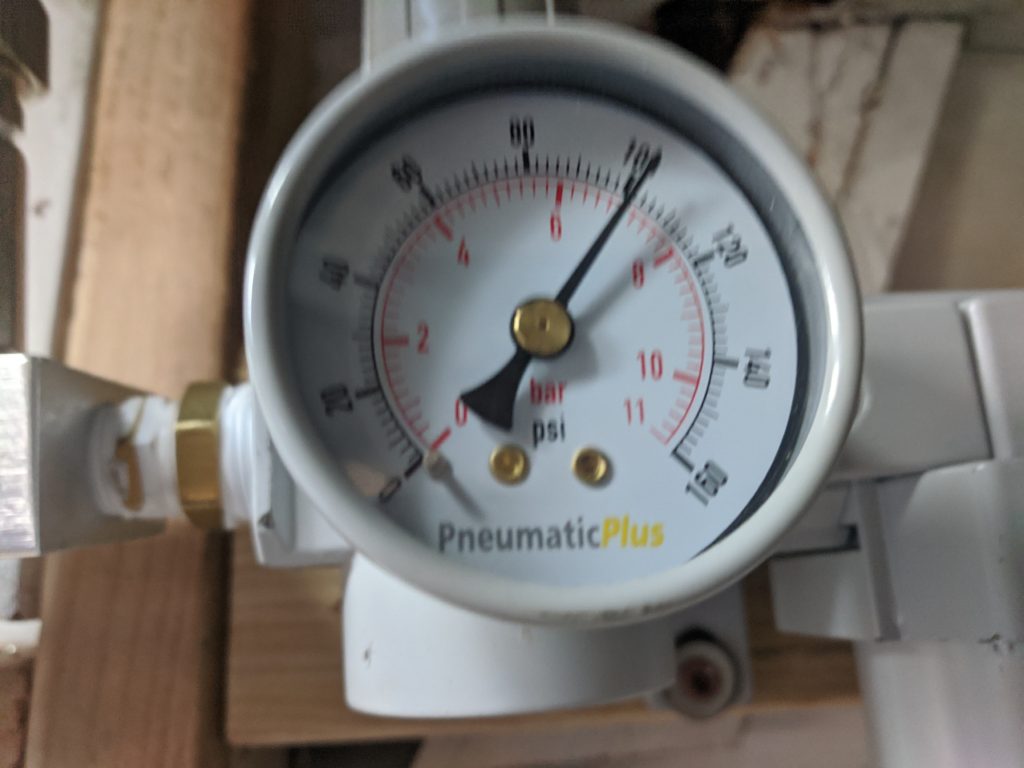
Pressure at regulator 
Pressure at machine
Haas Installation
The Haas technician rang my doorbell the monday morning after I called ( I thought he was coming Tuesday, so I was caught unawares). He was ready to set up the machine. I showed him to the shop in the back. His name was Angel.
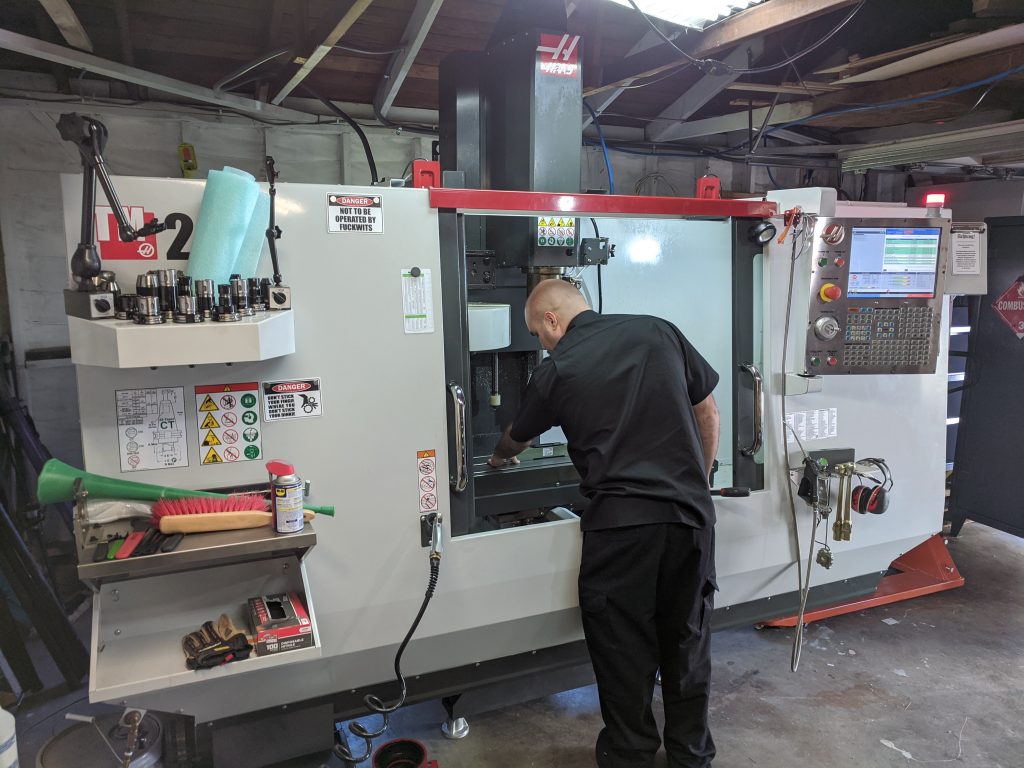
First thing Angel did was power up the machine and check for alarms. It was good on power and air, so next he cleaned the table with simple green degreaser and a new lint free rag, to remove coolant oils left on the table from prior use. Then he took a stone to the table to remove any burrs, rust, or swarf left on the table. I didn’t have a proper norton stone, so lent him one of my knife sharpneing stones from the garage ( it was 1000 grit ). He first sprayed some WD-40 all over the table, then would slowly move the stone in a figure 8 motion on the table, feeling out any high spots and knocking them down. Once it was good and clean, he felt it with his hand to make sure there were not any burrs left.
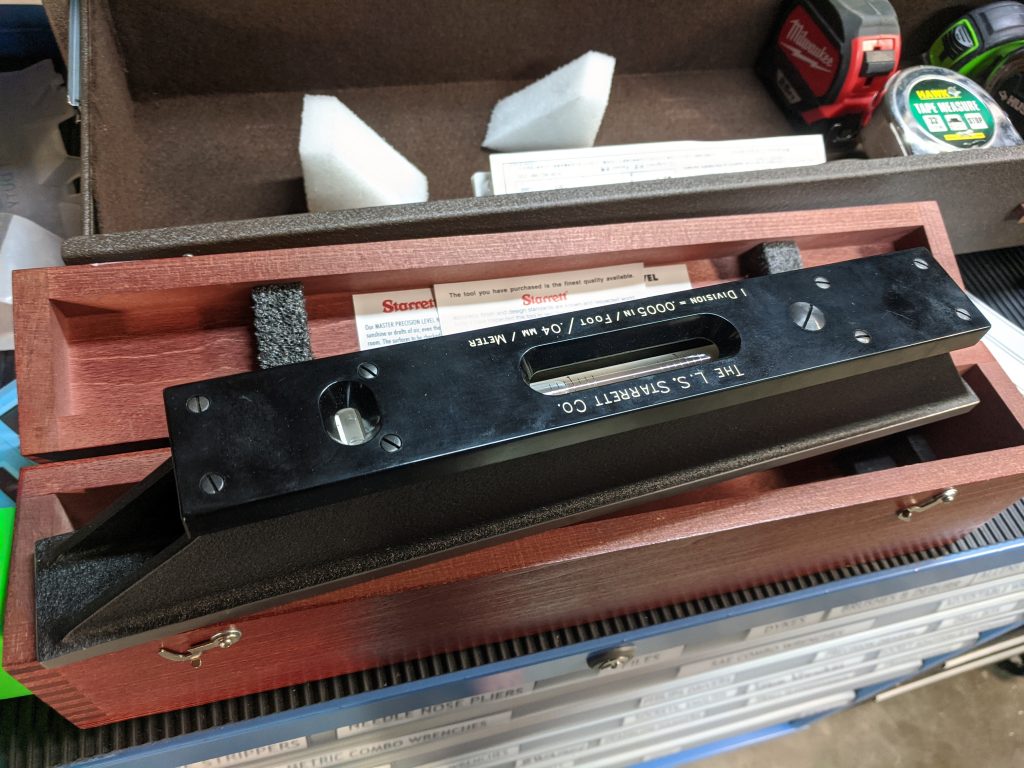
Next he set about leveling the machine. He got out a spirit level ( similar to the starrett I have) and checked level on the table (it was way out), then he got a wrench and socket and adjusted the 4 feet until it was roughly level front to back and side to side, going back and forth to make sure he wasn’t putting twist in the frame. This probably took half an hour. Eliminating twist is critical to making flat parts by keeping the table square to the column. A machine out of level and twisted will make inaccurate parts.
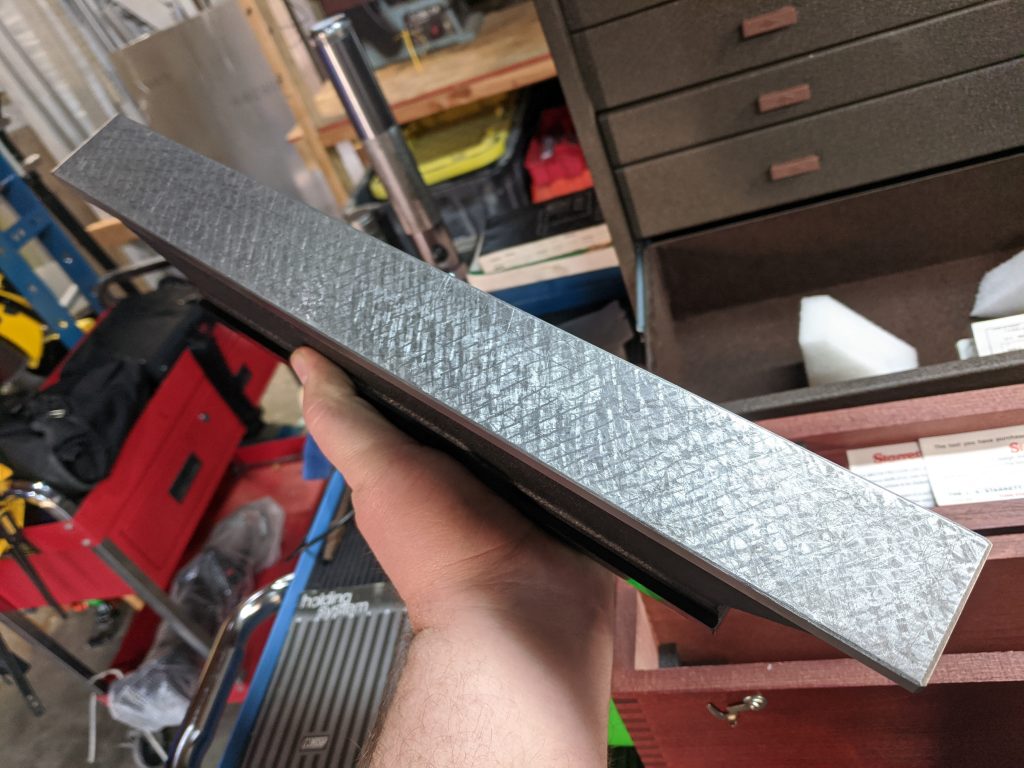
Spirit levels are neat. They can very accurately determine level, and be used to align large machines very accurately. They use the same type of bubble you’d see on a level in a hardware store, but larger, and have a hand scraped bottom surface that is very flat. On long straight objects, the angular accuracy of a spirit level can give you very fine resolution data about the location of the endpoints, At Hyperloop we used spirit levels to align large tooling frames when quickly calibrating it before using the tools to set track elements. This was easier to do for the machinists in the shop when the laser tracker team wasn’t around or the tracker was otherwise occupied.
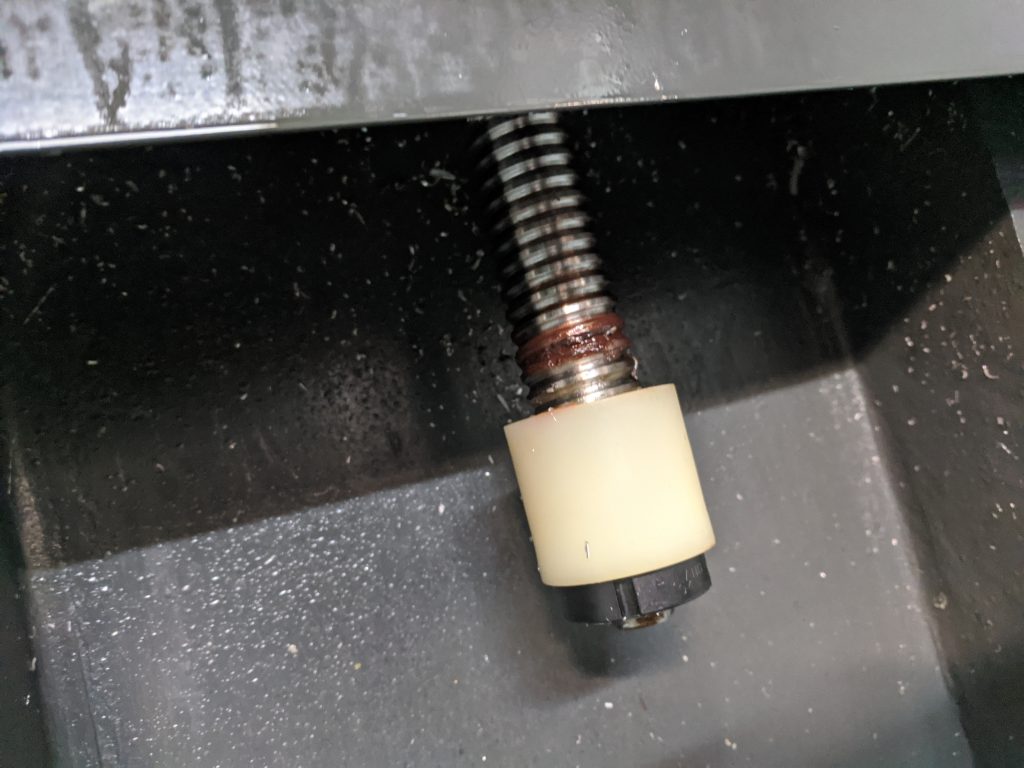
While Angel was leveling the machine I asked him about ongoing maintenance and thankfully he was happy to dump some knowledge on me. He gave me some tips on maintaining the machine, where to look for the right amount of grease on the ball screws and linear slides, and to use a phone camera to check under the X and Y screw covers. If there’s no stripe of grease at the end of the screw or slide, hit the grease zerk with 5 to 10 pumps until you can visibly see the grease again.
Next I asked him to calibrate the tool setter and the probe. He checked the batteries on each, and the tool setter was dead, but the probe batteries were fine. He started with the tool setter, putting an indicator on the spindle and sweeping the head of the setter in x and y using the jog dial on the control. He adjusted set screws to pitch and roll the stylus on the probe until it indicated within a tenth of flat. (.0001″). He swapped the batteries into the probe and grabbed a 1″ ring gauge ( like an inside out pin gauge), which ran through a macro to calibrate itself. First it touched off the tool setter to set up it’s z length, then he jogged it over to the ring gauge (which he attached to the table with some high strength neodymium magnets) and it touched off the ID of the gauge in X, and Y, spinning 180 degrees to determine its runout and probe diameter.
I’ll be doing some in depth articles covering the more interesting tools used in machine shops, like indicators, where there are many types and brands available, and interesting tips and tricks to get the most out of the tools. Look for those starting next week.
Before he left, Angel loaded a spindle warmup routine onto the control ( there wasn’t one, normally there is). It’s for getting the grease in the spindle warmed up at the beginning of a day of operations. It starts at low RPM and dwells for 5 minutes, bumps the RPM up by a thousand or so, and repeats until the max spindle RPM is reached.
Mixing Coolant
Coolant is used to cool the tool and the workpiece while cutting with an endmill or a drill. It also lubricates the cut, and washes chips or swarf away. This keeps chips from regrinding into the surface and screwing up the finish, or potentially even breaking the tool.
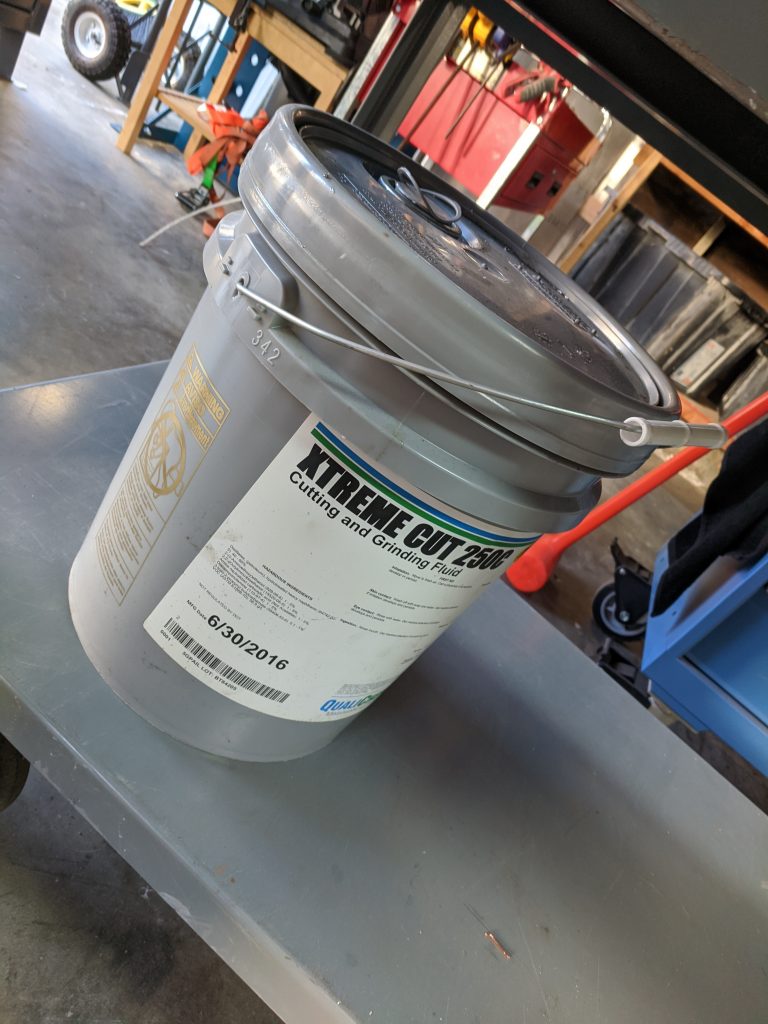
The coolant that was in the mill before is xtreme cut 250, which is a water miscible oil and is good for general work with ferrous and nonferrous materials. It’s fairly non toxic, though it’s recommended to wear gloves when handling it and not to breathe vapors. When it dries on something it leaves an oily residue which can be cleaned off with a rag and some degreaser. At some point I’d like to try Blaser Swisslube’s Synergy 735. It’s non toxic and clear when mixed, which would be great for visibility during cutting operations running coolant.
I gathered the coolant concentrate bucket, a couple empty five gallon buckets, a refractometer and the hose and filled the 5 gallon buckets with water. I was looking for about a 5-7% oil to water mixture. I poured a quart of coolant concentrate into each bucket and mixed with a paint stirrer.
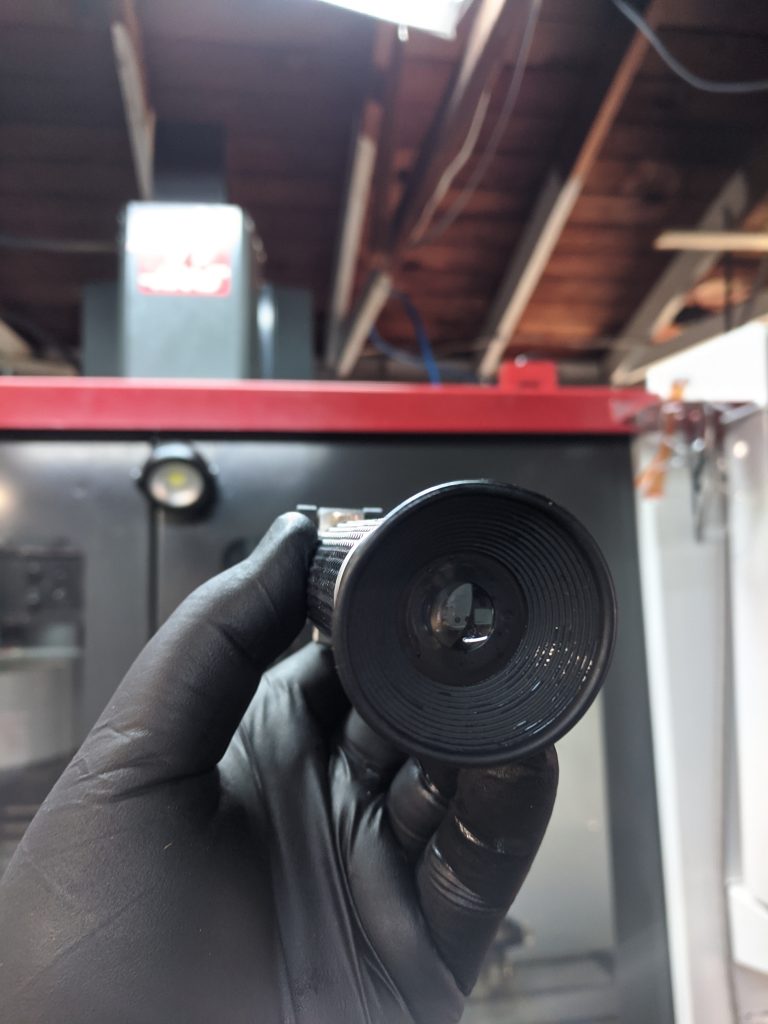

After mixing for a minute, I put a drop on the refractometer glass with the included pipette, closed the flap, and looked through the eyepiece. Each bucket was right around 5%. After adding 3 buckets (15 gallons) to the empty coolant tank I made the last bucket a bit rich (extra concentrate) and ended up closer to 7% overall mixture ratio of coolant to water.
Haas has a pretty good video covering this mixing process. Check it out: (Haas Coolant Mixing How-To Video) Mark Terryberry is a chief.
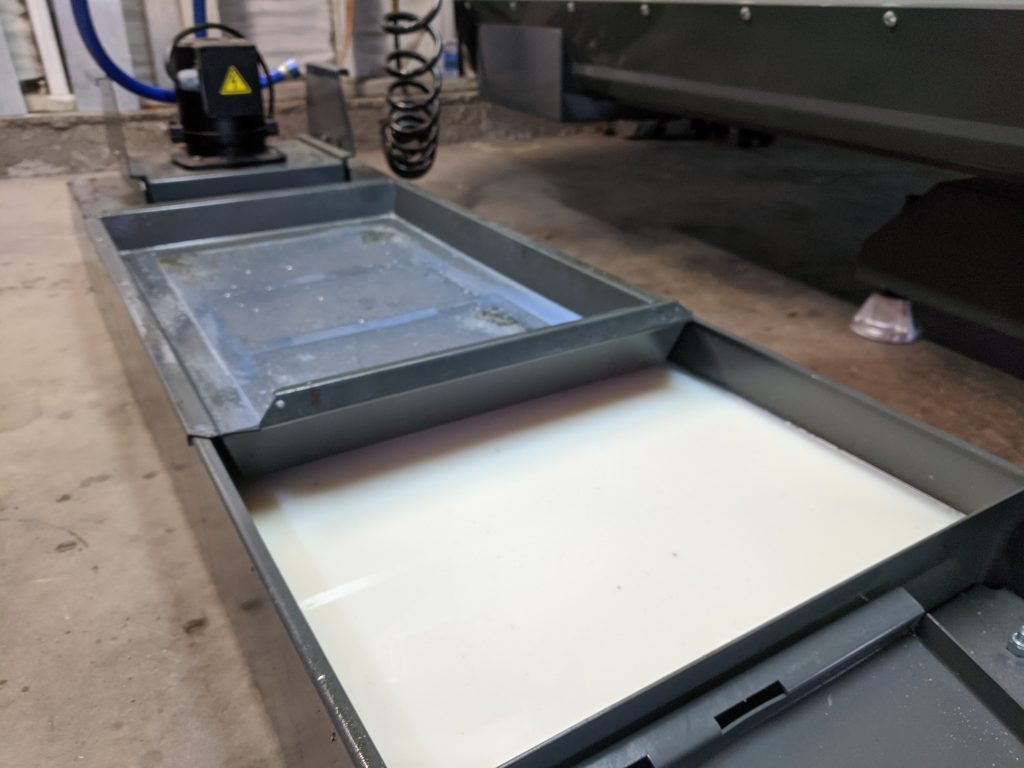
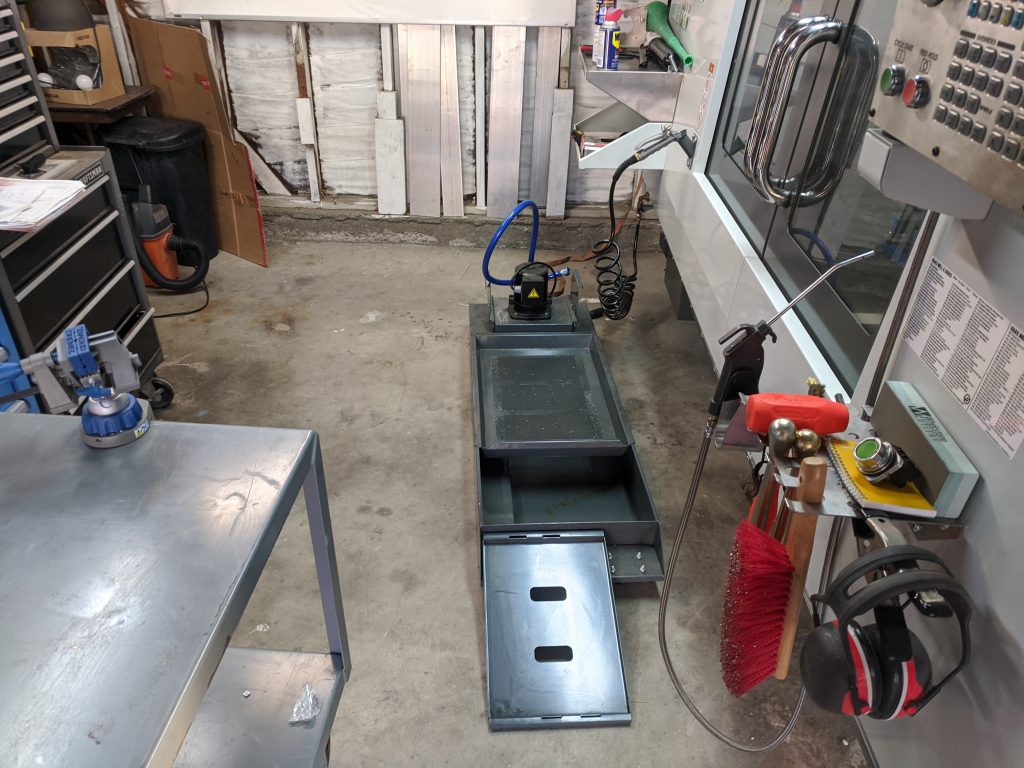
Once the tank was full I hooked it up to the machine and ran coolant through the nozzles for about 30 minutes to make sure it was very well mixed. The flood on this machine is pretty solid, good flow rate, lots of coverage.
Next Up: Organizing the shop, First cut, first part, what I’ll be making, what I can make ( machine spec)
Thanks for stopping by and having a read! Next week I’ll be covering how I organized the shop, now that everything is in, get some sweet video of the first cut on the machine, go over the first part I designed and it’s toolpath, and talk a little bit more about what I’ll be making on the Haas.
If you’ve got projects or ideas, leave a comment below or reach out. I’m on twitter: @risknc or drop me an email
I’m also going to get into some detail on what you can make with a machine like this, by talking about its specifications. Check back if you want more techno dweeb knowledge about Mills.
Till next time!
- Kyle
Dude, that Angel guy…..h needs to become a drinking bud!