

How to cram a CNC shop in your garage from xSpacex engineer @risknc (plus, a Corgi)
This is the beginning of a series on how I got my small machine shop ( Swarf ) setup in my garage. I’m both documenting my experience with getting tooled up, and also I’ll try to have some asides to explain for those who aren’t as familiar with metalworking.

I’m going to setup IFTTT to coordinate posting my blogs on social there so people know I’m doing something. If you want to talk, message me via telephony / chat apps, or leave a comment here
Shop Basics
I’ve always wanted to have metalworking capacity at home. At my day job (er… well my old day jobs I guess) I design systems that are mostly composed of fabricated and machined metallic components ( vacuum chambers, rocket launchers, etc. ).
The foundational machines used to subtractively create parts are the Lathe and the Mill.
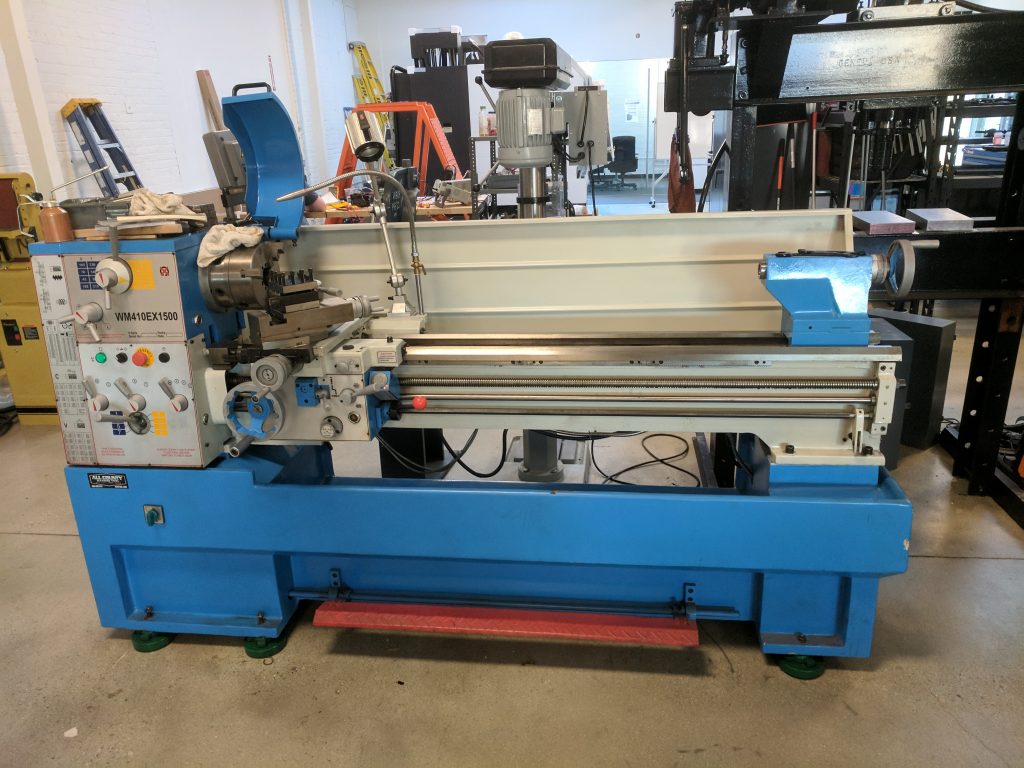
A lathe cuts metal in cylindrical shapes, by rotating it in a spindle and cutting it with a tool held on a carriage and cross slide. Lathes can be used to make pins, valves, screws, collets, bolts, nuts, dowels, rings, all sorts of stuff.

A mill cuts metal by spinning a cutting tool at high speed and feeding it into the part using cartesian x, y, and z motions. Mills can be used to make brackets, plates, blocks, manifolds, mounting blocks, tuning forks, all sorts of stuff.
Manual mills have handles for feeding each axis, and sometimes have additional axes of adjustment to make manual operations easier ( like the head tilt on a knee mill). Some have powered handles, or a Digital position readout.

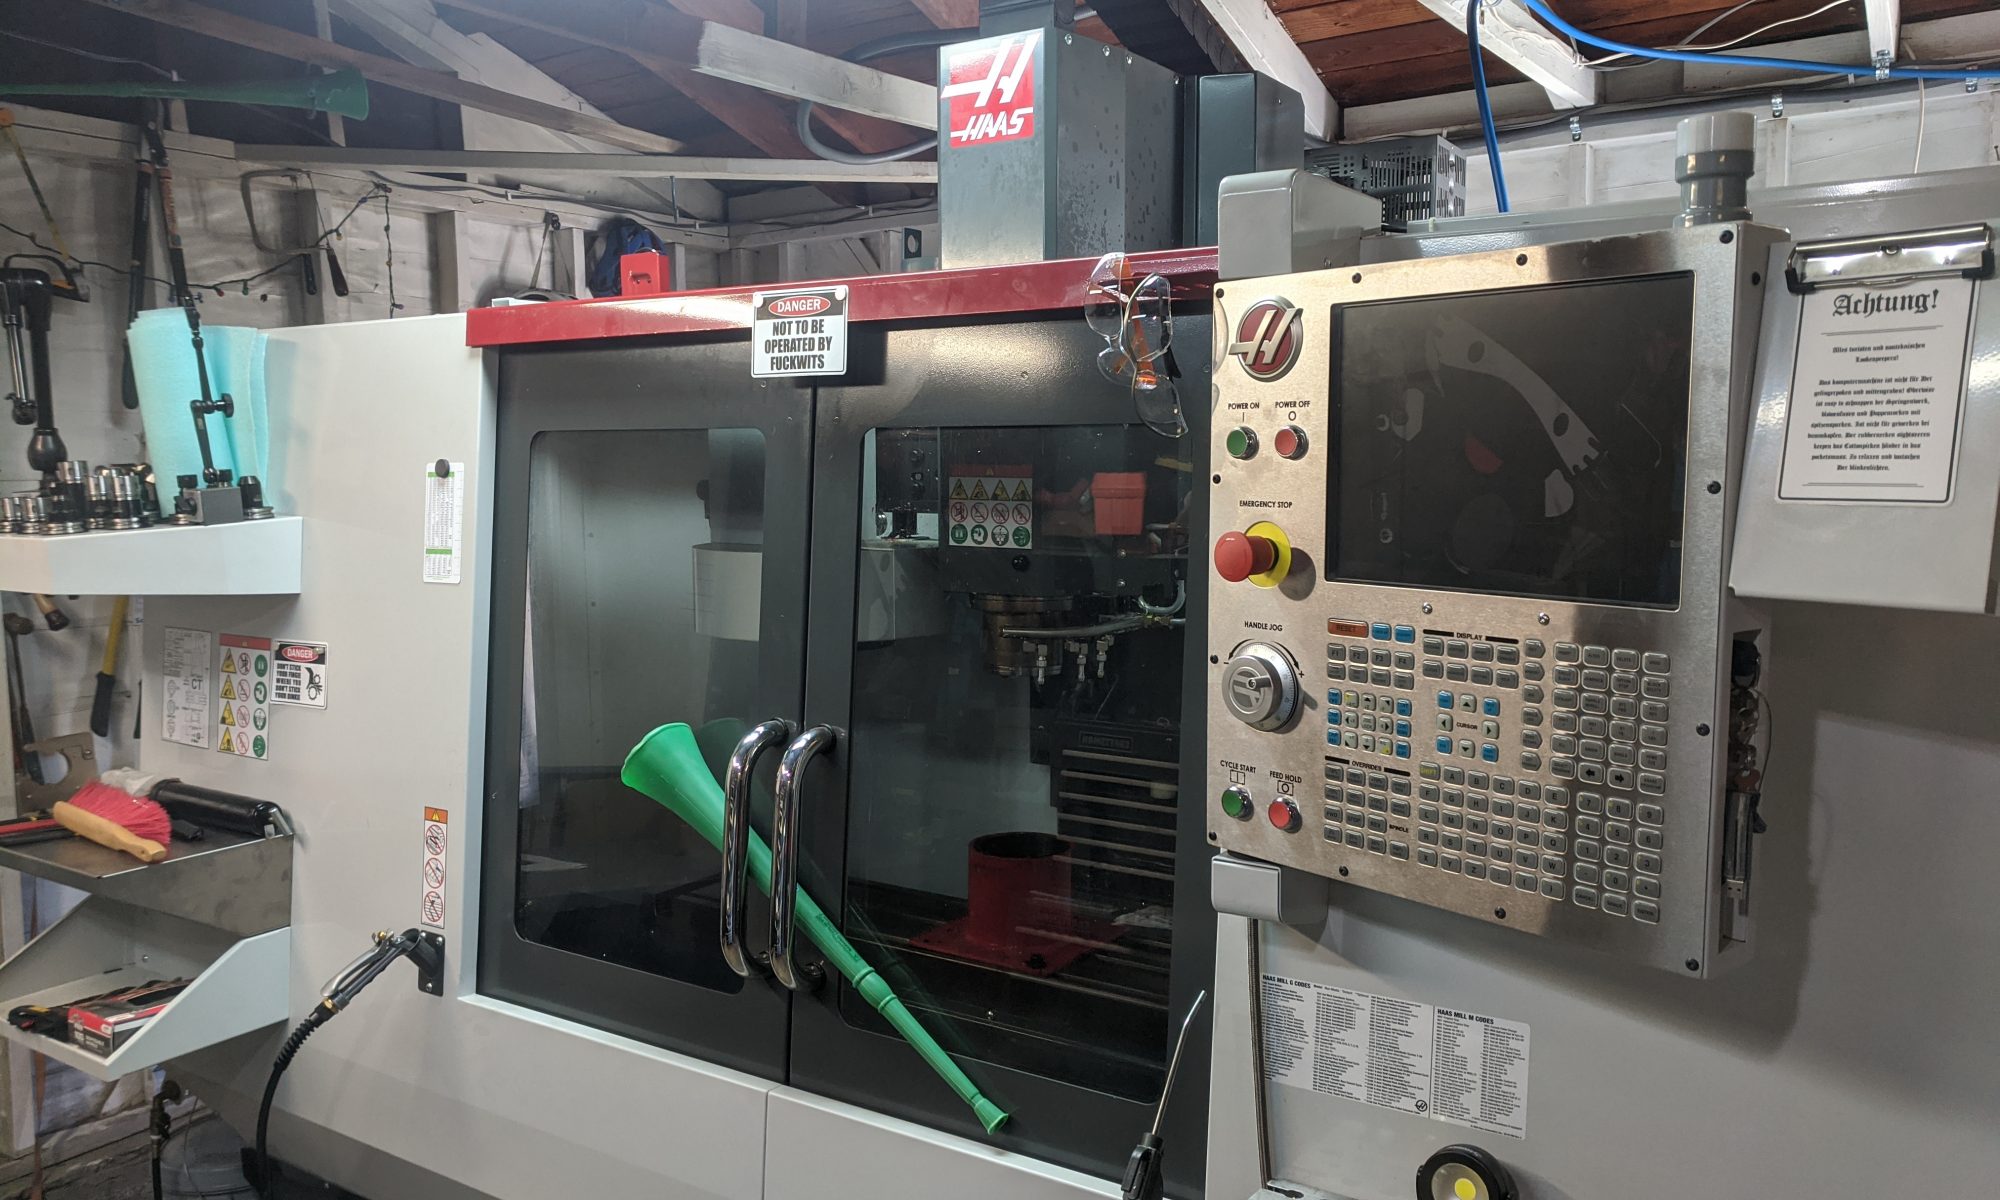
A CNC Mill ( what I have ) uses servo motors attached to ball screws to drive each axis. The motors are driven by control software, and programmed by the operator using G-Code. A special programming language developed at the MIT servomechanisms laboratory during world war II. This allows precise, repeatable positioning, as well as complex multi axis moves that would be impossible by hand. Pierre Bézier was dreaming of CNC when he developed splines at renault for creating complex body curvature for cars.

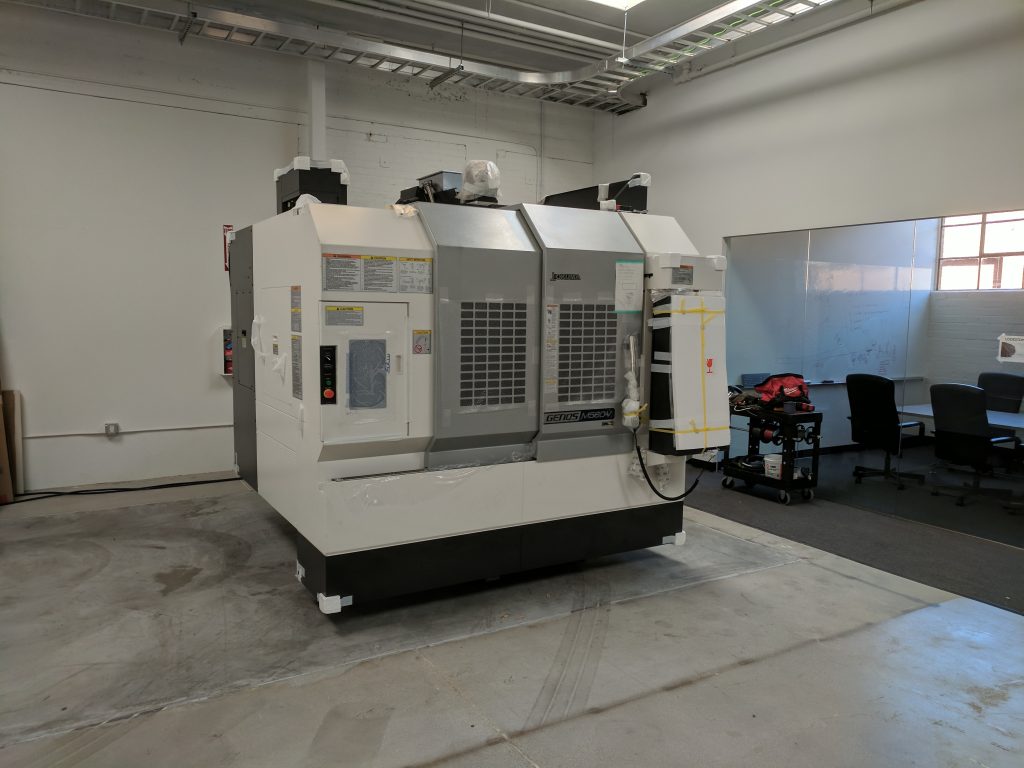
The particular mill that’s moving into my shop is a Haas TM2P toolroom mill. It’s designed for use in what’s called in industry a Tooling Room, where tooling parts used for fixturing and building larger assemblies are made. Tools are generally low volume (made in quantities of one or two instead of hundreds), but sometimes require high precision to insure fits are correct and parts made on the fixtures meet tolerances.

The table on this mill is large for its size, about 36″ x 10″, and the axes can travel 40″ x 16″ x 16″ (X, Y, Z respectively), this is a bit larger than a Bridgeport series I, a workhorse manual mill that most machine shops have one or two of. I’ll cover the rest of the specifications of the machine later in this post, but this should give you an idea of how big the parts this can make are.

Bridgeports are beautiful and ubiquitous, have a long history in the US, and are generally regarded as a must have for any real machine shop, for doing quick modification work, when programming a CNC is too much overhead. You can also make complex parts on a bridgeport with tooling and a lot of practice. I’ve made quite a few fun parts on one.

Normally stock material from a steel mill or aluminium foundry is brought into a shop, cut to size to fit in the machines with saws, machined into parts, inspected, and finished with coatings or surface treatment. From there it’s assembled into larger sub assemblies and assemblies, sometimes post machined after being assembled, or welded into a weldment (an inseparable assembly of parts glued together with weld).
Layout
First thing I had to do was figure out where the machine was going, and if it would fit in the door. I went on Haas’s website and checked shipping dimensions, and went to the garage where the machine was stored and took extra measurements. I taped out the width of the machine on the floor to figure out alignment using a square and a tape measure, and double checked by taking the diagonal across the machine.
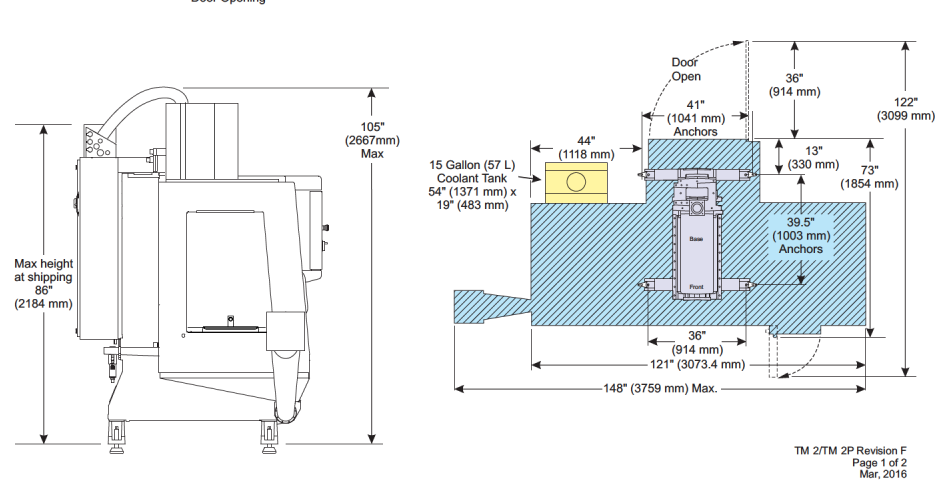
In general, when doing shop layout there are a lot of factors to consider when positioning a mill. First and foremost, footprint of the machine is critical.
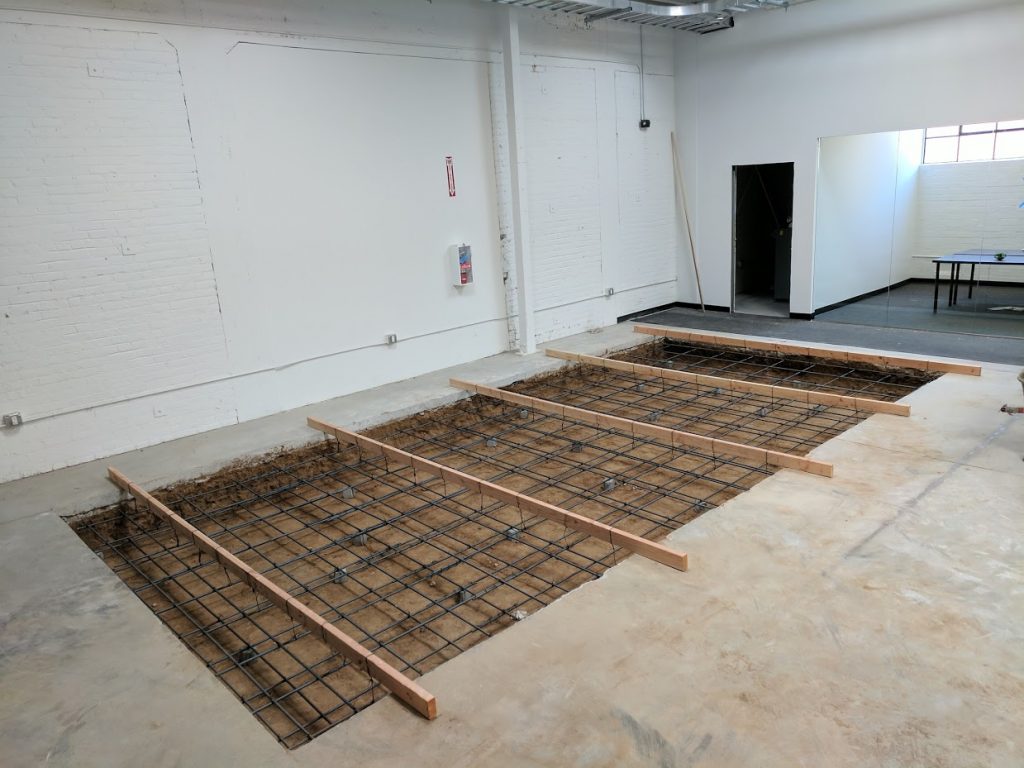
Ask the manufacturer recommendations for foundation size. Smaller machines like this Haas (around 5,000 lbs) don’t need a specially reinforced pad. Larger mills will need a rebar reinforced pad ranging from 7-12″ for a ~20×40 machine, to much larger for boring mills and gantry mills. Try to avoid placing the machine on two different concrete pads, as settling may be uneven and put the frame in torsion, leading to inaccurate cutting.
Leave room for the operator to stand in front and get around the machine, as well as access for loading and unloading heavy parts. An overhead crane or jib crane is useful when working with larger components that weigh too much to lift. If there’s no crane available for a larger machine, consider allowing room for a forklift to drive up to the machine.
Try to keep doors and openings in the enclosure free to allow long parts to overhang the table.
Next make sure electrical cabinet and maintenance doors have clearance, and the top of the column ( or z axis ) travel won’t hit overhead objects ( roof, rafters, lights). Check to make sure you can get the coolant tray under the machine. Look for electrical, data, and pneumatic hookups, and make sure there is nearby available power, air, and network connection.
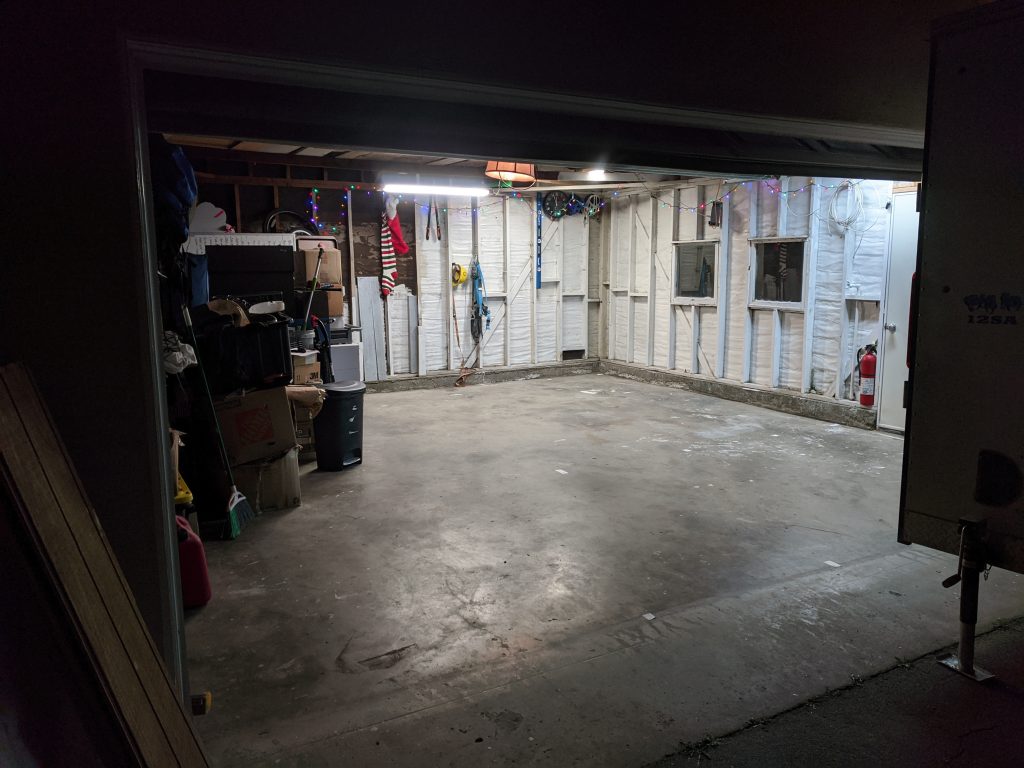
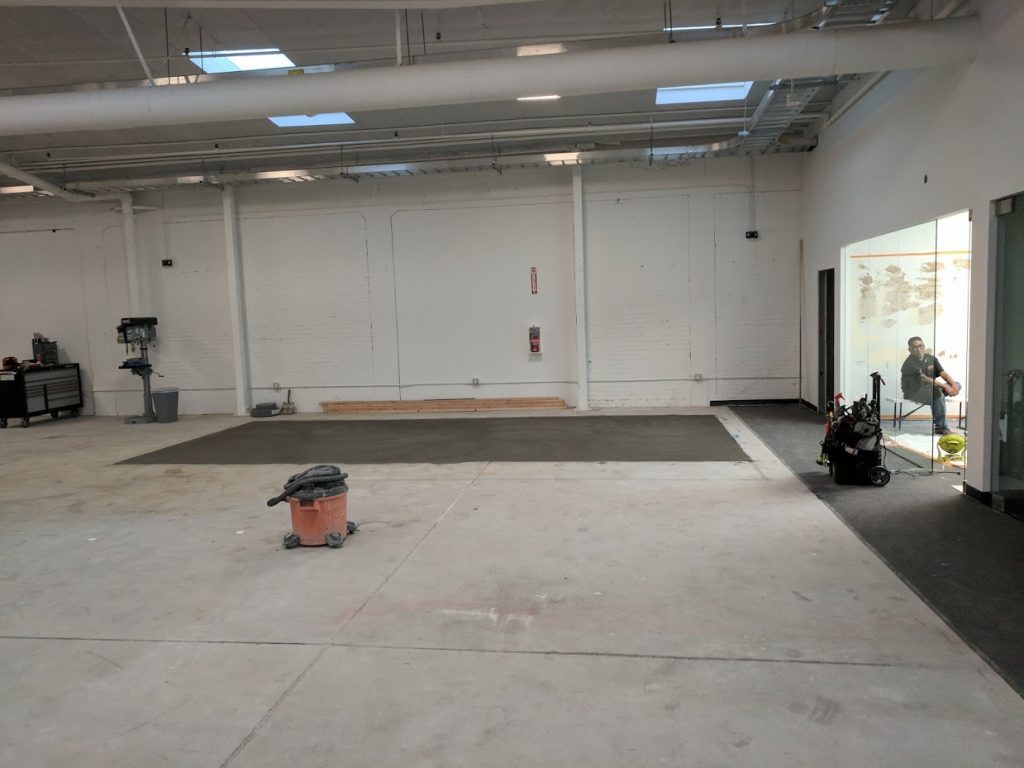
Cleaning

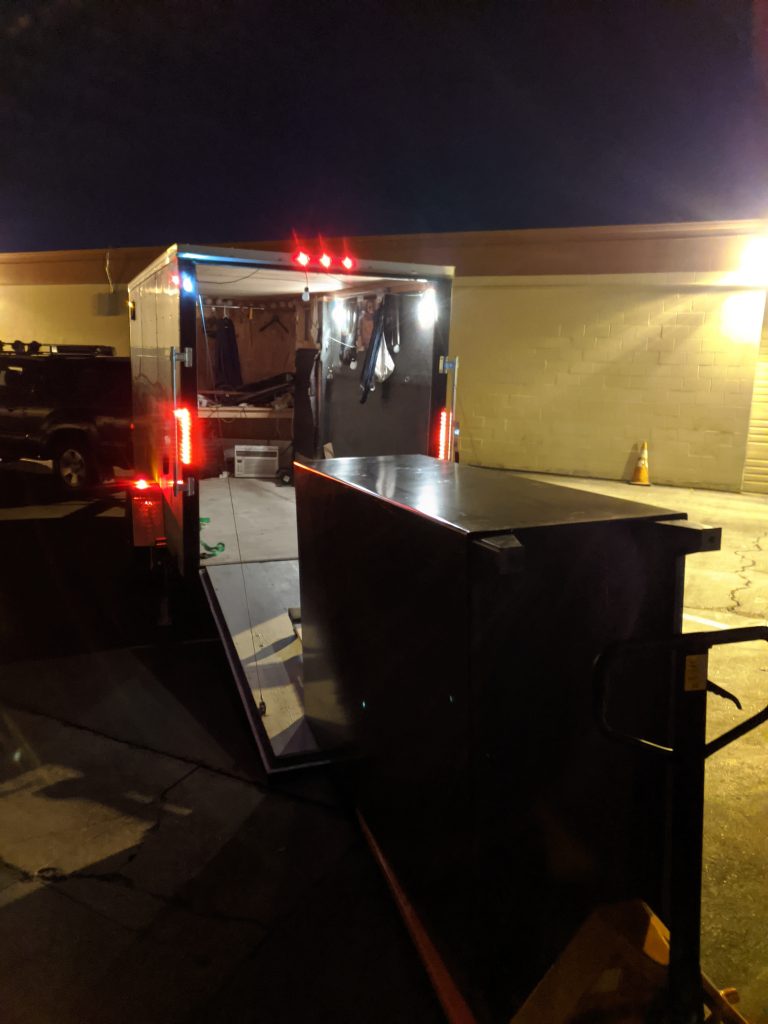
I had a lot of stuff in my garage from moving in initially. I also have a travel trailer I use for camping and hauling stuff. After I picked up some stronghold cabinets from my friend’s shop up in burbank (he was storing them for me) I loaded all the “garage cruft” that had accumulated in the garage into the trailer for temporary storage. I should probably get a storage unit at some point, or drop my shipping container somewhere and store it in there ( yes I have a stubby shipping container with a 3/4″ plate steel floor and a jib crane, I bought it for a dollar, but that’s a story for another day)

Machine Delivery
The owner of the machine scheduled delivery for the 4th, but he was already out of town, in Puerto Rico, so I had to work with the shippers to make sure the extraction and delivery went smoothly. I woke up hecka early and drove over to his place. The night before I’d grabbed the last of the stuff in his garage ( I left the box labeled “adam’s rocket stuff” I kind of regret that now).
The machinery movers disassembled the risers from the machine and used some special lowering bottle jacks along with some custom fabricated U channel roller skates to keep the machine as low to the floor as possible when getting it out. Once it was under the garage door, the hyster 18k forklift they’d brought along carried it just fine. They secured it on their truck with chainstays, picked up the granite surface block, compressor, and toolboxes and I drove back to my house to meet them for load in.
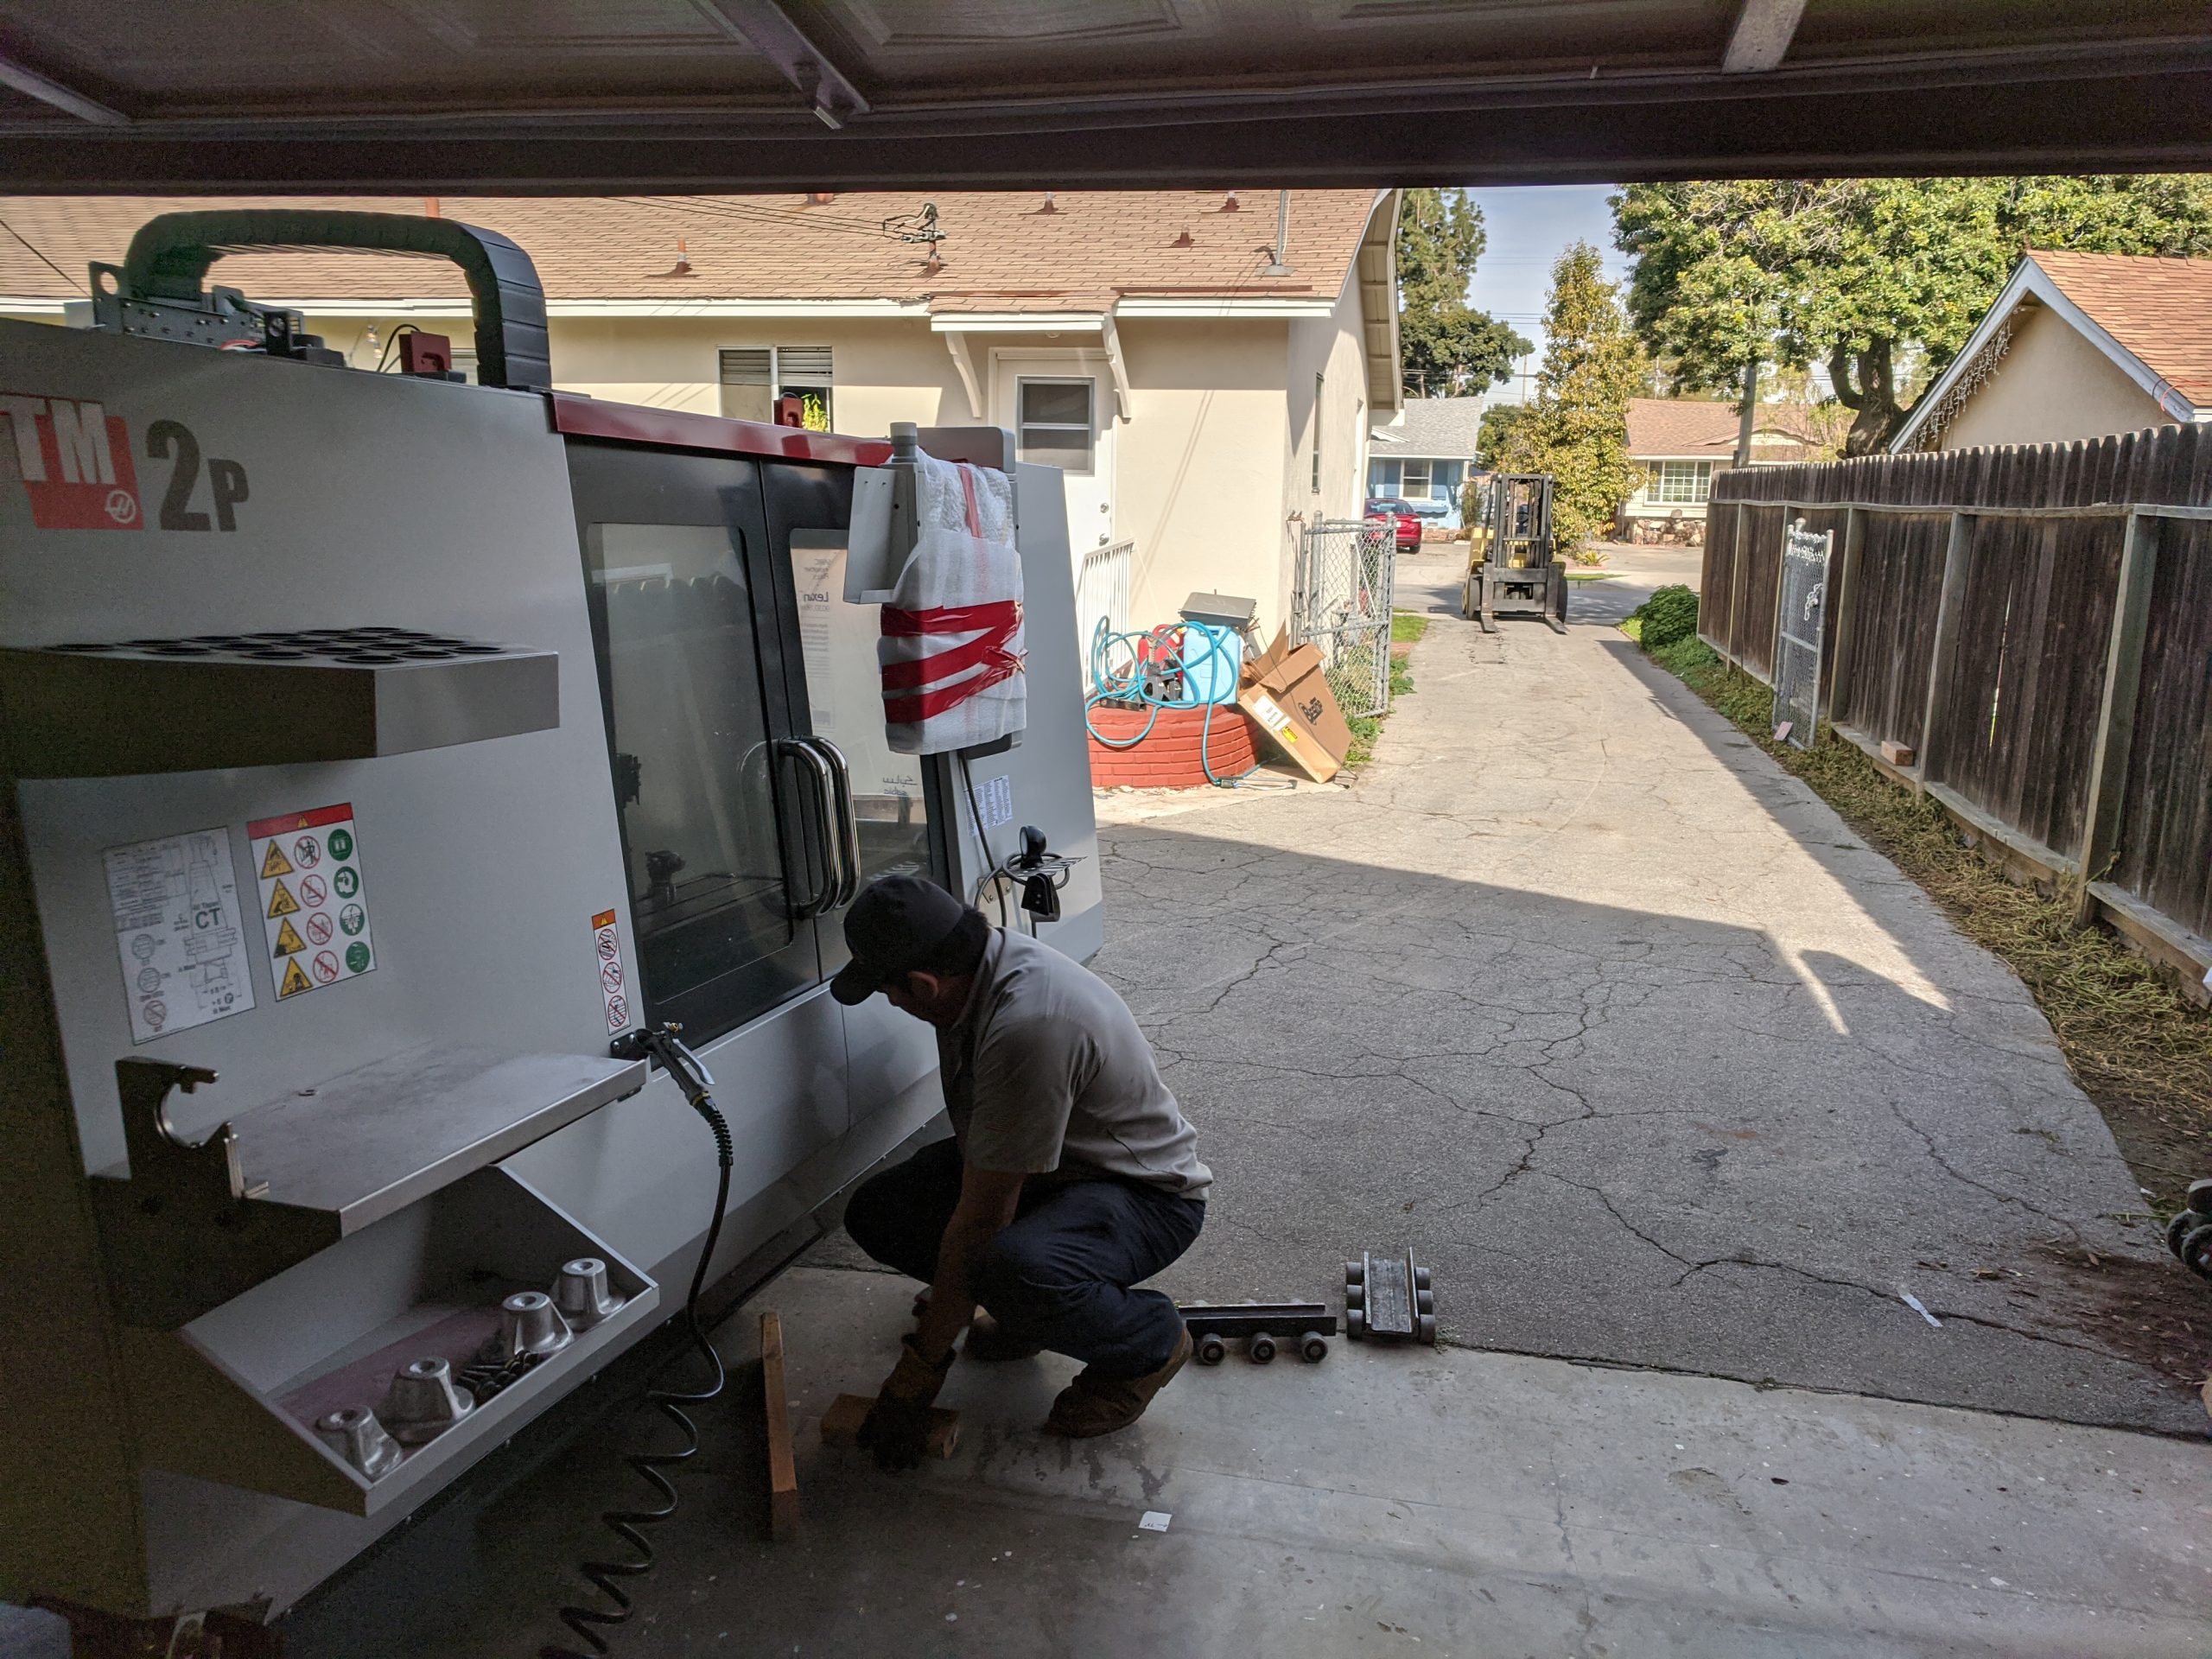
I opened the garage and the gate at my house and moved quickly to get ready for their arrival. I also re parked my trailer down the street, just to make sure the driveway was wide open. They unloaded the machine, set it on some blocks and flipped around it with the forklift to get oriented properly. My neighbors were all wandering out, wondering why a huge semi was parked in the street, they figured it out pretty quick though. My nextdoor neighbor hung out for a while watching them put it in, he was amazed it made it in, and was really excited about it.
The machinery movers started to drive the forklift up the driveway but stopped when they realized the asphalt was a bit thin for the weight. So they transferred the machine to a machinery moving pallet jack and we fast walked it to the concrete garage skirt (this was a bit… hairy). They lowered it onto the roller skates and made it under the door. Using jacks, they lifted the machine and replaced the risers, I signed the bill of lading and bam. I was the proud possessor of a Haas TM2P.
Organizing
My electrician couldn’t make it out till closer to the end of January to assess dropping single phase 230 to the garage (for powering the machine), so in the meantime, I figured I could pick up some cabinets I had in storage and get started organizing all the inherited tooling. Stacie and Levi stopped by and helped me assemble a 60 Ton shop press that was new incrate over in the corner, and then we unpacked and filed away all the tools that came over with the machine into my lista toolbox.
Josh helped me load everything up at his shop, and Jake stopped by and helped me unload the cabinets at my house. The pallet jack steve donated to my shop was very helpful with all of this. We used the Jib crane to break over the cabinets ( they weigh a few hundred pounds each), and then rolled them up the ramp into my trailer. They just barely fit. Then on the receiving end, we again used the pallet jack to lift and slide the cabinets out of the trailer. We put in some elbow grease and tipped them upright (no crane! :D), and then wheeled them into the garage.

Next Up
Well, the machine is in! Come back next week for all the excitement of trapping 230 Alternating Current Pixies and jamming them into the electrical box, putting 120 psis in a tank, and routing lots of lines everywhere. Next blog will cover
- Power
- Air
- Machine Leveling, Calibration
- Haas TM2P specs and capability
- Coolant
Thanks for reading, if you have questions or just liked reading this, leave a comment below, follow me on twitter for the latest and greatest @risknc

Good old CHARLI… 🤖❤️
The machines in RoMeLa are so much fancier now 😀