This year I had a huge opportunity to knock out some projects for the burn!
Usually I’m burried in startup work and just barely scrape away to go do that thing in the desert. This year I got a break right before and had a few weeks to really knock out art, and quality of life enhancements. I also planned a Tiki party the weekend before departure, so I was a bit stacked in the lead up to hitting the road.
I worked on two main projects for this year: Trailer upgrades and the Space Goats Sign.
Space Goats Sign
Last year I joined a new camp. I’d been mayor of the old crusty dusty camp gigsville in 2018 and had a pretty rough co-mayor experience, so when I was asked to join a real small camp called the space goats I was excited to eject some dust and work with some people who were a little more excited to be burning. I still like those gigs folks, but I think I’d rather get the gig experience in small doses.
We had just three people in camp my first year with space goats ( 2019 ) Hermit and Hijack, the camp leads, brought all of the art and lighting ( some huge horns and some domes and hammocks, their setup was awesome). and I was the new guy! There was also one other person, a friend of Hermit and Hijack, but after a few days she got real sick and departo’d. It was a real laid back, fun burn. I was going through alot at the time ( an aerospace startup rescinded an offer after I’d moved to LA two days before I left for the burn. it was rough).
Then there were two years of no burn. I guess everyone was on vacation or something.

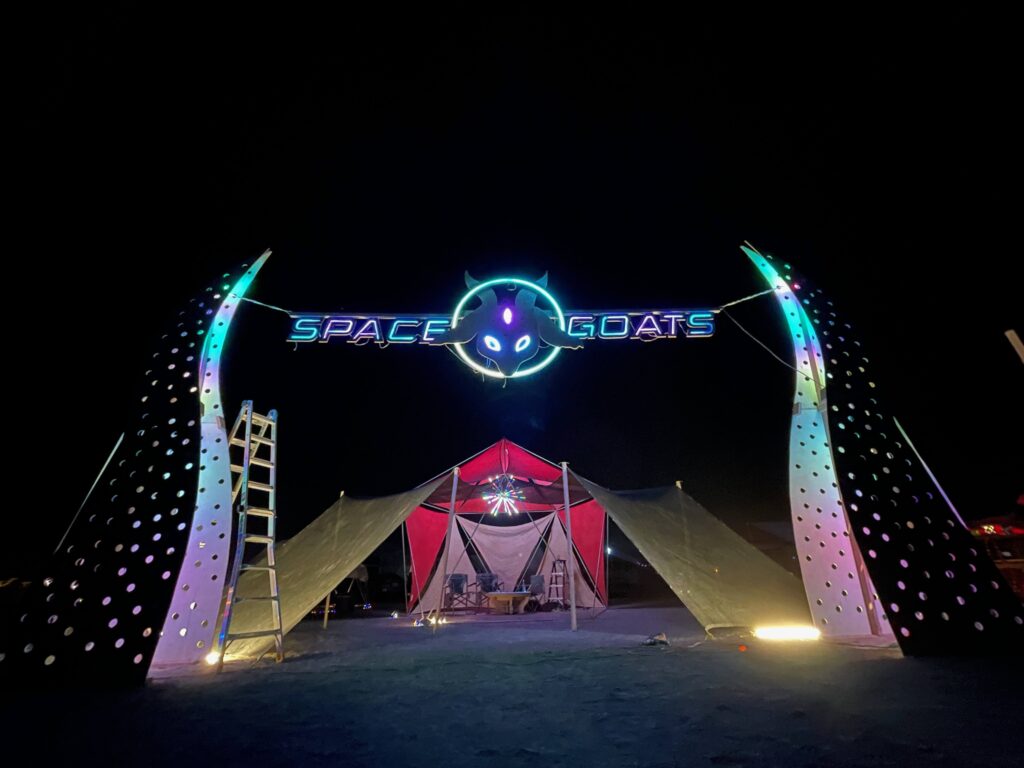
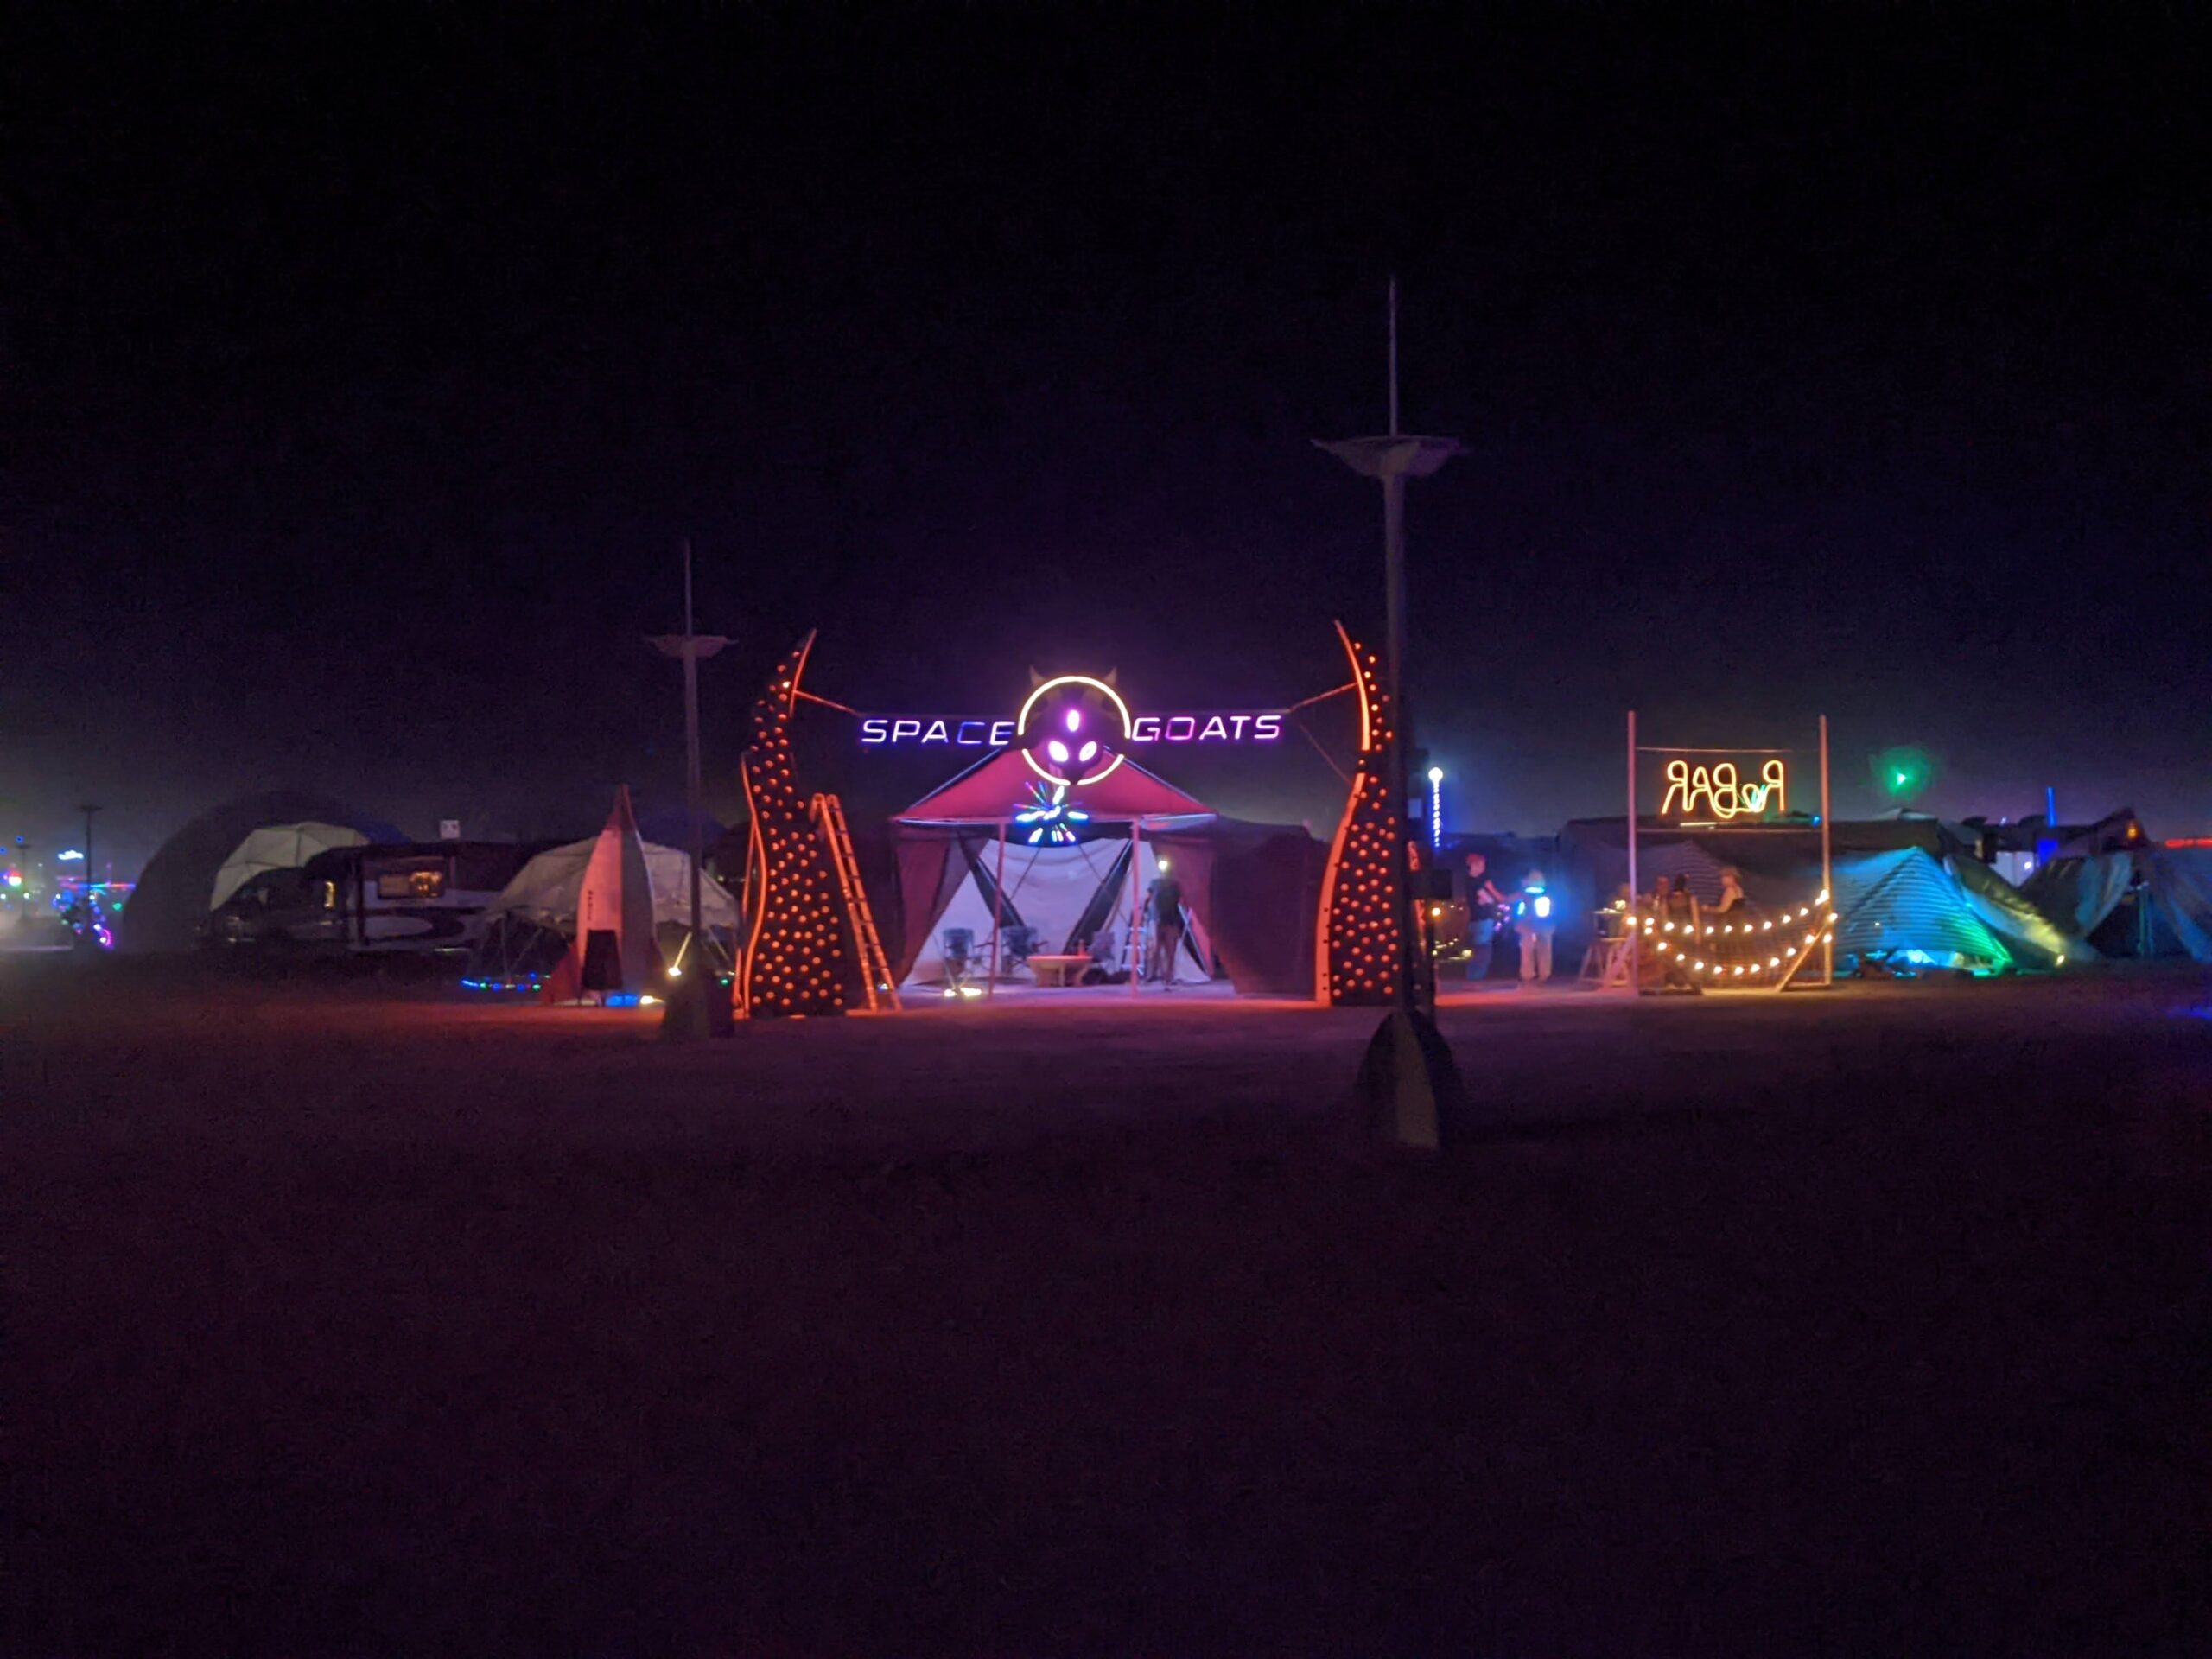
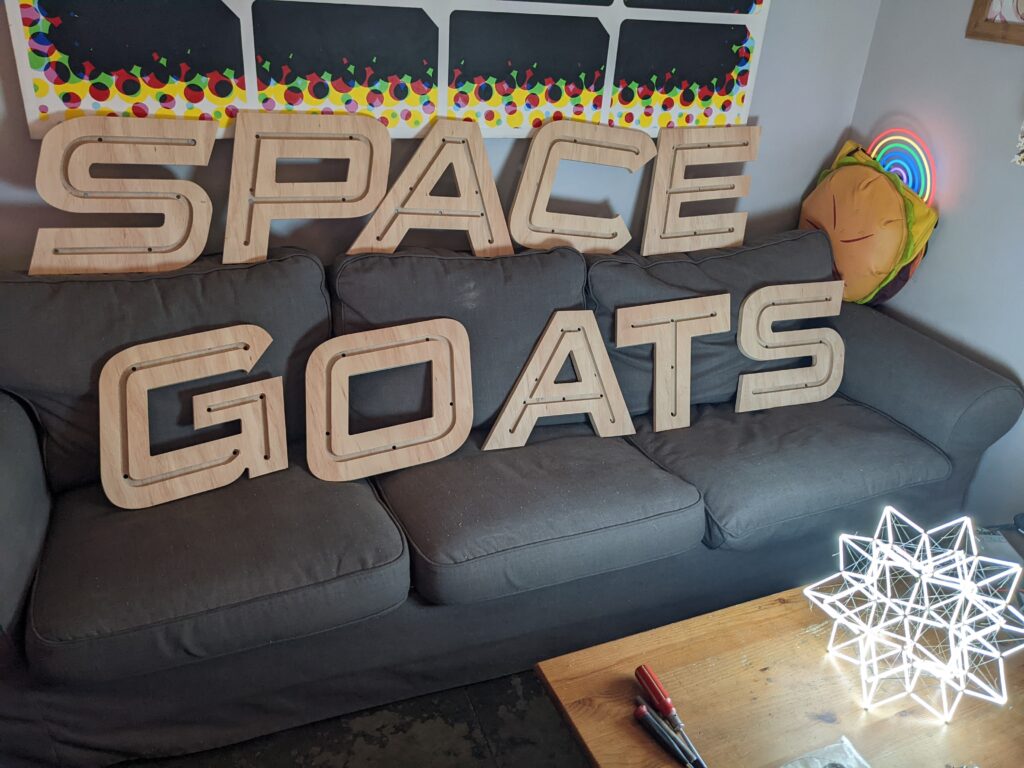
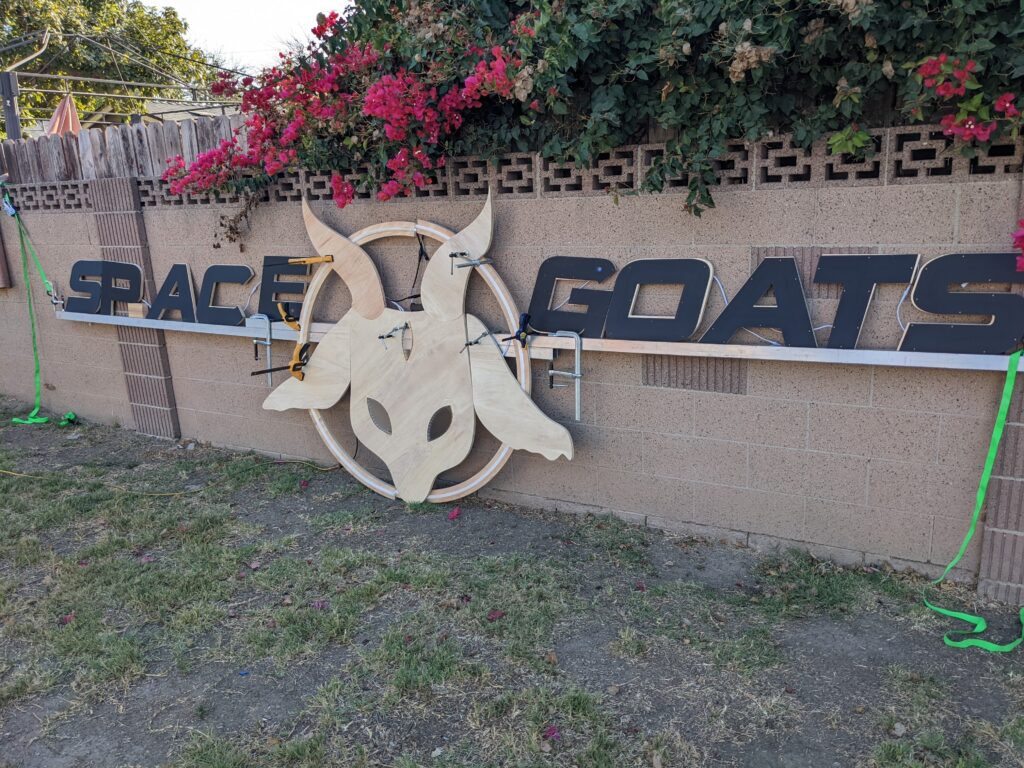
2022 rolled around and Hijack setup a discord. I invited some friends from disorient and other camps to see if space goats was for them. All in all we ended up with 18 people in camp. Kind of wild growth. There were some mentions of “hey lets do some projects this year” and we never had a sign before, so I volunteered to make one.
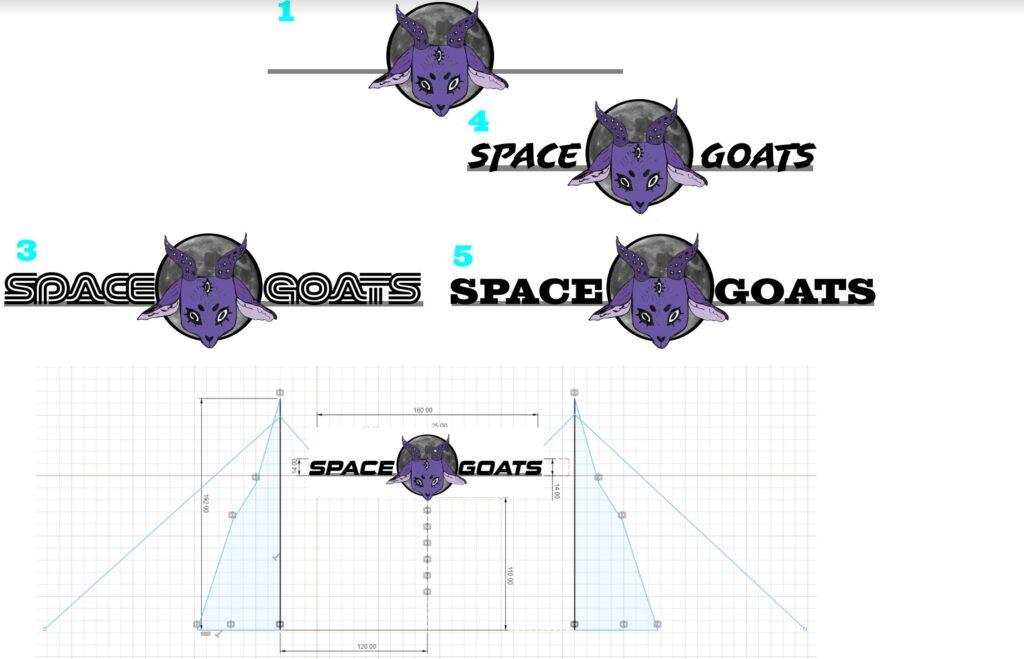
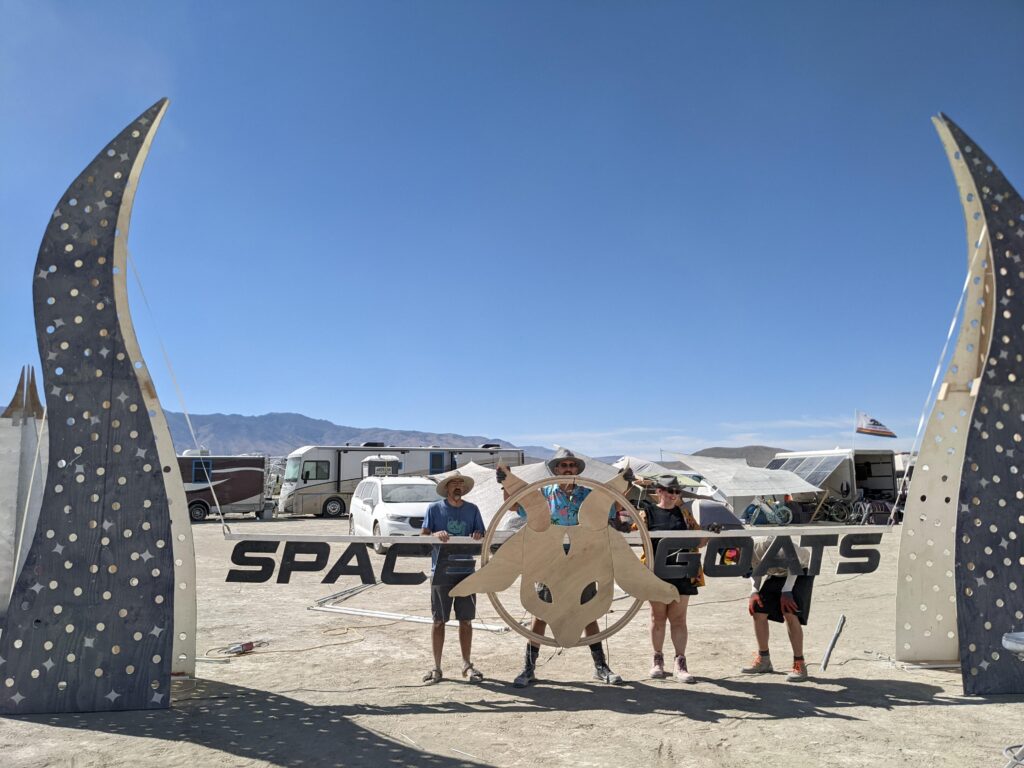
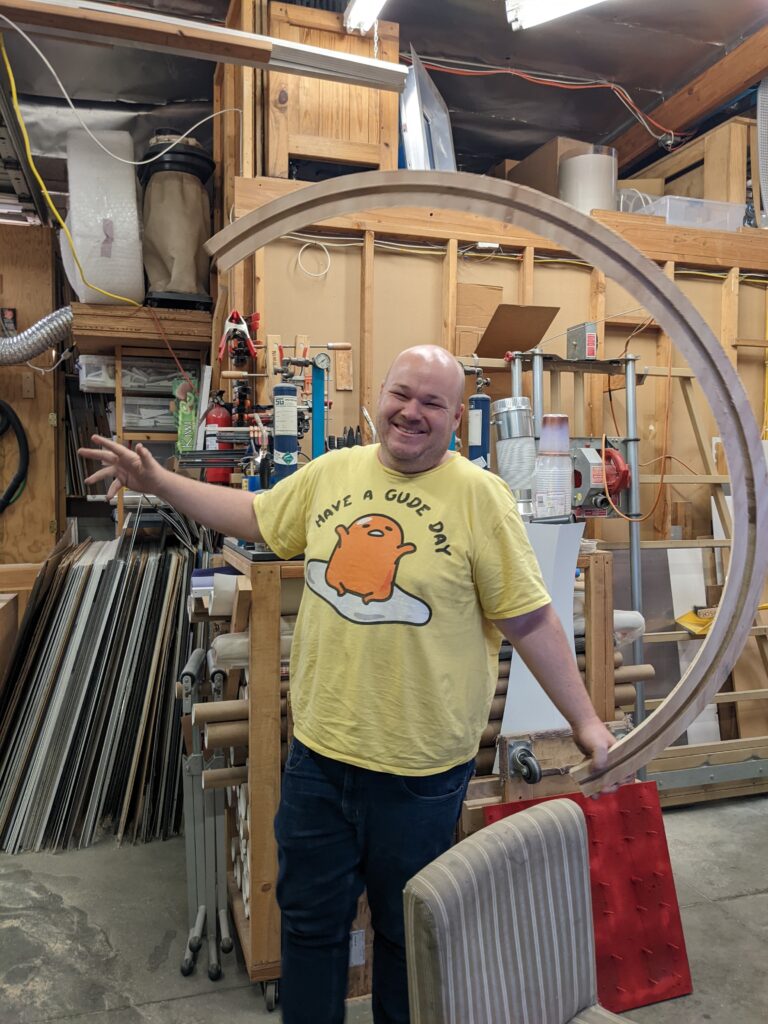
I threw the horns in CAD and played around with some fonts / a goat head in the middle. I got to something everyone liked and went to get started fabricating.

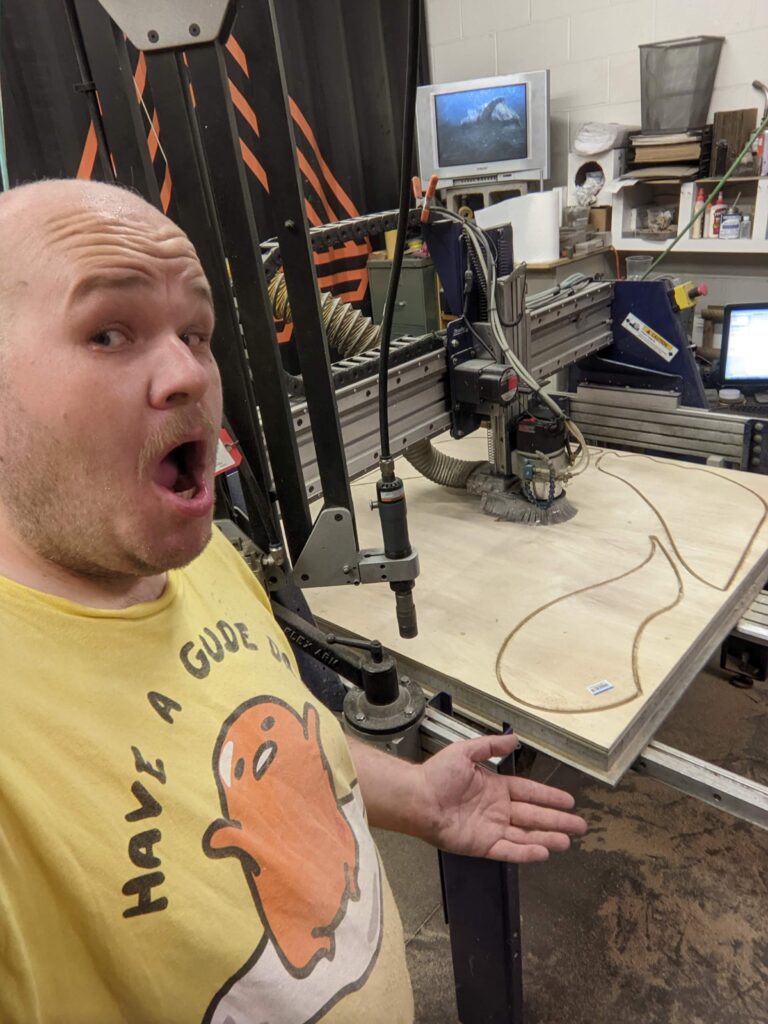
A friend in the valley let me get some time on his sheet router and we routed out the letters and shapes for the sign, as well as channels and pass through holes for mounting LEDs in the letters (so the sign would be visible at night).
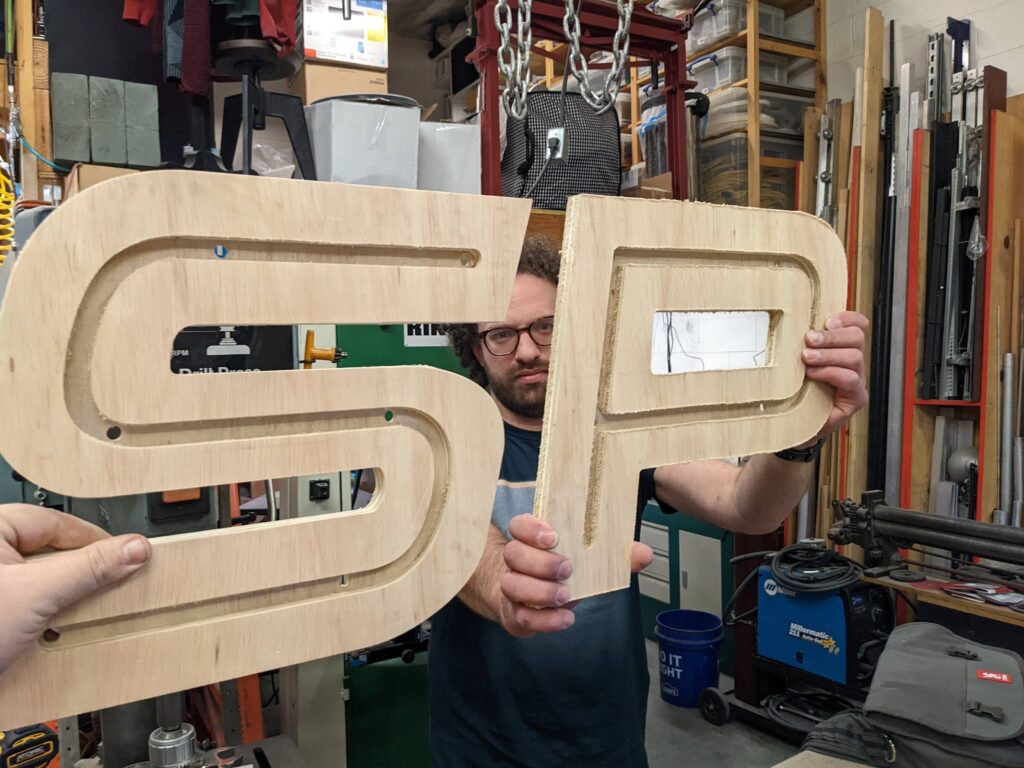


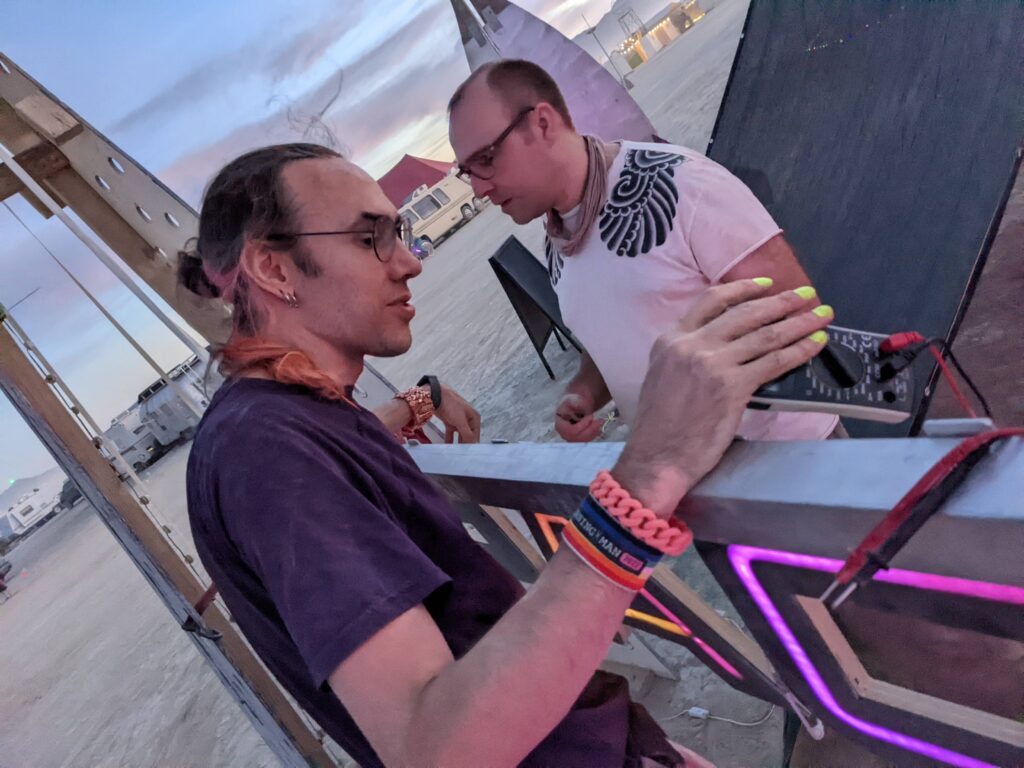
I was a bit tight on budget so asked if anyone in the camp had some spare LEDs we could use to light up the sign. Another camp member Rina volunteered to populate the letters with LEDs and do the controllers / power supplies. We decided to put some LED diffusion acrylic over the fronts of the letters to enhance the look a little. Rina even went so far as to get lath screws that matched the black acrylic.
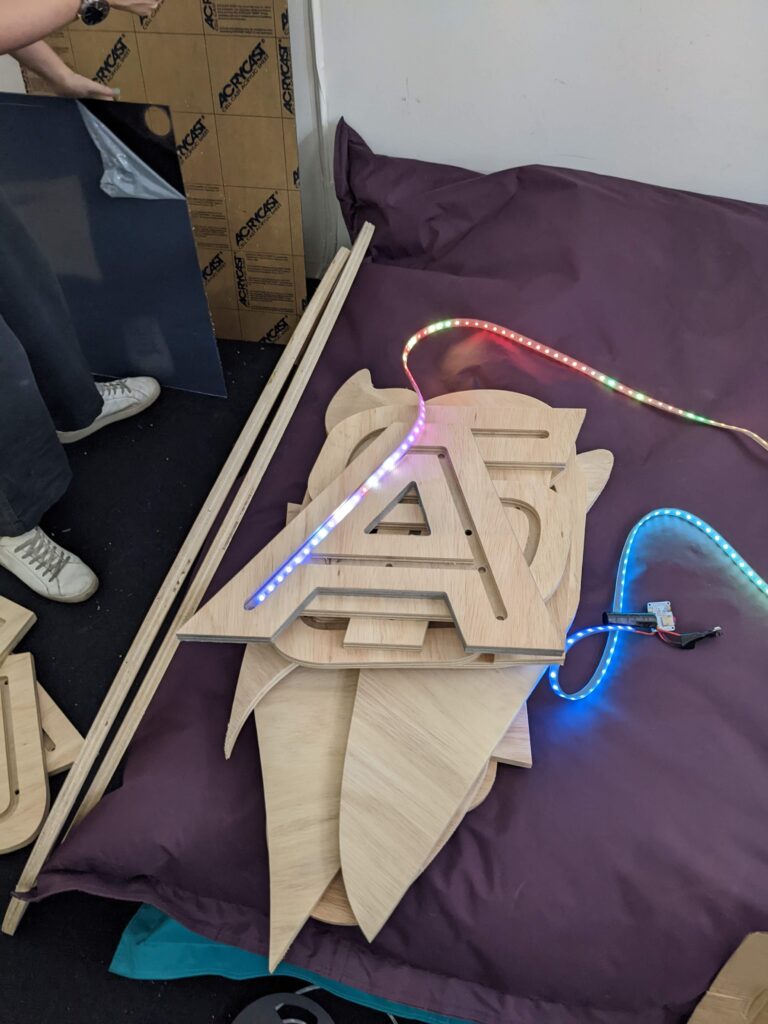

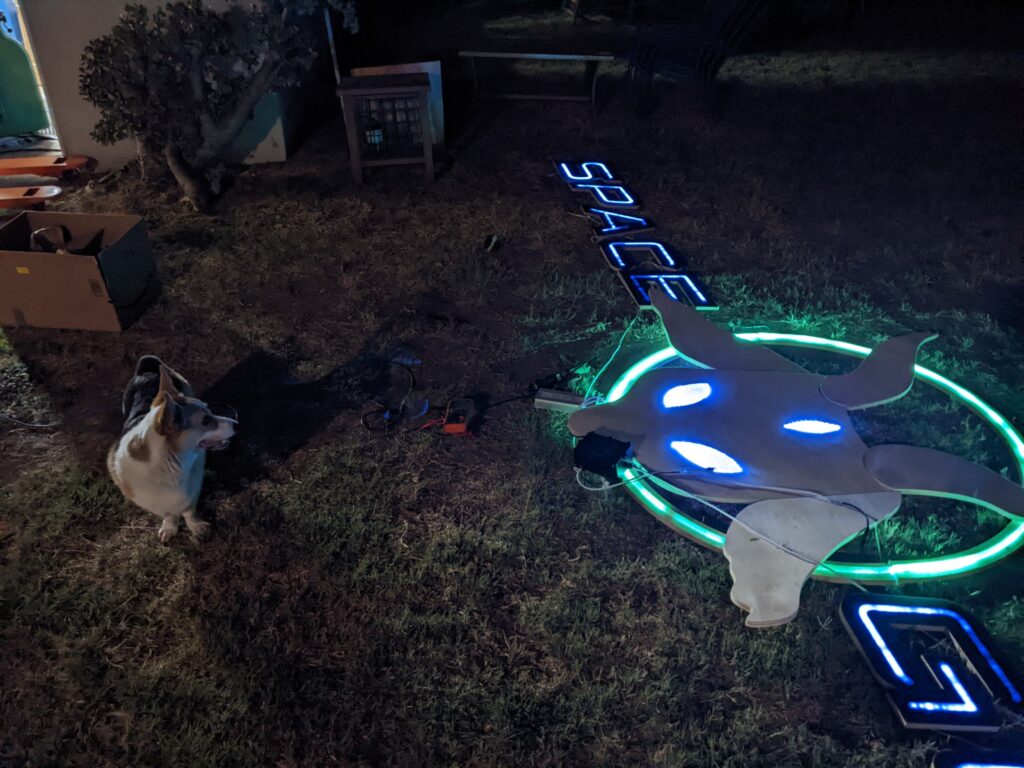

We tested the lights in my backyard. They were a tad glitchy. Rina messed with the code running on her custom micro but ended up frying a USB hub ( there was actually smoke ). We eventually came to the conclusion on playa that the 12v tolerant micro was overheating and resetting. Luckily Rina came prepared with a 5v buck regulator and we switched the micro off the 12v power which resolved the issue.
I had big plans for the frame. The goal was to get a couple 10ft lengths of 3x1x.125″ 6061 tubing, machine some clearance holes and ream out some holes for shear studs, build some big bracket plates on the CNC, and make it easy to assemble and disassemble. Being sick ate into my schedule for all that work. Material was also extremely hard to track down. I ended up getting the last 2x2x.125 x 24′ stick that tell steel in long beach had. To expedite it I went and grabbed it in my truck. They did me a favor and cut it in half (2x 12′ sections). It came down to the wire and I was packing and fabricating the frame at the same time.
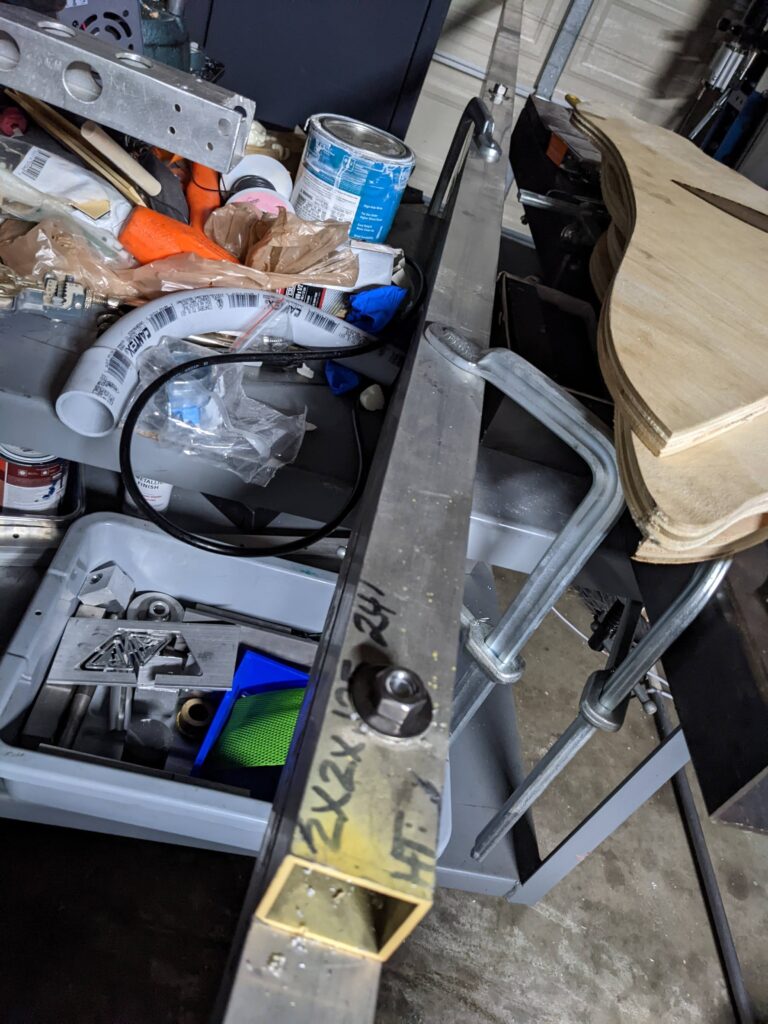
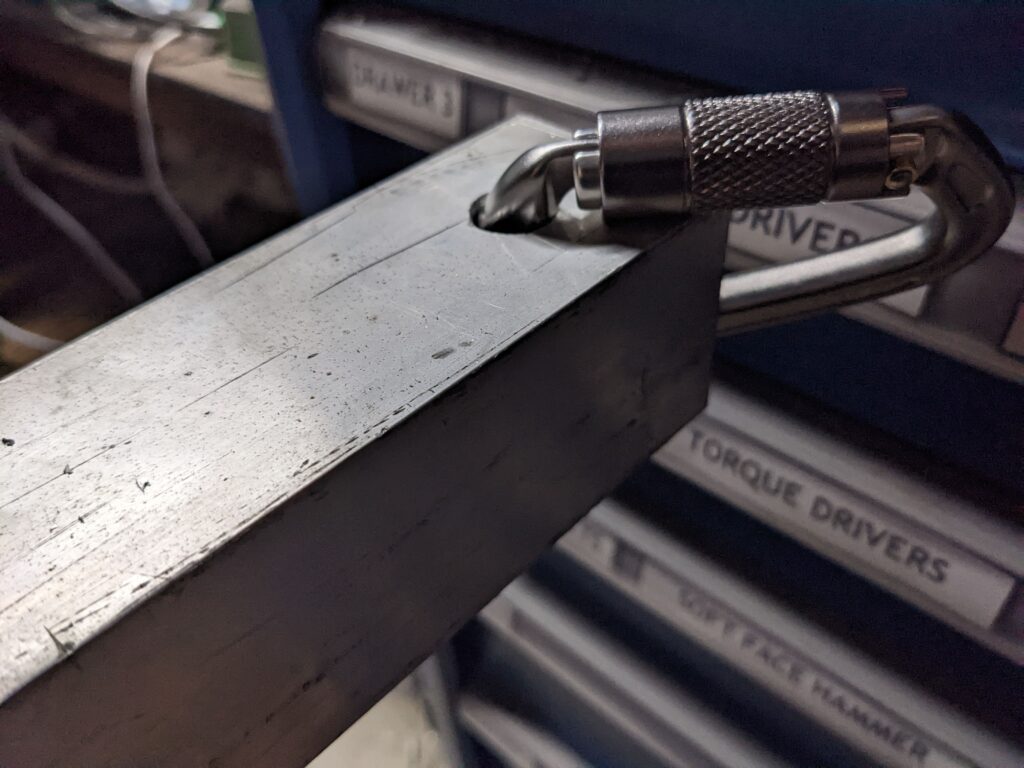

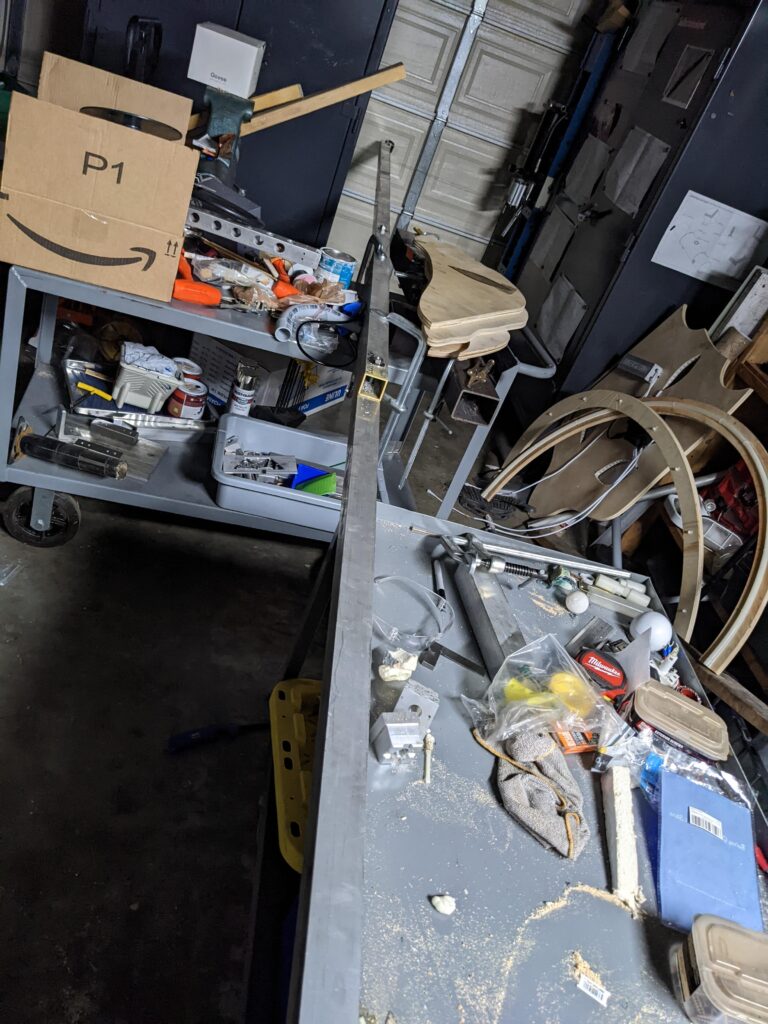
To go even faster I dropped the bracketing and decided to match drill the frame pieces and bolt them directly together. I fixtured the whole mess on one of my work carts and broke out the old mag drill. The match drilling worked well and the frame was ready to go. I also popped a couple holes in either end of the beams for carabiners / shackles to make it easy to hang the sign.
30 minutes before we hit the road I made ~20 mounting tabs for the letters. I packed some self tapping screws and my drill and decided to wrap up the project on playa.
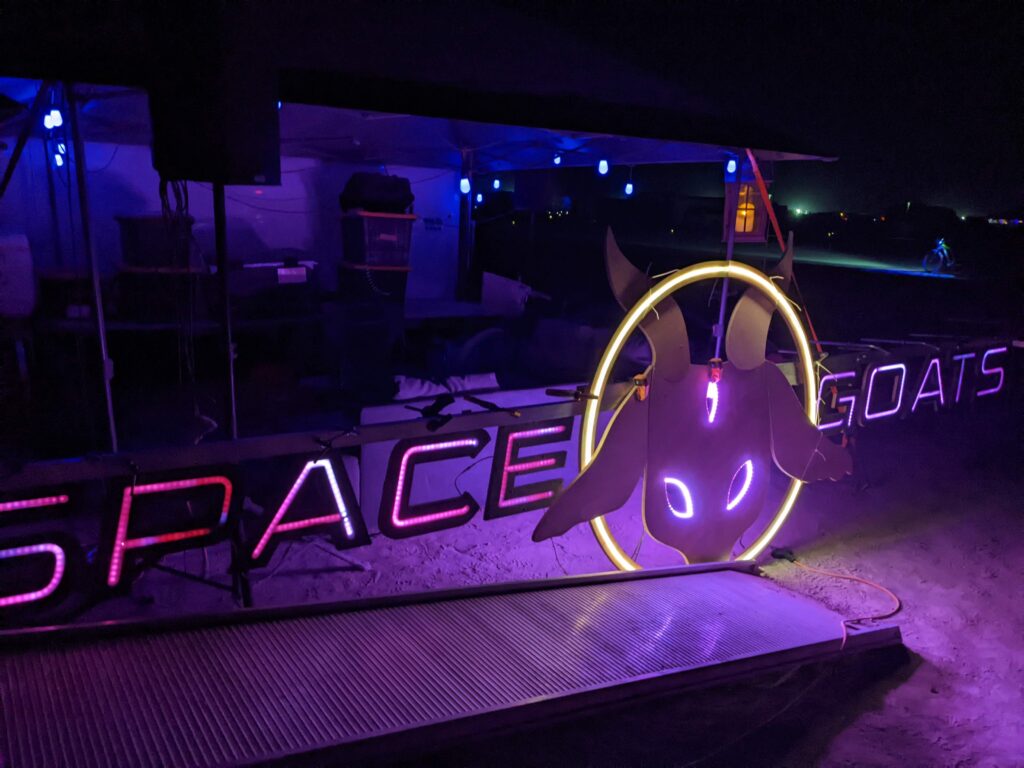

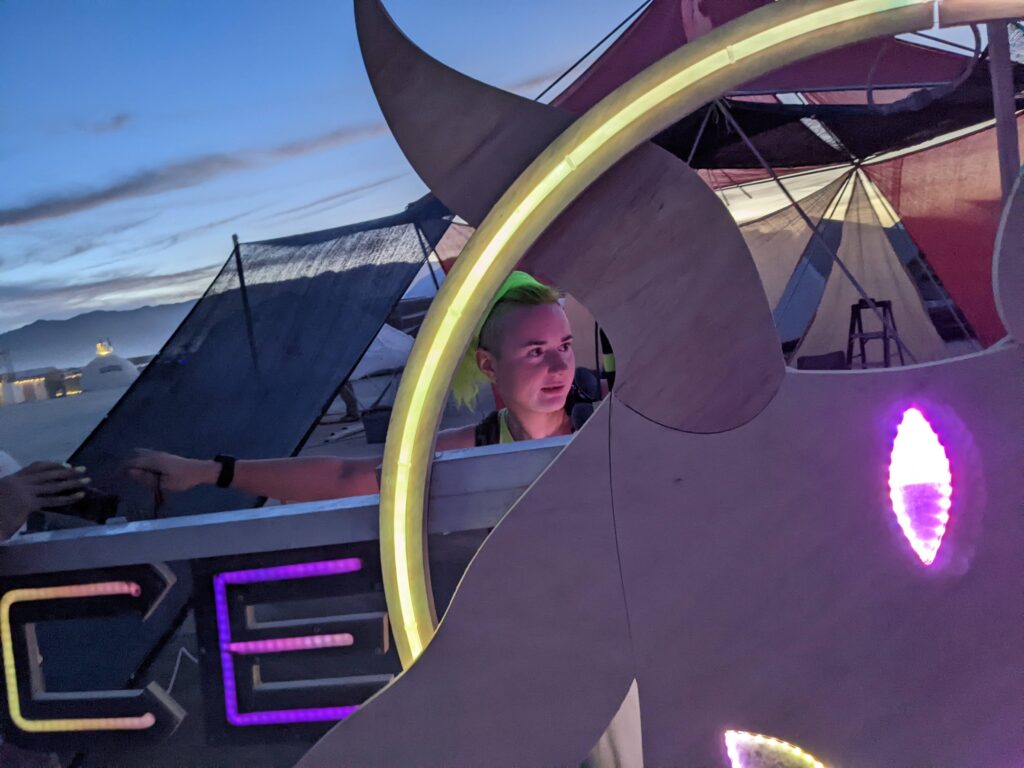
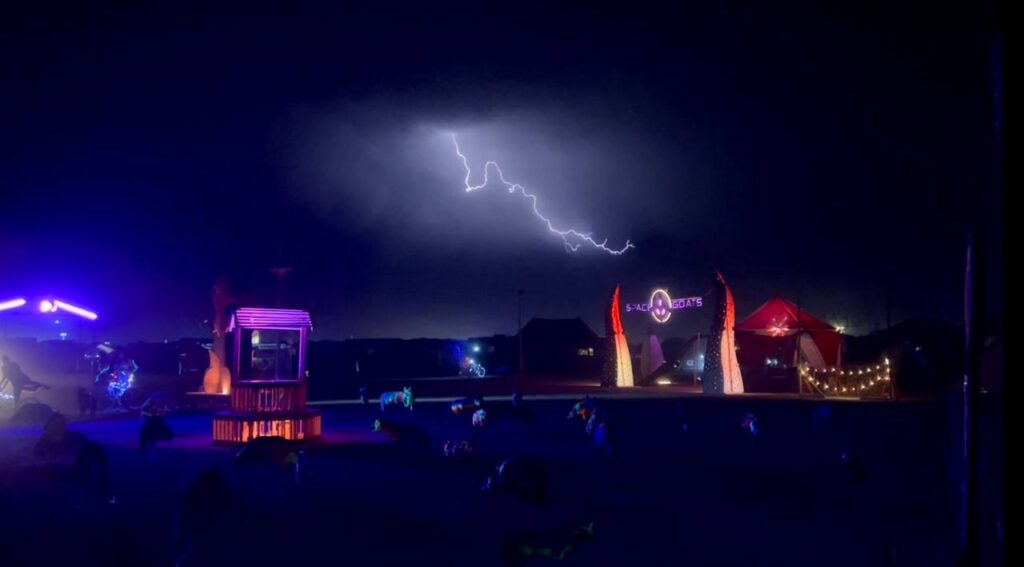
We got the sign assembled in a couple days in camp. Everyone lent a hand with screwing the letters on, catching the moop, and getting it hoisted. After some LED fnagling, it was looking great. It even stood up to the high winds during a thunderstorm that blew through right as the event started.

I’m pretty happy with how it turned out, for my first big playa art piece it was looking good. The 730 sector facebook group even made it their cover picture. Pretty amazing. It’s currently retired in my garage and I’ll haul it out next year ( maybe with some upgrades to make it easier to assemble)
Here’s a video of the storm. Huge props to the videographer who caught this.
Trailer upgrades

I’ve had a 6ft x 12ft enclosed box storage trailer for a few years now ( this is the third burn it’s been to). In 2017 it was well over 100F every day and I decided an insulated box with an AC was a quality of life thing that I wanted to have going forward. This was a relatively cheap way to do that with utility outside the burn (it’s been great for moving house and camping).
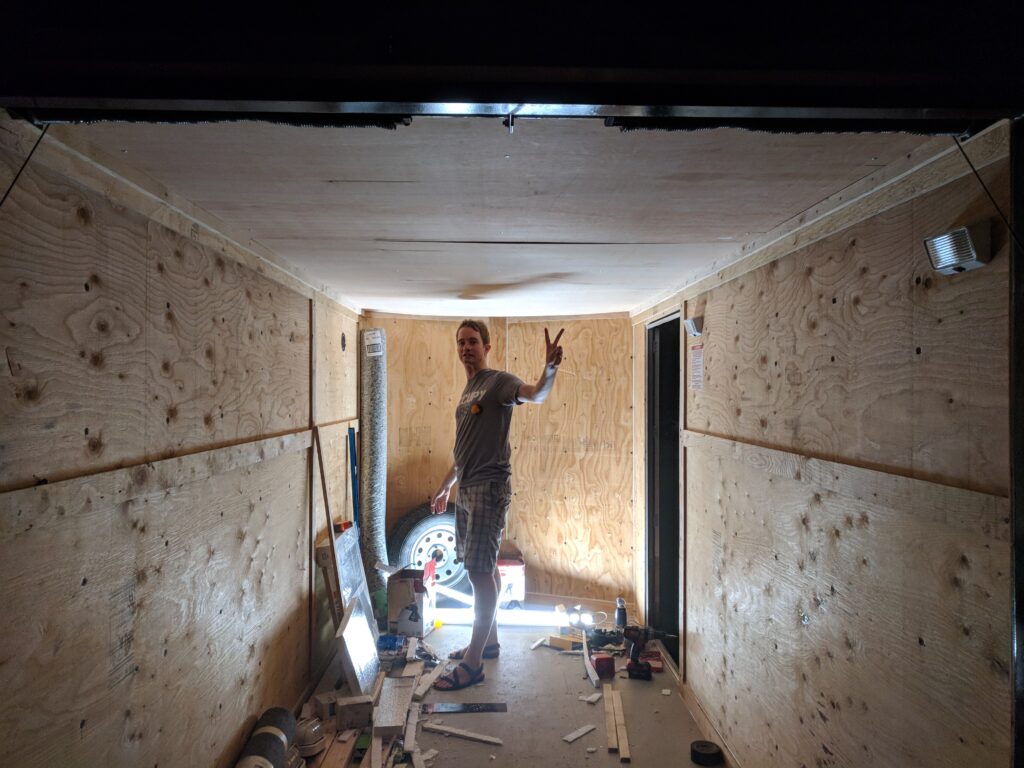
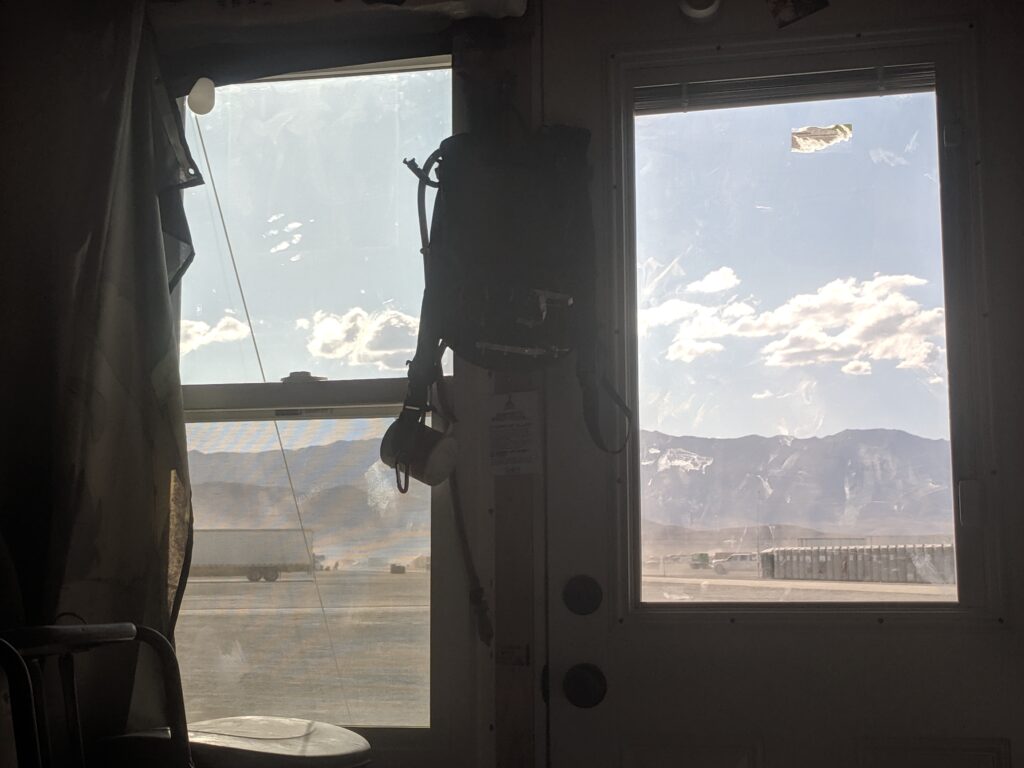
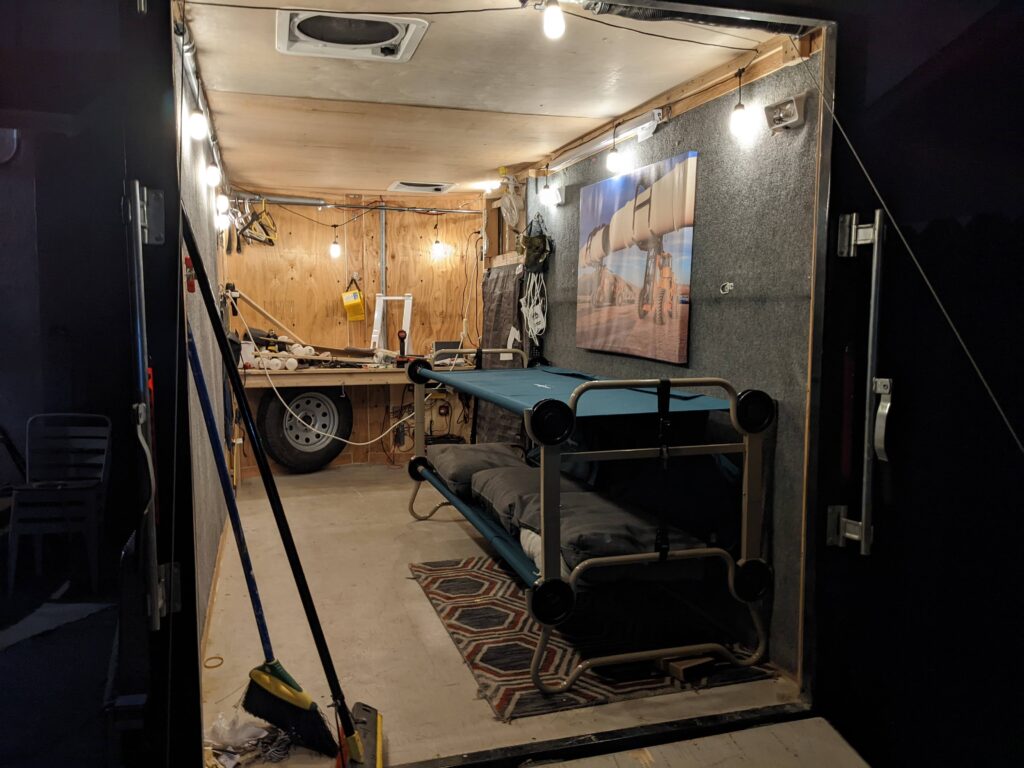
The trailer was already modified from previous burns. Its first year Casey Handmer helped me with the carpentery and we put a false door inside the side door for adding a window AC unit. I also added leveling jacks with a MIG welder, we added a removeable bench to the front end, a clothes rack, some hooks for hanging small items, a window in the door so I could see out, and we insulated the roof / added a thin plywood ceiling.

Year two Casey helped out again and we added a full size door and window to the ramp end of the trailer.
This year I decided to make some more serious upgrades. I had replaced the jack with an electric one in a previous year, but I had no 12v electrical system on the trailer so it was entirely manually operated. I’d also drilled a hole in the floor for passing in an extension cord to run to a generator for charging batteries, running lights and other electrical needs.
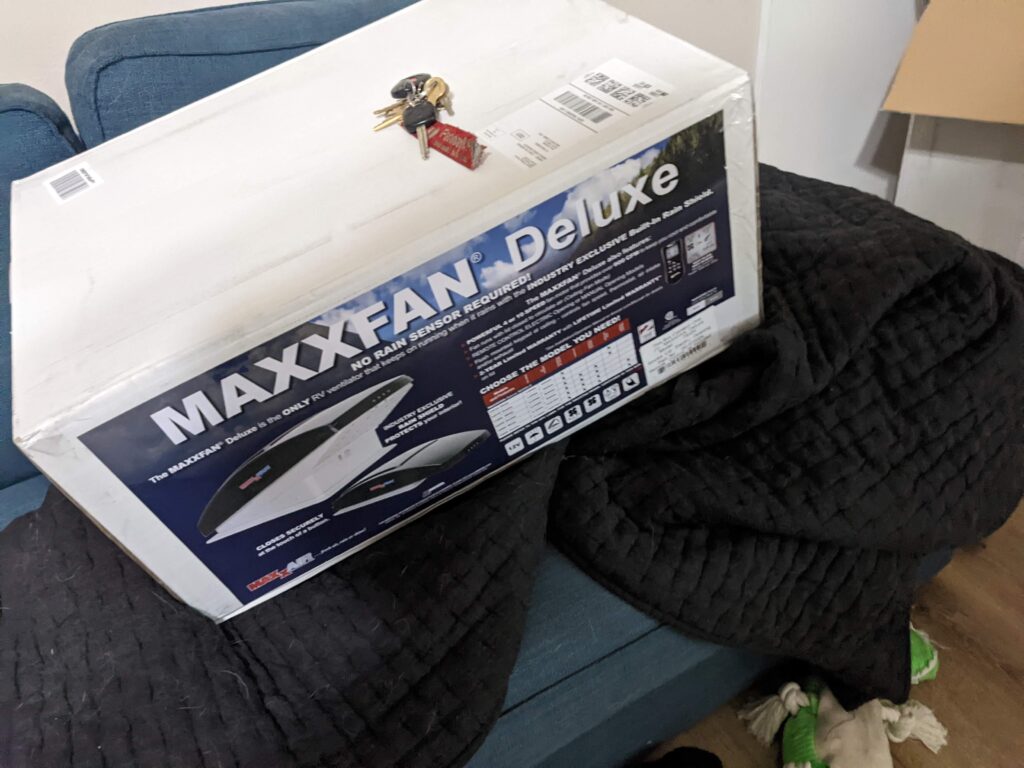
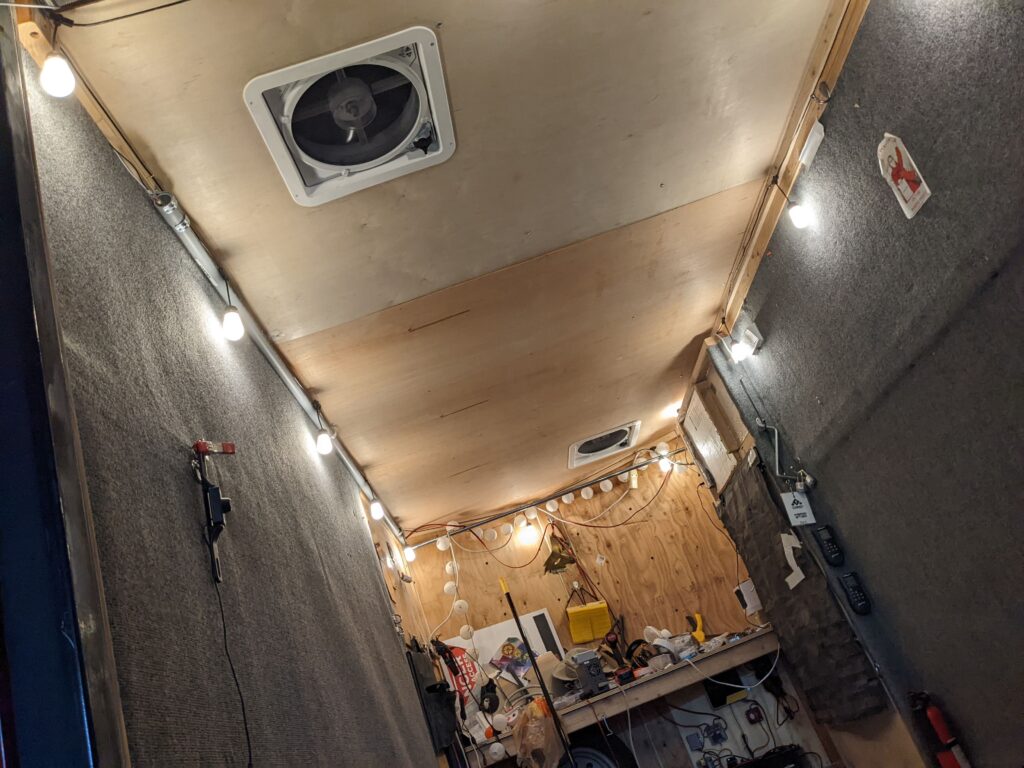
One issue I’d noticed was despite adding windows, airflow was pretty stagnant in the trailer, smells lingered and if something spilled it’d stay damp. Also some nights I’d get headaches, from what I assume was a lack of proper airflow. So I researched ventiallation options and found some pretty neat 12v fans by Maxxair. I ordered a couple and worked a few days with emily to install them.
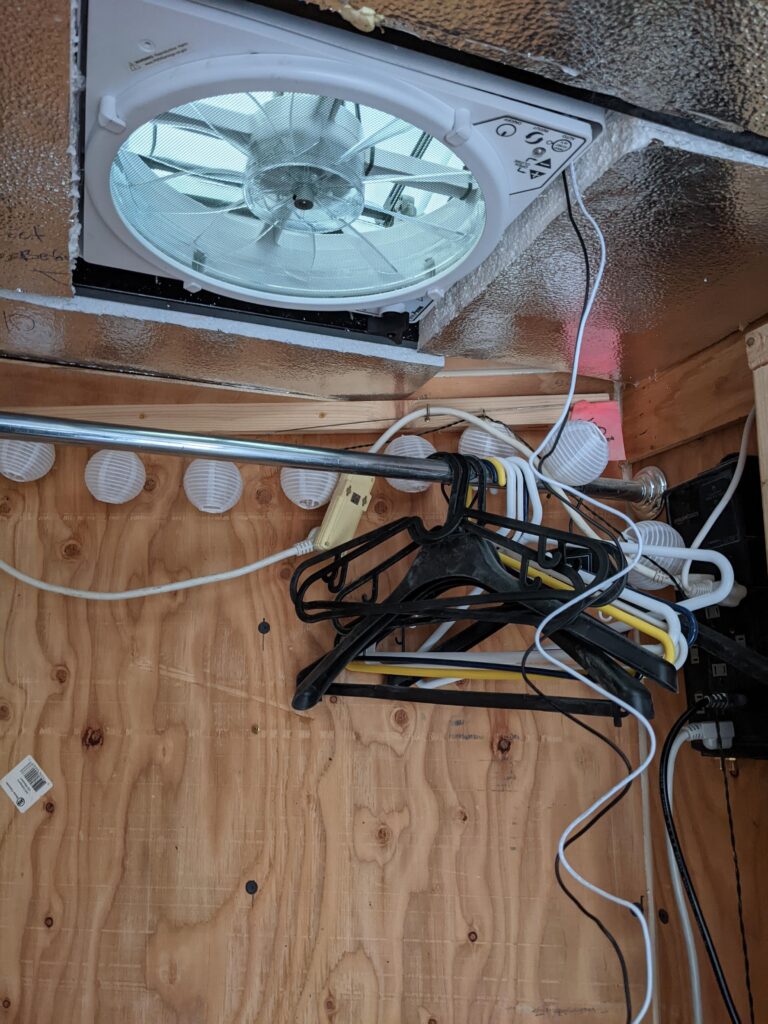
The roof was thin sheet metal and the first step in installing the fans was to cut a 14″ square hole. I picked up a jigsaw for cutting the hole, and carefully measured so I wouldn’t cut a frame beam. I drilled a pilot hole for starting the jigsaw blade and cut out the squares. Then after applying some sealing tape and silicone sealant, screwed the fan flanges down, attached the fans, and tested them with a power supply. Everything worked! The fans got a really great airflow going in the trailer with all the doors closed.


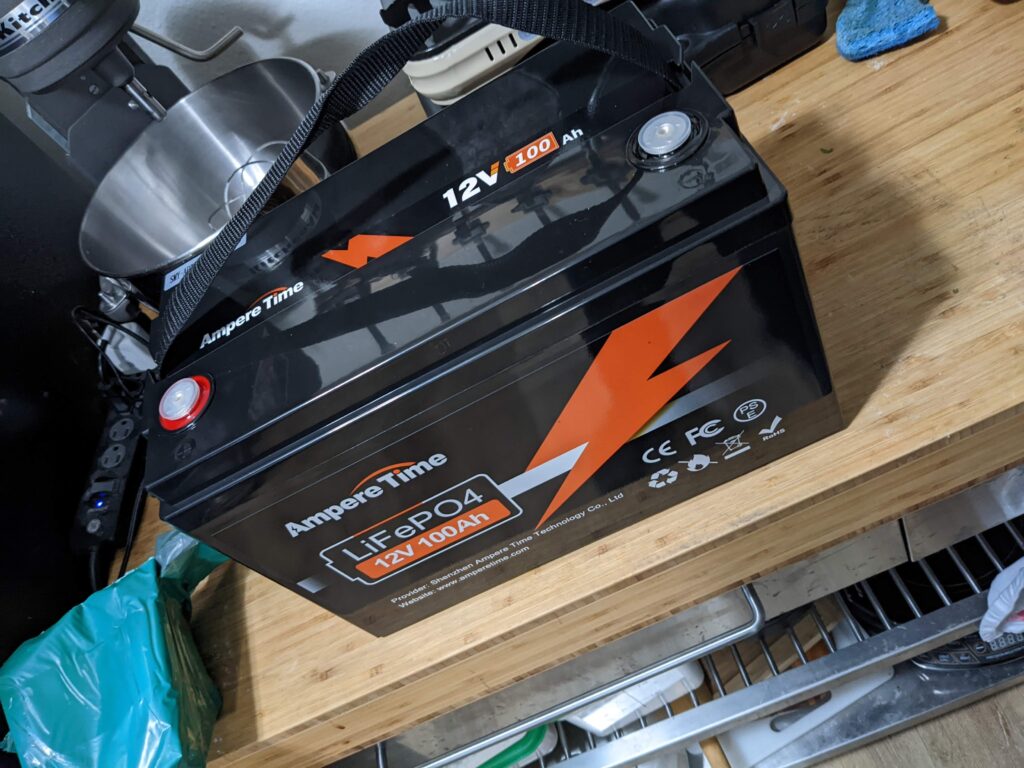
Next I needed a source of 12v to run the fans (and maybe the trailer jack). After some research I landed on 12v 100AH LiFePo batteries. They’re lightweight, have a great cycle life, and can supply a ton of power (1200w continuous for an hour!).
To charge the batteries I could use a regular battery charger with the generator or wall power, and I had a couple solar panels for when the generator might not be running. I decided to pick up an MPPT (maximum power point tracking) charge controller for optimally charging the battery with the solar panels. The charger controller I found also had a convenient bluetooth app for monitoring the state of charge and how much power the solar system was providing.


The last thing I grabbed was a small inverter for providing AC to things like a laptop, phone charger, or some LED lights for interior and exterior lighting. I could’ve gotten a larger one and tried to run the AC, but my budget was tight and I can circle back for one next year.
To connect everything I grabbed a couple fuse blocks for individual devices and a couple circuit breakers for the main connection to the battteries, chargers, and inverter. I added a couple weathersealed passthroughs for passing in generator power and solar panel power. I even ran conduit for the 12v and solar cords to protect them from getting snagged when loading / unloading or during transit.
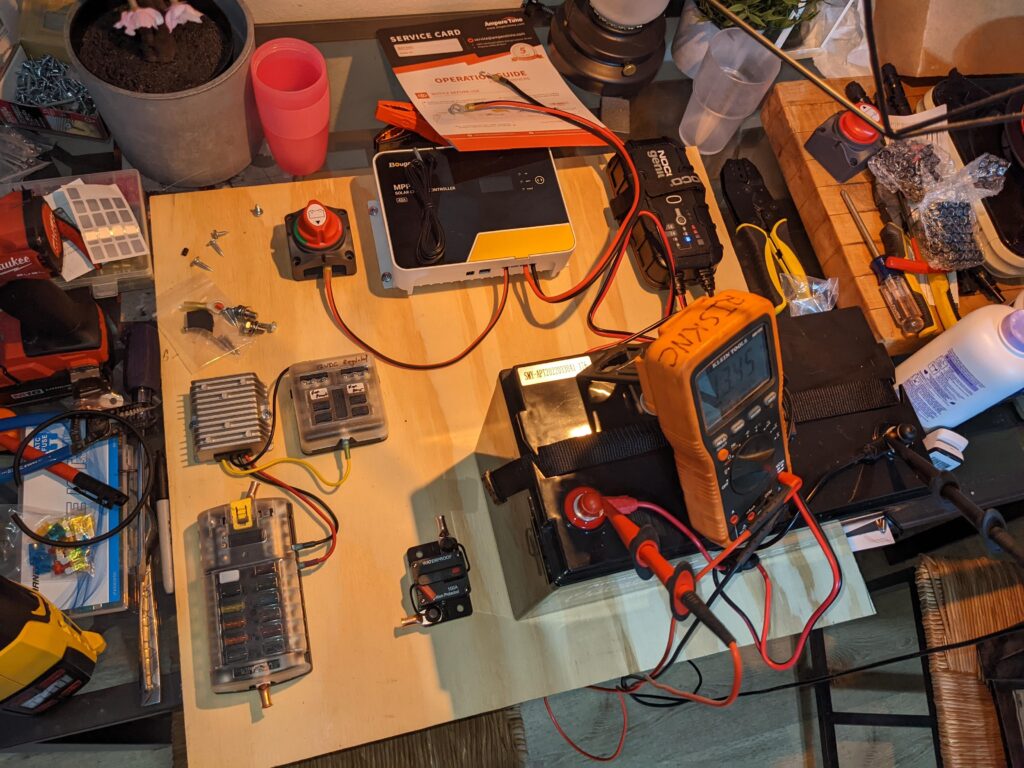
I built out the electrical on a removeable board, added swaged and heat shrunk ring terminal connectors to all the cables, plugged everything together and tested it out. The ~160w of solar would actually charge about 400-600WH / day, which is pretty good. The solar charge controller could handle more panels and batteries so I can upgrade later, but that’s enough to run all the fans and lights, charge phones, etc, and never need the generator (the battery stayed topped off most of the burn)


I had to pop down the plywood ceiling and insulation to cut holes for the vent fans and add finish flanges. This took a few hours but wasn’t’ too bad. When putting back the panels I decided it would be nice to paint them. I picked a dark blue paint and Emily helped me paint the whole roof a dark sky color. We added some glow in the dark stars and UV LEDs to the top edge of the internal ceiling line. When it’s dark and you turn on the UV it looks great!


The last thing I could get to was the door. It was kind of weak in the middle so it wouldn’t latch properly and would drag on the floor. To remedy this I decided to add a fixed post in the middle ( that is not as easy to uninstall but provides a lot of rigidity) I pulled out the old framework and disassembled it, then cut some new 2×4’s to shape to fit the steel frame in the back of the trailer. I bolted them in and added a screwed in bracket to the floor. I rebuilt the door into this new frame. I sealed everything up with some foaming sealant..

A couple days before I rolled out the AC came in. it’s about the same size as the old one, but fits in the back window and is much easier to install / uninstall. it also pulls about 400w in eco mode (and 700w full blast) which cuts in half the load on the generator and made gas go a lot further. It kept the inside between 75-85 all week, even when it was 110+ outside. This was really great for people dodging heatstroke inside.
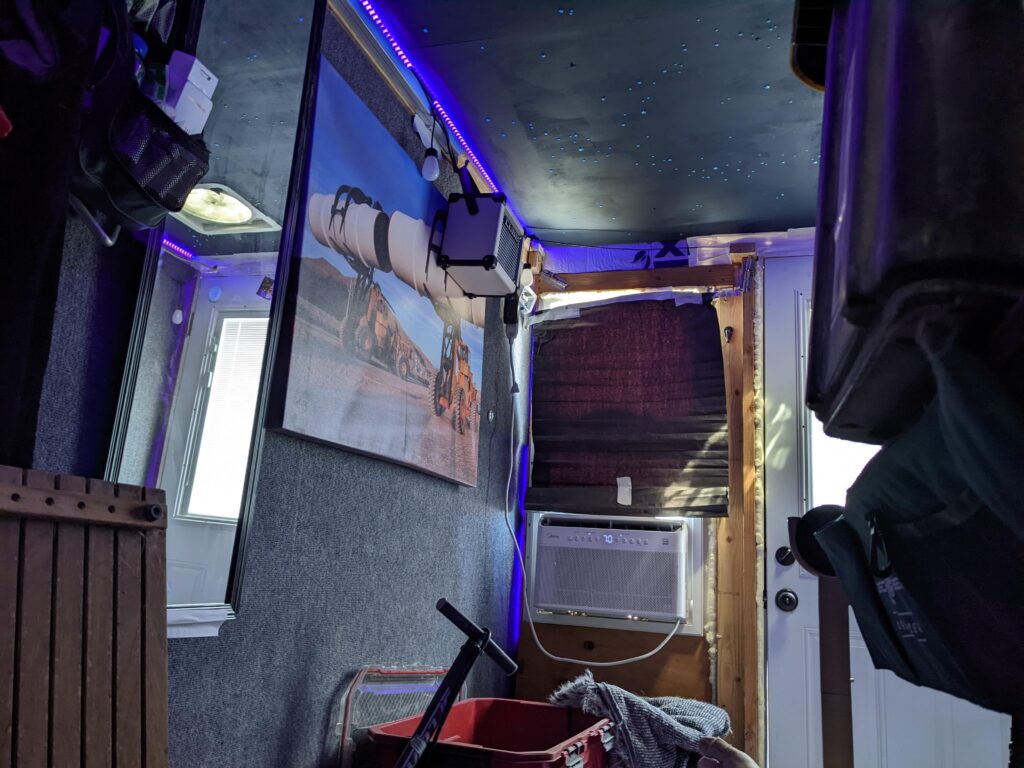
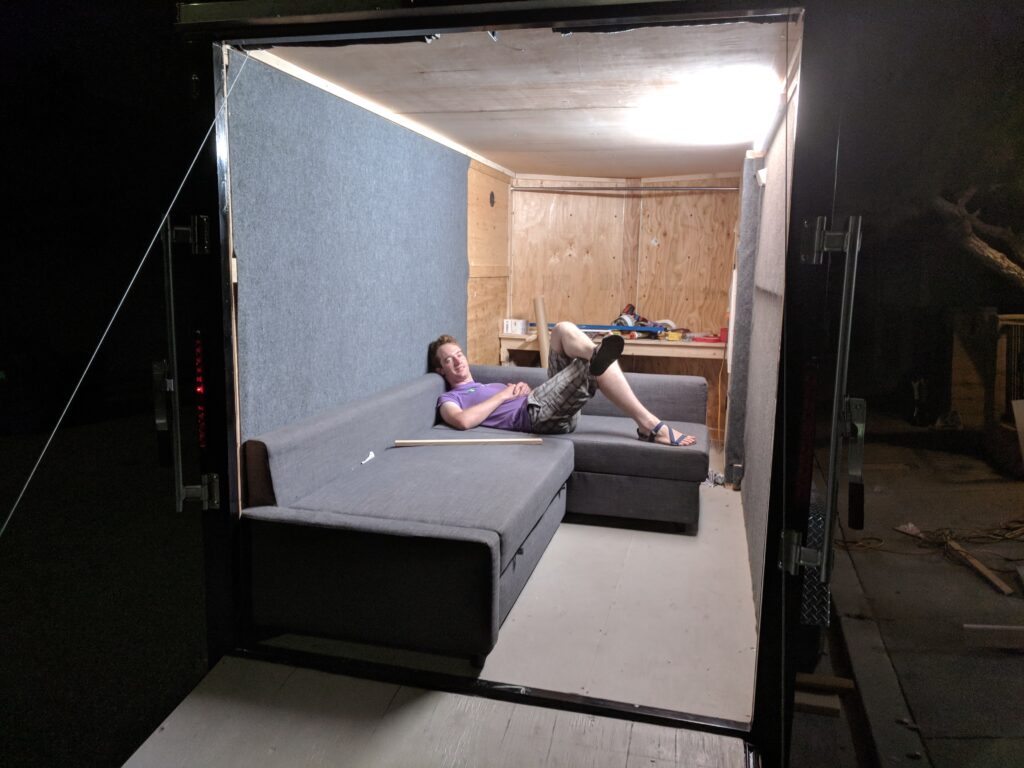
On the trip up I picked up a full length mirror. I ended up taping it to the wall. I’ll install it more permanently as it’s great for getting dressed in the morning. I also set up the new bunk cots on arrival. Those are amazing when you want to sleep and a friend wants to dodge the heat for a minute and take a nap.
I was pretty ambitious and was going to build even more custom stuff, but got the ‘rona and lost a week on the build, so I wrapped up what I’d been doing and started packing for the journey.
Next year I’ll get to some of the open projects. I’d like to insulate the floor, add an awning and more solar to the rear ramp, and maybe a vestibule for entry / wardrobe storage

I’m also considering built in beds that fold up during the day, and adding a small sink / range inside for simple meal prep without setting up a large camp. Fixed water tanks would also be great for an external shower.
If I get a bigger budget, I’ll probably put between 5-7kwh of batteries and 1200-2000w of solar, a 3000w inverter, build a tounge platform and permenantly install a mini split with a heat pump for AC / heat. Dropping the need for the generator would be great.
A roof rack deck / awnings would also be nice secondary structure to add. And maybe a couple window portholes would be cool.
Goats are also planning on building art cars, so I might need a bigger trailer. Luckily a lot of this hardware can transfer over, or at least the experience with products and installation will. We’ll have to see where finances are too.

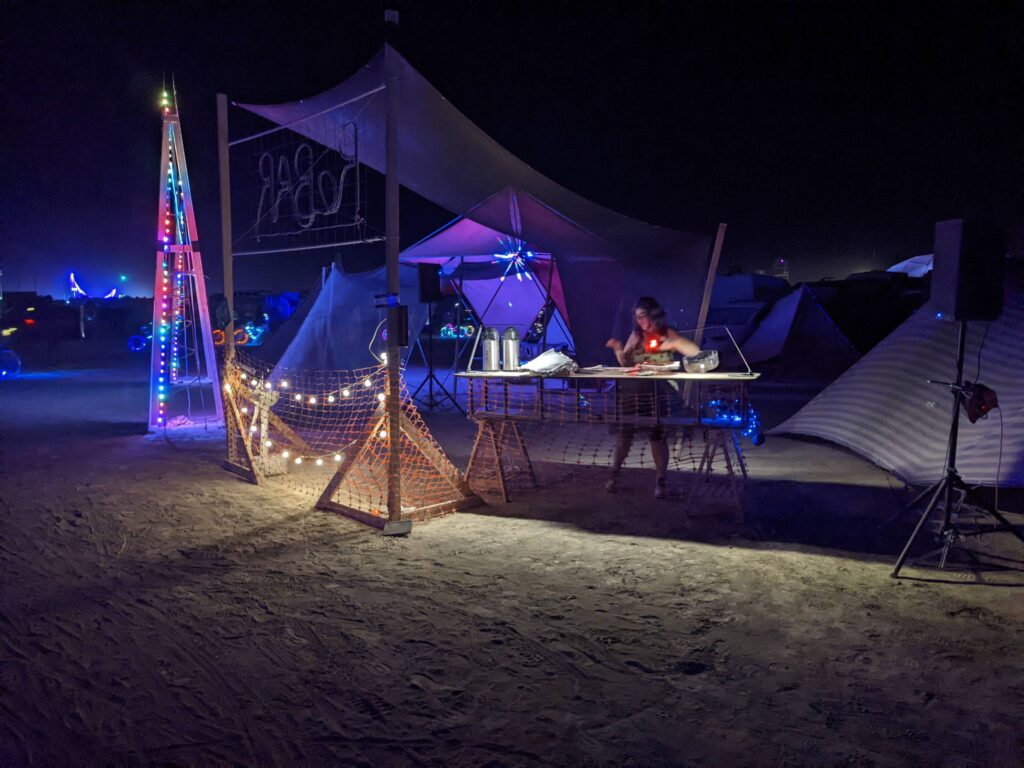
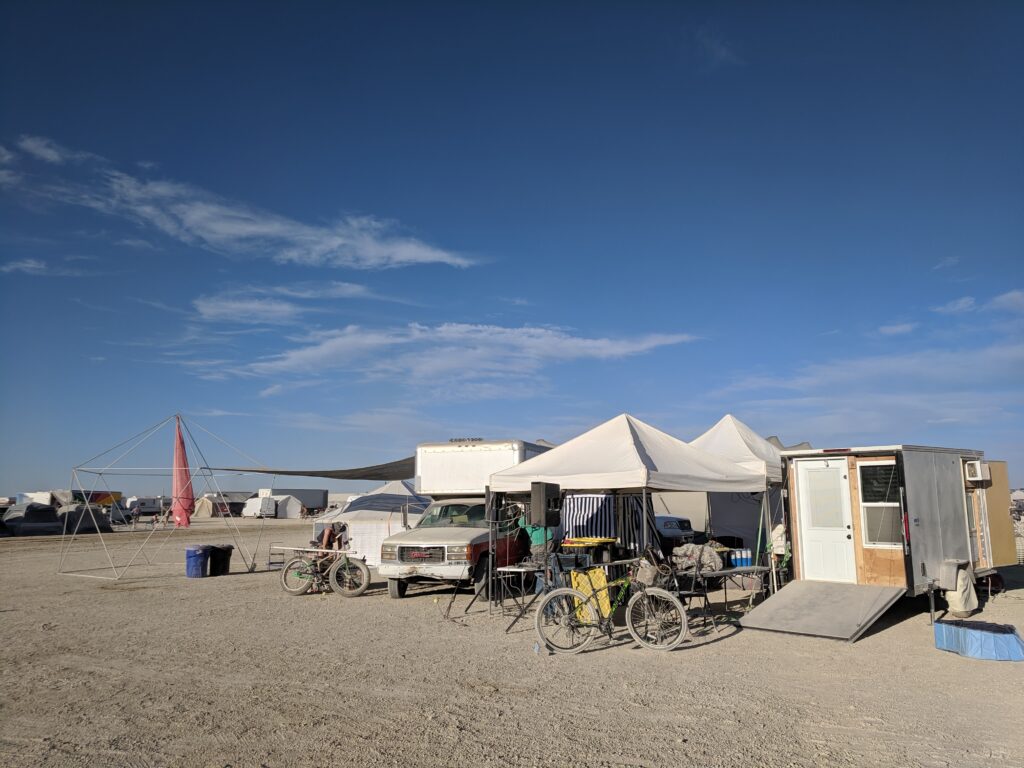
Here’s a gallery from our camp at the burn to wrap up this post. It was a hot dusty year, but I made more great friends and had a wonderful time!